Crafting a Standout Music Video Performance: A Practical Playbook
A scene-driven, hands-on guide to directing performance in a music video, with field-tested steps you can apply tonight, from rehearsal to release.
Frame the Performance for the Music Video: From Beat to Shot List
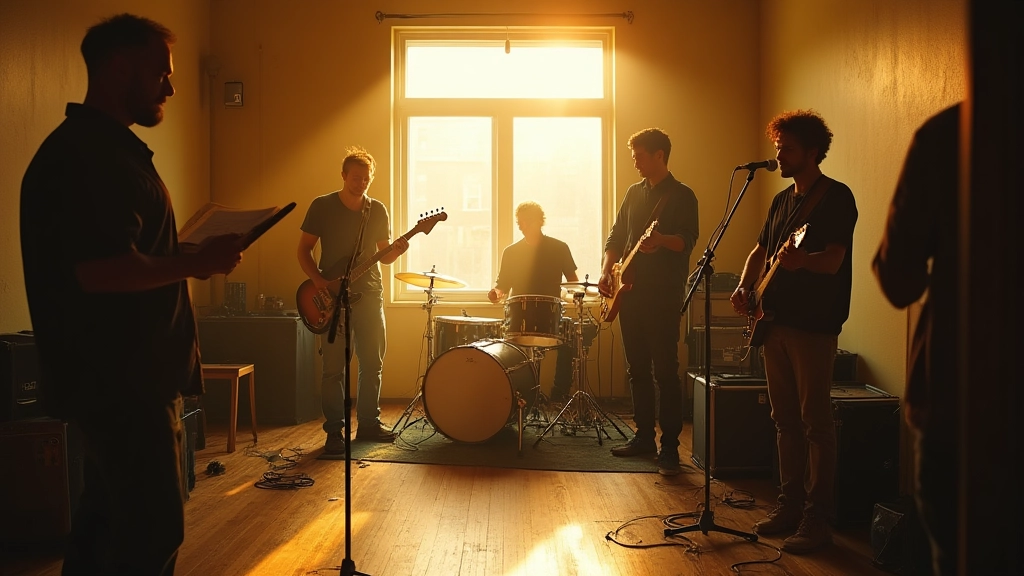
Think of a music video as a sequence of living moments rather than a isolated single performance. Your job is to translate a song’s pulse into a cinematic journey. Start with the core performance: where is the singer or instrumentalist most emotionally present in the groove? Where does the energy crest, and where does it breathe? In practice, sketch a beat map that aligns with the chorus and the hook, then translate each beat into visual equivalents—framing, movement, and camera distance.
Action steps you can take today:
- Identify three performance moments per verse that you want the audience to feel, not just hear.
- Draft a one-page shot list that pairs each moment with a camera distance and a movement idea (for example, wide passive balcony shot vs. tight dolly to reveal a drummer’s hi-hat flourish).
- Illustrate transitions between moments with a simple storyboard; you don’t need perfect art, just a clear sense of flow.
Mini vignette: In a rehearsal loft, a guitarist eyes the camera from a low angle as a string bend lines up with the kick drum on the track. The director calls for a slow push, then a quick cut to a close-up of the fretboard, matching the song’s bite. The moment feels earned because the visuals echo the rhythm in real time.
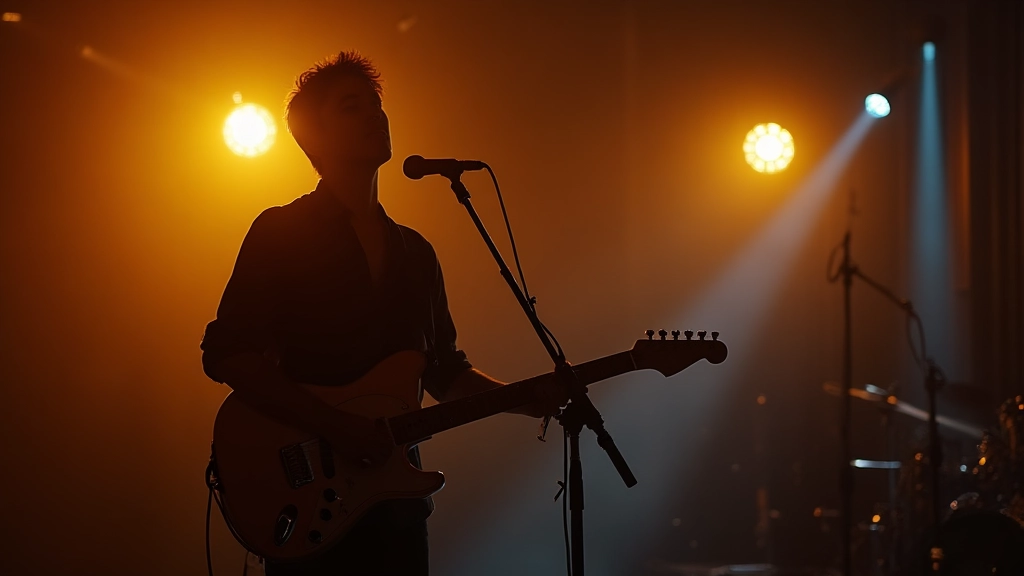
Light It to Speak: Cinematic Lighting for Your Music Video
Lighting is storytelling. A simple setup can be a drumbeat in itself if you rotate light quality and color temperature to mirror the track’s emotional arc. Start with three key looks that can travel with you across locations: a warm, intimate key for close-up verses; a cooler, more reflective key for breakdowns; and a punchy backlight that adds separation during the chorus. Use practicals—lamps, neon signs, window light—and keep color temperature in a 3000–5200 K range to preserve a natural but cinematic feel.
Practical exercise:
- Choose a single scene where the subject is front-lit with a warm key (soft white to warm amber).
- Re-shape the same scene with a cool fill to create contrast and emotion.
- Add a motivated backlight or edge light to carve the silhouette and separate subject from the background.
Direct on Camera: Coaching Performance in Any Setting
The best performance cuts come from performers who feel seen, not rushed. As a director, your job is to create a safe space where they can experiment with timing, eye contact, and breath, then lock these discoveries into the frame. Start with a two-minute warm-up that isolates one line or one riff; then push toward a two-beat hold to capture the breath and reveal character.
Coaching tips you can apply now:
- Establish a clear, concrete option for each take (even if it’s imperfect) before moving on.
- Use specific eye-line cues: where should the performer look when the kick hits or the bass note lands?
- Encourage micro-gestures that feel true to the song’s mood—slack jaw for vulnerability, a clenched fist for resolve, a smile for release.
Case study vignette: On a rooftop, a singer breathes in sync with a held note. The director signals a gentle tilt of the head and a lingering gaze toward the camera lens, creating a moment that reads as intimate rather than performative. The take is slow, but the emotion lands with a quiet authority that you can feel even in a long-wide shot.
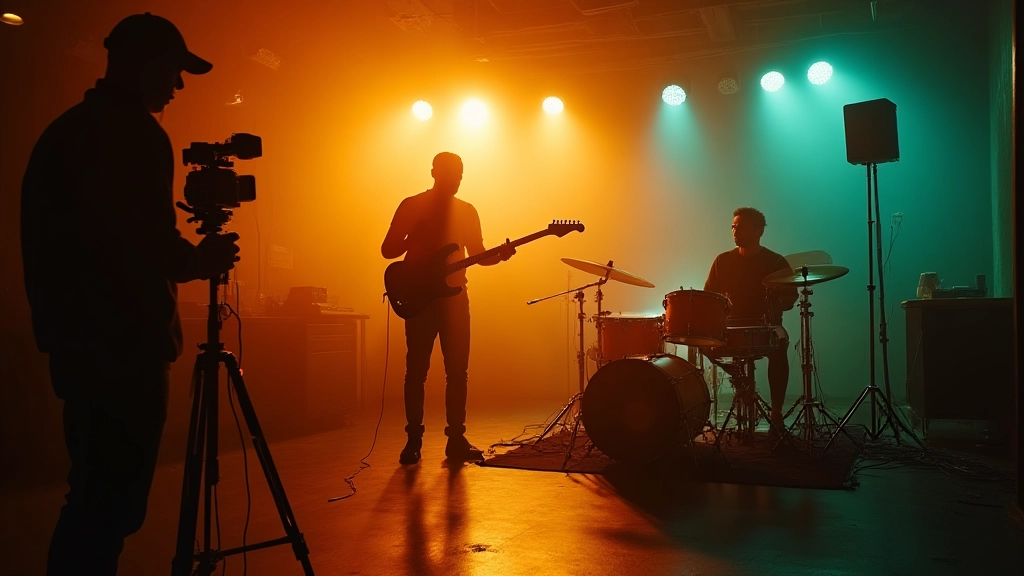
Capture for Editors: Coverage Strategies that Speed the Cut
A well-structured shoot is a gift to editors. Aim for coverage that minimizes guesswork: 2–3 angles per major beat, 1 wide, 1 medium, and 1 close-up that captures essential facial expression or hand movement. If you are working with a single camera, you still can approach coverage like a multi-camera shoot by planning parallel paths—one that tracks motion and another that locks to the face on the important lyric moments.
Practical checklist:
- Number each take with the beat where it lands so editors can align tracks quickly.
- Label each clip with its camera position and subject focus (e.g., CAM1_WIDE_VERSE, CAM2_CLOSE_CHORUS).
- Record a guide audio track for tempo alignment during assembly, even if you plan to replace it in post.
Sound and Playback: Sync, Lip-Sync, and Performance Vibe
Even with backing tracks, precise lip-sync and mouth movement matter. Sync is not just technical—it sells the character and energy of the music video. Capture a quick guide audio reference on playback devices so performers can react to the presence of sound in real time. If you can, set a pre-roll where the playback runs before the camera starts so the performer can settle into the groove.
Tip you can use now: During the first pass, record 15 seconds of playback with a clearly audible reference tempo. Then run through the same 15 seconds in a second pass with a slightly different tempo to give editors flexibility to time the cut and keep the rhythm intact.
Edit with Rhythm: Cutting for Energy and Flow in the Music Video
The edit is where the performance becomes a story. Start with a 1-2-3 rhythm map: treat the chorus as a punchy cadence, the verse as a legato arc, and the bridge as a breathing point. Build an edit that mirrors the energy curve of the song, then layer in reaction shots and subtle glances that add subtext without stealing focus from the performer.
Guided exercise:
- Export a rough timeline based on the beat grid you mapped in pre-production.
- Tag cuts that align with every downbeat and every lyric emphasis.
- Try a 4-beat rule: every four beats, a visible change in framing (distance, angle, or expression).
Color and Look: Quick Grading for Consistency
Consistency matters when your video jumps across locations. Build a simple look that you apply across all takes: a main grade that preserves skin tones, a secondary grade for mood, and a uniform contrast level that keeps the footage cohesive. If you shoot with mixed lighting or mixed cameras, use a light color lookup table (LUT) as a baseline and then fine-tune per shot to maintain continuity.
Fast-look workflow:
- Start with a neutral base grade and adjust the red channel to reduce color cast.
- Apply a soft teal boost to the shadows for mood while keeping highlights natural.
- Match key frames across takes to avoid jarring jumps during the chorus.
Small pivot: In a rehearsal space, a subtle shift from warm tungsten to cool daylight can signal a shift in the song’s emotional tempo without a single lyric change.
From Pre-Production to Release: Distribution Tactics for Every Space
Not every video needs a glossy rollout. A practical distribution plan considers where your audience lives—YouTube for long-form, Instagram and TikTok for shorter cuts, and live-performance channels for raw energy. Build a release ladder: a flagship music video, three vertical cuts for social, and a behind-the-scenes short that teases the main piece. Plan your metadata early: keyword-rich titles, a concise description, chapters, and a thumbnail that captures the moment of peak emotion.
Action items you can implement now:
- Draft a title with a clear benefit for search and discovery.
- Prepare a description with 2–3 relevant keywords and time-stamped chapters for the long video.
- Create three social cuts: 15, 30, and 60 seconds, each with its own hook and caption.
AI in the Studio: Smart Helpers, Not Replacement for Direction
AI can assist with planning, tempo checks, and even rough rough cuts, but it cannot replace the nuanced dialogue between a performer and a director. Use AI to map out shot options from your storyboard, check lip-sync alignment against a reference audio, or simulate lighting setups. The key is to maintain human-led storytelling in every frame. Treat AI as a co-pilot for efficiency, not a surrogate for creative decisions.
Quick integration ideas:
- Run a tempo-verify pass that compares your take timing to the track and flags areas that drift.
- Use AI-assisted storyboard automation to generate camera moves from your beat map, then prune to fit your vision.
- Leverage AI tools for color matching across locations to reduce the number of manual tweaks in post.
The performance is the heartbeat of a music video; the camera should breathe with it, not chase it.
Three Concrete Case Studies
In each scenario, we see how a direction-led approach yields distinct, authentic performances even when resources are modest.
The Touring Duo
Two performers in a small venue want an intimate vibe. We map a three-scene arc: warm living-room vibe, crowd-reaction insert, and a final onstage glow. We shoot 2 angles per beat, keep the lighting sparse but expressive, and rely on tight transitions to maintain energy between verses.
Bedroom Producer on a Budget
We maximize creative effect with a single camera, a single light, and a playful blocking rhythm. The story is built in performance micro-moments synchronized to the beat, with a closing shot that hints at a bigger stage beyond the frame.
Indie Artist in a Shared Studio
Time is tight, so we lean on a punchy chorus cut structure, quick inserts of hands and feet in motion, and a color look that unifies the concrete textures of the space. The result is a music video that feels earned and real.
Practical Checklists You Can Use Tonight
Pre-Production Performance Checklist
- Define three performance beats that map to the song structure
- Create a beat-aligned shot list with at least 2 angles per beat
- Plan lighting looks that travel across locations
- Draft a one-page storyboard and share with the team
On-Set Performance Checklist
- Run a two-minute warm-up to align breath and tempo
- Lock eye-lines for each shot and rehearse transitions
- Capture 1 wide, 1 mid, 1 close per beat
- Review arc and adjust blocking for the next take
Closing Scene: Returning to the Heartbeat
As the shoot wraps, remember that a music video lives in the cut as much as in the frame. The final performance shot should feel like a culmination rather than a last note. Revisit the opening moment with a fresh, quieter eye. If the room loosens and the performer smiles at a rhythm you can feel, you have achieved what you set out to do—move a listener through a moment that started with a beat and ends with intent.
Supplementary Resources and Templates
Keep a living folder of templates that you can reuse for future projects. Include a ready-to-fill shot list, a simple color look reference, and an editable performance brief that you can hand to performers ahead of shoots. Over time, these will become muscle memory for your creative process.
| Template | Purpose | Format |
|---|---|---|
| Beat-to-Frame Sheet | Link beats to camera moves | Spreadsheet |
| Performance Brief | Outline for performers | Docx |
| Look Reference | Color and lighting directions |
Remember, the goal is to empower every creator to tell their truth on screen. Whether you are a touring artist on a bus tour or a bedroom producer drafting their first visual, this practical playbook keeps the craft hands-on and human.
Hear what these choices do to your own song.
Upload stems or a finished track, choose a reference direction, and compare a private Moozix mix before you export anything.