From Idea to Screen: A Practical Playbook for DIY Music Video Craft
A hands-on guide for musicians who want to plan, shoot, and finish a music video on any budget, weaving lived-in storytelling with actionable steps and AI-powered workflows that keep the human touch at the center.
- Start with a strong emotional spine and a concrete shot list that maps every frame to a beat in the song.
- Plan lighting, sound, and performance together so the on-set reality supports a clean post-merge.
- Use accessible AI-assisted tools to accelerate planning, editing, and effects without losing creative control.
Storyboard as Compass for Your Music Video
Every great music video begins as a map, not a mood board. The storyboard translates that mood into camera angles, movements, and moment-by-moment beats that drive the edit. Start with the song’s core arc—where it rises, where it eases, and where it lands. Then translate those arcs into visual beats that will keep a viewer listening as the footage unfolds.
- Lock in the emotional spine. Write one sentence that captures the feeling you want the audience to feel at the chorus. Use that sentence to guide every frame you plan.
- Chunk the track into visual acts. Break the song into 3–4 vistas or settings that reflect the arc. Each act should have a distinct look or tempo shift.
- Define a shot language. Choose a camera stance (handheld, locked-off, crane-esque) and a movement vocabulary (push-ins, rail slides, whip pans) that you can return to for cohesion.
- Build a shot list with intent. For each beat, list the shot type, camera movement, and approximate duration. Tie every entry to a narrative purpose—not just a pretty frame.
- Storyboarding and thumbnailing. Create rough sketches or quick photo references for at least 60–75% of the shots. Don’t worry about perfection; just capture intent.
- Plan B shots for constraints. If a location falls through, predefine two viable alternatives that still preserve the emotional spine.
Great music videos feel inevitable in the moment, not forced in the edit.
Case in point: a touring artist used a three-scene concept—bus interior at dusk, a hotel stairwell with echoing acoustics, and a rooftop at blue hour. The storyboard kept the crew aligned even when the bus was late, the hotel room was booked for a shorter window, and the rooftop required a permit flip. The shoot still delivered a cohesive arc because the emotional spine never wavered.
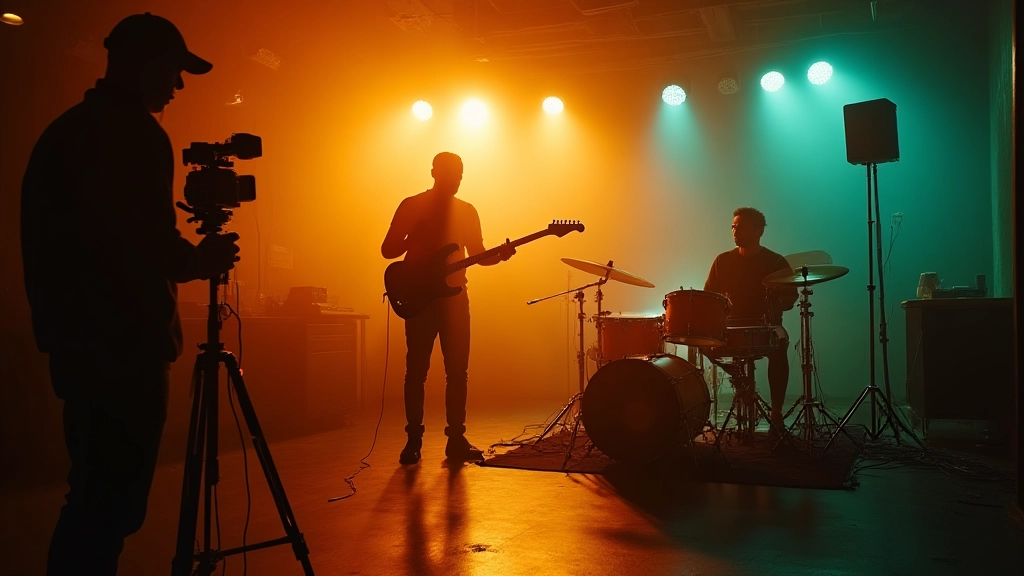
Cinematography and Lighting That Feels Real, Not Overproduced
Budget constraints demand smarter light, not more lights. The goal is a natural look with cinematic polish. Start with practicals—lamps or visible light sources in-frame that contribute to mood—then supplement with a couple of controlled key lights. The result should feel intentional rather than staged.
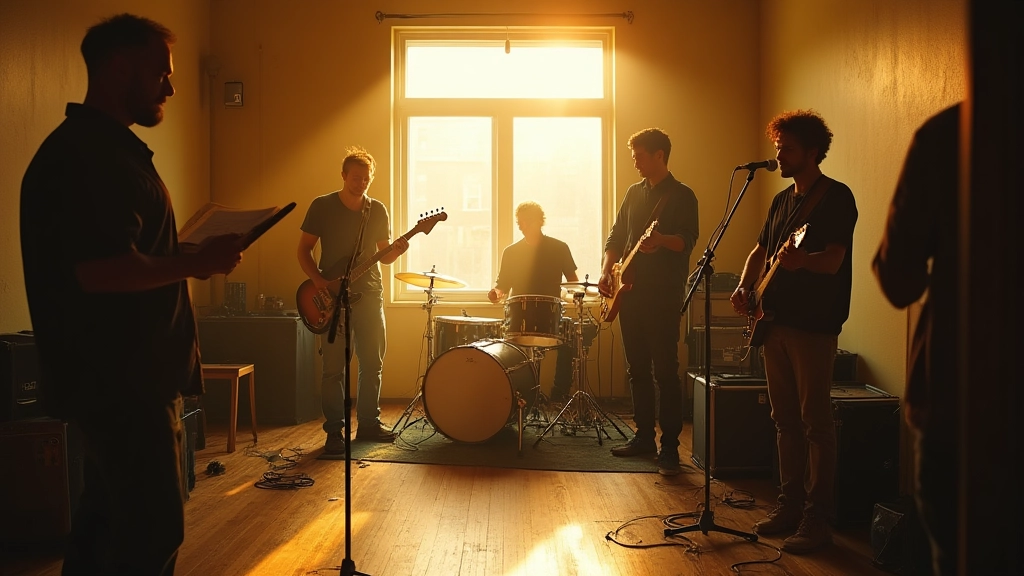
- Assess the space for natural light. Note the direction, color temperature, and times of day when light shifts. Use curtains or gels to shape it if needed.
- Three-point, on a budget. A practical key (a lamp or compact LED), a fill to soften shadows, and a backlight to separate subject from the background. If you cannot place three lights, prioritize the key and backlight for depth.
- Color temperature discipline. If you shoot in mixed light, set a white balance anchor (either 3200K or 5600K) and tint to maintain a cohesive look during color grading.
- Texture and atmosphere with practicals. Add a string of practical bulbs behind the artist or a backlit doorway to create silhouettes that punctuate the performance.
- Move with intention. When the song crescendos, let the camera push in or glide to mirror rising energy rather than just cutting to a new angle.
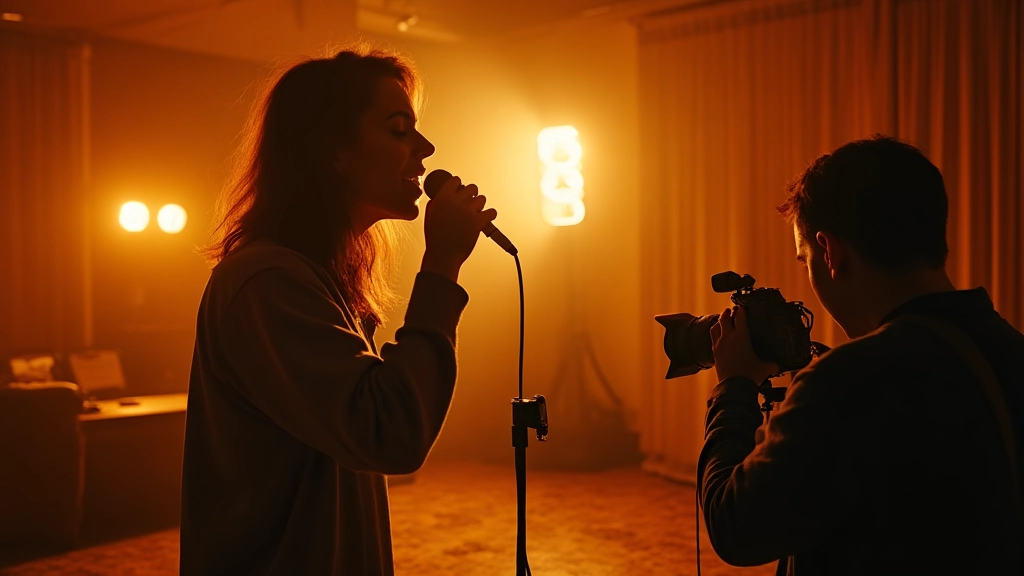
Mini case: an indie artist shot a performance in a dim rehearsal room using a single practical lamp as the sun set outside. A small bounce was used to lift the face gently, while a second lamp behind created a rim to separate the artist from the wall. The resulting footage read as intimate, not cramped, and the post color grade could lean into warm amber tones with a cool shadow edge for contrast.
Directing Performance for On-Camera Presence
The most compelling music videos treat performance as storytelling rather than performance alone. Your direction should elicit natural moments that align with the song’s emotional spine. Focus on micro-actions: breath, micro-movements of the hands, a slight tilt of the head, or a purposeful pause that mirrors a lyric shift.
- Pre-brief the artist. Share the emotional spine in a single sentence, plus two to three micro-expressions that should happen at specific moments.
- Give simple, repeatable commands. Short cues like "hold, breathe, lean, go." Keep it calm and precise to avoid fatigue on long takes.
- Batch performance takes. Shoot multiple takes for each beat, then pick the best moment in the edit. It’s easier to choose a great moment from several options than to force a single take to carry the scene.
- Use a mirror or waist-high monitor. Having a visual cue helps the performer stay in frame and in character without constant referential coaching.
Two quick vignettes illustrate the point. In the first, a solo guitarist tracks a vulnerable lyric in a cramped hotel stairwell; the director keeps the camera tight, guiding the player to inhale before a quiet line, letting the echo in the stairwell carry the weight. In the second, a duo on a rooftop moves in unison for a chorus, but one partner breaks away to create space, highlighting a human moment that the audience can connect to emotionally.
Editing Rhythms, Cutting Styles, and Pacing
Editing is the engine that translates performance into emotion. Start with the tempo map of the track and build edits that mirror the music’s energy. Don’t just cut on the beat; let the cut feel like a drum fill, a breath, or a lyric shift that compels the listener forward.
- Create a tempo map for the edit. Assign a rough cut duration per verse, chorus, and bridge that aligns with the song’s energy curves.
- Use a mix of shot lengths. Alternate quick cuts with longer holds to give the viewer time to absorb a moment and to heighten impact at the drop or refrain.
- Match action across cuts. Ensure that frames align in movement, so the edit feels seamless rather than jarring.
- Reserve a few breathing room moments. Silence or a single still frame can magnify a lyric or a phrase when it returns.
- Annotate the cut with a storyboard note. In your edit decision list, tag each cut with the beat or lyric it corresponds to so you can revisit decisions during color and sound work.
Mini-story in pacing: a bedroom producer crafts a synth-driven track with sparse visuals. The editor builds a rhythm by intercutting a close-up of the musician’s fingers with macro shots of the tape deck and a flickering LED. The cuts land on each chorus not by the click of a metronome but by a visual echo of the backing vocal line, making the video feel bigger than its budget.
Color, Mood, and Visual Consistency
Consistency is a storytelling decision as much as a technical one. Start with a look you can apply across all locations and shots, and then refine in post to unify skin tones, background hues, and lighting direction. A cohesive color palette helps even a loosely shot DIY video read as deliberate and professional.
| Look | Palette | When to use |
|---|---|---|
| Warm Glow | Amber skin tones, soft gold, muted blues | Intimate vocal moments, late afternoon amber light |
| Moody Contrast | Desaturated base, teal shadows | Chorus drop, night scenes, urban settings |
| Vivid Pop | High saturation with controlled highlights | Performance highlights, energy bursts |
Practical workflow: shoot in a neutral log-like profile if your camera supports it, then apply a gentle LUT that matches your chosen look. The aim is to keep skin tones natural while letting the overall mood carry the grade. If you are using AI-assisted tools for color matching, treat them as assistants rather than arbiters; you still steer the grade with your chosen palette and mood goals.
Sound for Video: Playback, Sync, and Final Mix
Audio is the silent ambassador of video. Lip-sync accuracy matters, but you also want the room tone, ambience, and momentary harmonics to feel authentic. On set, use a dedicated monitor headphone mix for performers so they can stay in sync with the track without straining their ears.
- Use pre-recorded guide track on set. A clean guide helps performers stay in sync; keep the actual vocal take for the post later if possible.
- Record room tone and ambience. A few minutes of ambient sound in each location makes post production easier for seamless mixing.
- Capture clean dialogue or lyric cues separately. If you plan to insert subtitles or lyric cards, pre-lay or script those lines to avoid lip-sync drift later.
- Sync in post with careful alignment. If you use AI-assisted lip-sync tools, verify the output by listening for subtle mouth movements that feel natural rather than machine-like.
Case example: a duo shoot in a cafe used a compact field mixer and two wireless mics, allowing a pristine vocal take while ambient cafe chatter provided natural texture. The final mix kept the foreground vocal crisp while the background remained alive but not overpowering, delivering a sense of place.
Locations, Permits, and Low-Cost Production Tactics
Scouting for locations that tell a story without bleeding your budget is an art. Look for places with built-in character—texture on walls, interesting light sources, or unusual angles—so you get more mileage out of fewer moves.
- Make a quick location map. Sketch or photograph potential spots and note entry/exit routes, power access, and potential sound leaks.
- Secure permits early if needed. Some public spaces and rooftops require permissions; a short email or call can unlock a window for shooting without penalties.
- Use portable gear to stay flexible. A small lighting kit, a compact gimbal, and a lightweight tripod can let you improvise without heavy setup times.
- Plan B locations in the same drive. If the first spot is unavailable, a near fallback that preserves color and mood keeps the day efficient.
Example: a city-based indie artist used a laundromat night shoot as a visual anchor. The operator allowed a closed shop after hours, and the crew repurposed a row of coin-op machines as kinetic texture. A second fallback at an alley with neon signage preserved the same color palette and kept the production moving.
From Pre-Production to Post: A Simple Timeline You Can Do This Weekend
Use a compact, repeatable timeline that you can replicate for future projects. The aim is predictability with room to improvise when a moment calls for it.
- Friday evening: finalize concept and shot list. Agree on the emotional spine and the 3–4 visual acts. Create a rough storyboard and a shot-by-shot list with timing cues.
- Saturday morning: scout locations and secure gear. Confirm permits or permissions, test lighting, and assemble a lean crew or solo rig plan.
- Saturday afternoon: run a dry rehearsal and test shots. Capture a few frame grabs to check framing, exposure, and color direction.
- Sunday morning: shoot with intent and time buffers. Focus on the essential takes and couple of flexible options for each scene.
- Sunday afternoon: first-pass edit and export. Assemble a rough cut to judge pacing, then adjust shot order to tighten narratives.
Release Strategy and Distribution for Your Music Video
Publishing is part of the creative process. A thoughtful release plan improves visibility, helps your fans find the work, and protects your rights. Start with a clean metadata package, compelling thumbnails, and a staggered release that suits your audience.
- Choose primary platforms and adapt formats. YouTube for long-form, Instagram Reels or TikTok for micro-mlices, and a representative clip for Twitter/X. Prepare platform-specific aspect ratios and captions.
- Optimize metadata and thumbnail. Use a clear title, relevant tags, and a thumbnail that shows the moment of highest emotion or action.
- Consider a staggered release. Tease with a short clip a week before the full video drops to build anticipation.
- Protect rights and track usage. Ensure you have license rights for locations, music, and any third-party visuals and consider a Creative Commons approach for non-commercial dissemination if appropriate.
Another practical example comes from a touring artist who dropped a teaser clip during soundcheck at a festival, followed by the full video a week later. The staggered approach built momentum, encouraged fan engagement in real time, and allowed for a second round of edits based on audience response.
AI in the Music Video Workflow: Real Tools, Real Limits
Artificial intelligence is a helper, not a replacement for craft. It can accelerate planning, organize assets, and assist with post tasks, but the human eye remains the final judge of storytelling, mood, and rhythm. Here are practical ways to weave AI into your process without losing control.
- Pre-production aids. Use AI-powered storyboarding tools to generate shot variants from a single beat or lyric cue, then pick the strongest options for your live shoot.
- Auto-captioning and accessibility. Generate captions during or after the edit to ensure accessibility and broaden reach without extra production time.
- AI-assisted color and look transfer. Run a look transfer pass to harmonize color across disparate locations, but follow with a manual grade to preserve skin tones and mood.
- AI-based audio alignment and cleanup. If lip-sync drift occurs, use alignment tools to tighten cues, then fine-tune with human judgment to preserve naturalness.
- Use AI for safe, ethical VFX planning. Scaffold simple background replacements or motion effects, then execute with practical in-camera elements when possible to keep the video grounded in reality.
Three concrete mini-stories show how AI touches the process without taking the stage. A songwriter uses an AI storyboard draft to explore nine shot options in under an hour, then selects the three strongest to shoot in a single afternoon. A multi-instrumentalist uses AI-assisted color matching to unify scenes shot on three different cameras, maintaining skin tones across the board. A small-town artist experiments with AI for quick subtitle generation and a lyric visual that reinforces the chorus without overshadowing the performance.
Three Mini-Case Studies: Real-world, On-Budget Wins
The Bus Tour Ballad
A touring guitarist used a single camera, two battery-powered LEDs, and a window-lit bus interior to tell a story of longing and movement. The key was a simple 3-shot spine: door frame at takeoff, seat by the window, and the highway framed through the windshield. The shoot was tight, the edit crisp, and the mood readable even on a small screen.
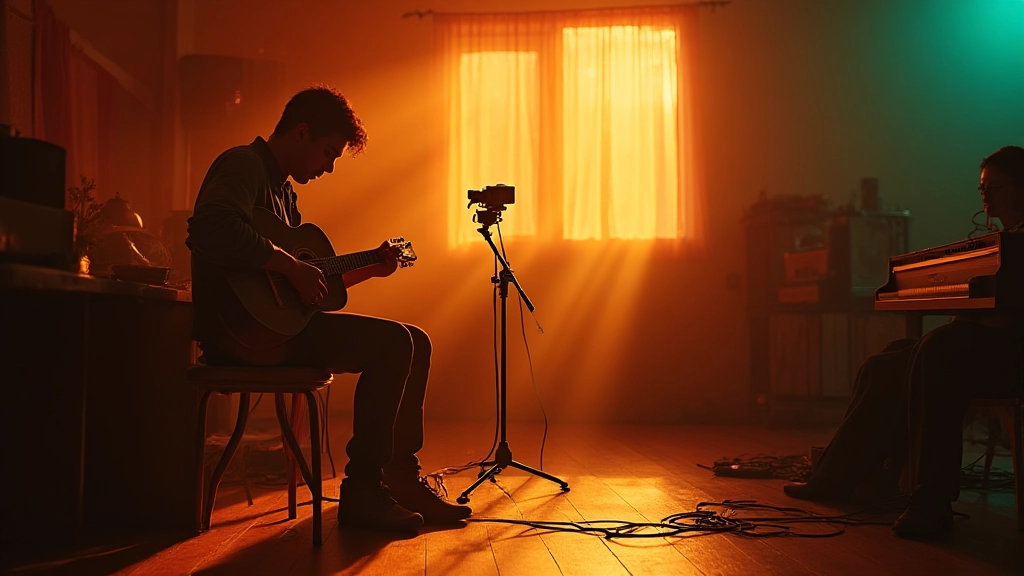
Bedroom Producer, Big Sound
A bedroom producer used a corner of the living room as a stage, with a single key light and a handheld cam for kinetic intimacy. The narrative music video leaned on cut timing and micro-expressions, delivering a loud emotional impact without expensive gear.
City Rooftop Duo
Two performers on a rooftop captured a chorus with a simple monitoring setup and a compact gimbal. The scene relied on the city lights, a faint wind, and a steady cadence of cuts to build momentum across the chorus without requiring a multi-camera rig.
Practical Exercises You Can Do This Weekend
- Create a 60-second storyboard for a song you’ve written or love. Map three visual acts to the verse, chorus, and bridge.
- Run a lighting rehearsal using two lights and one practical. Shoot test footage and compare skin tones in color grade.
- Edit a rough cut with pacing that follows the music. Swap in two alternative takes for a handful of key beats.
- Pull a quick color grade using a single LUT, then refine manually to preserve texture and skin tones.
Closing Frame: The Next Frame Is A Decision You Make
Crafting a music video on your own is a practice in deliberate constraints and verve. Every choice—where to place the camera, how long to hold a beat, which look to carry across scenes—speaks to the story you want to tell. With a strong storyboard, thoughtful lighting, disciplined editing, and a grounding in color, you can elevate your work from a simple performance video to a narrative experience. And if you lean into AI as a collaborator, you’ll find new lanes for experimentation without losing your voice.
Hear what these choices do to your own song.
Upload stems or a finished track, choose a reference direction, and compare a private Moozix mix before you export anything.