Music Video Directing: The Live Moment Playbook for Creators
A practical, narrative-driven guide to planning, shooting, editing, and releasing a music video that speaks with your voice and your budget.
Set the emotional beat before you touch a camera ✨
Your music video begins long before the first frame. It begins with a feeling you want the audience to borrow for three minutes and change back into their lives. Imagine the moment after the last chorus: what did the audience carry away? Write a one-page concept that answers three questions: What is the core emotion? Where does the action happen? What is the one visual that must be seen to believe the song? This is your north star. In practice, it guides location choice, wardrobe, camera angles, and even when you decide to cut to a close-up versus a wide to re-center the room. If your track breathes in a slow, intimate mood, plan a crawl of visuals that lets the audience lean in. If the track blasts through a high-energy chorus, build a wall of motion with precise, rhythmic edits that land with the beat.
To translate that concept into a shot plan, create a 12-shot skeleton that captures the arc in under two minutes. A skeleton is not a rigid storyboard; it’s a living map you’ll adapt on set. It should include a mix of performance moments, close-ups of hands or instruments, and a few narrative inserts that you can shoot with minimal gear. The goal is to prove you can tell the story of the song with visual variety while staying faithful to its energy. As you draft, ask yourself, which shot would you remember ten minutes after watching this video, and why?
7 steps to plan a music video that delivers
- Clarify the core emotion and the lead visual. Write a one-page beat sheet that pairs each verse with a camera action and a cut rhythm.
- Build a 12-shot skeleton. List 12 distinct shots that cover performance, detail, and narrative beats; assign each shot a location, time of day, and approximate duration.
- Schedule a 15-minute blocking drill with the cast. Walk through where each player sits, how they move, and what cues signal a change in energy.
- Capture a rough performance take. Film without pressure, focusing on the moment that will become your anchor edit. Keep a second take in reserve for tempo shifts or breath cues.
- Plan sound playback and lipsync. Decide where you will rely on a scratch playback and how you will align lip movement to the final track in post.
- Secure light and camera flexibility. Choose a primary lighting setup and a backup plan that works with daylight or practicals; keep cables tidy and accessible for quick changes.
- Deliver a concise treatment for your performers and crew. A one-page pitch keeps everyone aligned on expectations, vibe, and safe practices.
Directing performance with clarity and care
On set, the mood you project becomes part of the performance. You are not merely pointing a camera at musicians; you are shaping the moment they feel seen and connected to the song. In practice, use a two-layer approach: a coaching voice that guides how to inhabit a moment, and a director’s eye that captures the frame. The coaching voice helps performers relax into the truth of the moment; the director’s eye ensures the image stays legible and expressive across cuts. When you rehearse, begin with a warm-up of la-la-las and micro-gestures before moving into the song. Keep your commands concrete: "Hold here for two counts, then lean into the mic and let the chorus lift." That specificity reduces confusion and speeds up a complex shoot. A practical tip: always keep a backup plan for the chorus shot, like a stationary performance at a single angle, so you’re not left with a shaky alternative when a long take proves impossible.
To make solos and duets feel intimate even in large spaces, place performers on a three-quarter angle toward the camera, and ask them to share a single, small motion that reflects the emotional hinge of the section—such as a finger drum on a guitar body or a breath at the start of a line. When you shoot, keep the camera moving only if the move reveals something the eyes can’t already sense in the sound. Otherwise, let the performance breathe with a steady frame and a rhythm that matches the song. Your job is to translate the musical energy into visual energy, not to over-illustrate every lyric or gesture.
Lighting recipes that travel with you
Great lighting for a music video is less about expensive gear and more about intention. A single flexible setup can carry you from a closet-sized rehearsal room to a small stage. Start with a soft key that sculpts the performer’s face, then add a subtle backlight to carve them out from the background. If you can improvise, use practicals—lamps, neon, even a phone screen—as part of the scene. The trick is to keep color consistent across the sequence so the eye never fights the frame. When you travel, bring a modest kit: one compact key (a portable LED panel or a small Fresnel, depending on your power needs), a wrap light for fill, and a small backlight for separation. A practical exercise you can try on any shoot is to set up three color temperatures within the room: warm for intimacy, cool for tension, and neutral for performance balance. Then shoot 30 seconds in each setup and compare how the mood shifts with the same performance.
In a recent on-tour shoot, we relied on a Moozix portable rig to stabilize a runaway mic and keep the feed clean while the room’s windows cast a changing pattern of light on the actor. The result was a natural, documentary feel that still remained visually coherent across the cut. You don’t need the fleet of a studio to achieve cinematic lighting; you need discipline, timing, and the willingness to improvise with what’s at hand.
Shooting with restraint: movement, lens, and rhythm
When you are limited in gear, you become more creative about camera movement. Build a small toolkit of go-to moves: a slow push on a 24–70 lens for a vocal moment, a handheld glide for a chorus, and a steady crane-like lift achieved with a simple tripod and a low angle to widen the space. The rhythm of edits should mirror the track: longer takes for verses, quicker cuts for the chorus, and a decisive closing shot that lands like a drum hit. A simple rule of thumb: if a move doesn’t reveal something new about the performance or the story, leave it out. The audience will sense the restraint as confidence rather than limitation. For those on a shoestring budget, think of the camera as a storyteller with a limited vocabulary; every frame must earn its breath and its place in the song’s arc.
This is where the 12-shot skeleton shines; it nudges you toward variety without forcing complexity. It also helps you plan for weather changes, crew shifts, and last-minute permit tweaks. The goal is not to chase grandiose moves but to chase moments that feel earned—moments that would be missed if the viewer blinked once. In the end, restraint can create a stronger sense of immediacy and intimacy that bigger rigs sometimes blur.
Rhythm and pacing in the edit: cutting for emotion
Editing is where the song finally meets the screen. Start with an assemble cut built from your 12-shot skeleton; mark where the emotional peaks land and where a small breath or gesture can communicate a beat shift. Then map your cuts to the track’s tempo grid. For a mid-tempo track, you might aim for a cut every 2.0–2.5 seconds; for a faster song, 1.0–1.5 second cuts. This is not a rigid formula; it is a guide that helps you preserve energy while ensuring musical alignment. If you have a lyric-heavy section, consider letting a lyric cue carry a frame or two of reaction shot to connect the audience to the singer’s intent. Later, refine with rhythm-based editing: use jump cuts on percussion accents, match cuts to a drum fill, and finish with a closing shot that echoes the opening moment for a satisfying circle-back. A practical exercise: create a two-column timeline with one column for video cuts and one for musical cues, then adjust the cuts until each beat lands on a frame that feels inevitable.
In the post stage, you will also balance lip-sync and motion. Lip-sync drift is natural in performance-based videos, so plan for a slight adjustment in the frame during color correction rather than attempting a perfect alignment in the edit. If you have access to generic AI-assisted tools, you can use them to help with timing alignment, but keep human judgment as the final arbiter for intent and nuance. The goal is fluidity, not mechanical precision; the audience should feel the song guiding the visuals, not a machine forcing the tempo.
The best music video is the one that reveals truth in the moment, not the one that pretends perfection exists in every frame.
Color as a storytelling instrument
Color should reinforce mood, not merely decorate it. Start by selecting a primary look: a warm cinematic palette for tenderness, a cool, desaturated palette for tension, or a bold, high-contrast look for adrenaline. Create a look transfer plan so the palette travels consistently from shot to shot, even if you dodge or hop between locations. A practical method is to build a small look-room workflow: color-correct primary shots in a neutral pass, then push secondary shots toward the final look using targeted lifts in highlights and shadows to preserve skin tones. For multi-venue shoots, capture a gray card and a color chart at each location to maintain uniformity across the board. And always save a fallback grade that preserves legibility in smaller screens online. You want the video to feel coherent whether it’s watched on a laptop, phone, or a theater screen.
Sound playback, sync, and the final mix
On-set playback helps performers feel the tempo and energy, but it is not a substitute for a good final track. Use a scratch mix during the shoot to preserve the sense of rhythm, then align in post with a clean final mix. If you are using in-ear monitors for performers, ensure they do not leak into mics and that your ambient sound remains controllable. For lip-sync, mark a tight cadence where the mouth movement aligns with the lyric stress, not just the syllables; this makes the look and the sound feel connected. In a small studio or bedroom setup, you can layer a basic ambient mic with a direct feed from the vocal mic to achieve a more natural blend in the final mix. The aim is to avoid the jarring mismatch that can derail the energy you built on-screen.
Release strategy and distribution for your music video
Planning the release is part of the craft. You do not want to drop a video without a plan for how it will reach listeners who care about your music. Start by defining your primary platforms and the formats you will deliver: a 60-second teaser, a 15-second cut for reels or shorts, and a full-length video for YouTube or Vimeo. Then map your rollout: premiere via a live stream or a curated listening session, publish a well-told description that invites engagement, and accompany the video with captioned transcripts to improve accessibility. Build a simple distribution timeline and create a set of deliverables for each platform, including thumbnail choices, caption files, and social snippets. If you are a touring artist, coordinate with venues and promoters to align the premiere with upcoming dates. A bedroom producer might partner with a soundtrack or podcast creator to cross-promote the release and reach new listeners. The key is consistency: a steady cadence of content, behind-the-scenes glimpses, and a clear call to action that invites viewers to explore more of your music.
Where AI fits in modern music video making: practical use, not hype
AI tools are increasingly capable assistants in planning, look matching, and even rough editing. You can use AI to generate storyboard variants from a beat map, to propose camera angles that maximize coverage, or to apply look transfers that harmonize disparate locations. You can also use AI to detect lip-sync misalignments and propose timing adjustments for later refinement. But remember, AI is a tool; the storytelling and the human connection must remain in your hands. Use AI for rapid iteration during pre-production, testing several looks or shot orders, then choose the concept that best serves the emotional core of the song. In practice, you might run a quick AI-assisted storyboard pass on a 12-shot skeleton, then lock the plan and execute with your crew. The best results come when you combine human intuition with AI-assisted efficiency, never letting either asset override the artistry of the moment.
Three field-tested vignettes: real-world scenarios
The Tour Bus Shoot
A high-energy van tour becomes a moving set. We used a single camera and a lightweight wireless audio rig to capture the groove between soundcheck and stage. The challenge was maintaining a consistent look while the bus rolled through different towns. A practical solution was to lock a warm, intimate key light and use window light as a natural fill, with a color grade that kept the footage cohesive. The result felt immediate, as if you were a passenger in the moment.
The Bedroom Producer Lab
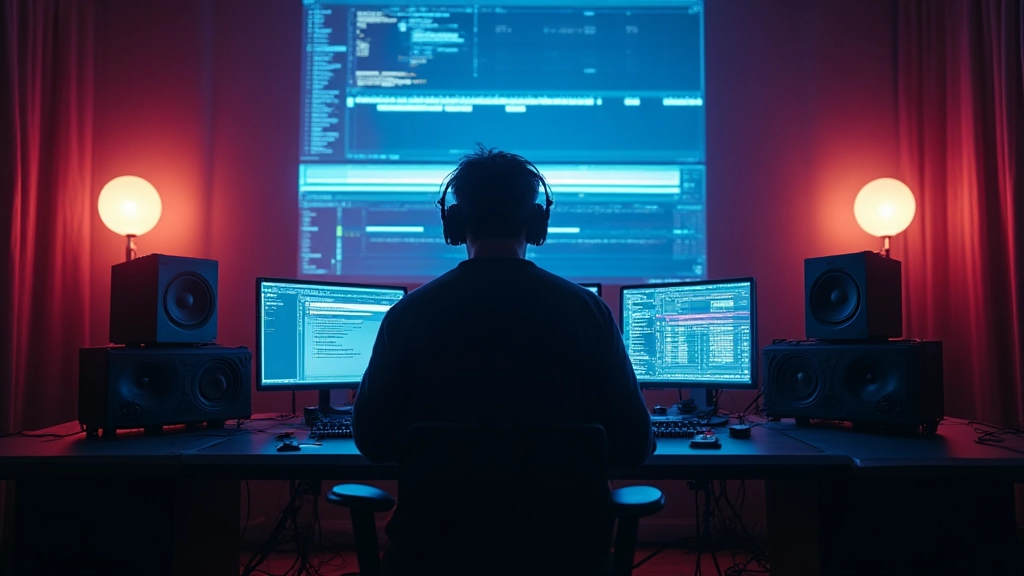
A solo artist with minimal gear built a narrative around a late-night session in a small room. We staged a few reflective cuts—hands on the keyboard, eyes in the screen, a mug of cold coffee—to suggest a creative process rather than a performed spectacle. The low-budget approach emphasized storytelling over spectacle, proving you can deliver a compelling music video from a spare room with clever blocking and a tight edit.
The Rehearsal Space Collaboration
In a shared space with a small band, we used dialogue-free inserts to establish relationships among players, letting the music carry the story. We shot a few close-ups of hands on strings and a couple of wide, stable takes that captured the group’s chemistry. The combination created a sense of authenticity that elevated the performance without requiring a large crew or elaborate production design.
Final pre-shoot checklist you can print and use today
- Concept beat sheet with the core emotion and the 12-shot skeleton
- Blocking drill results documented and shared with performers
- One-page treatment approved by all cast and crew
- Backup plan for weather, gear, and permits
- Sound playback and lip-sync strategy mapped to the edit
- Lighting plan with backup gear and color targets
- Shot list aligned to the track tempo grid
- Accessibility plan: captions and transcripts prepared
The closing frame: a few actionable takeaways
Plan the emotional arc first, then design the visuals to serve it. Use a small skeleton as your compass; let lighting and sound be the texture of the story rather than its crutch. Edit with the heartbeat of the track, not the clock, and let color work as a mood instrument across locations. When you blend craft with discipline, you deliver a music video that feels inevitable and honest, no matter the budget or the gear. Remember, the aim is not to show how much you know but how clearly you can tell the truth of the song through image and rhythm. The moment you achieve that, you have built a video that travels with your audience long after the final frame closes.
Hear what these choices do to your own song.
Upload stems or a finished track, choose a reference direction, and compare a private Moozix mix before you export anything.