When engineer Bethany Rodriguez received the final mix for indie band The Velvet Thorns' debut single, she knew immediately that something was off. The track had all the right elements but sounded like it was trapped behind a veil of frequency mud and tonal imbalance.
Three hours later, after applying her systematic mastering approach, the same recording emerged with crystalline clarity, punchy dynamics, and the kind of tonal balance that makes program directors take notice. The difference wasn't magic or expensive gear – it was methodical tonal shaping that addressed each frequency range with surgical precision.
Most home studio producers approach mastering like throwing pasta at a wall, hoping something sticks. But professional mastering engineers follow proven workflows that systematically address tonal problems from the ground up. Here's the exact 8-step process that transforms bedroom recordings into broadcast-ready masters.
Why Tonal Balance Makes or Breaks Your Master
Before diving into techniques, understand what tonal balance actually means in mastering context. It's not about making every frequency equally loud – that would sound terrible. Instead, it's about creating a cohesive frequency response where each element occupies its proper space without fighting for attention.
Think of tonal balance as architectural engineering for your mix. The low end provides the foundation, midrange carries the structure, and high frequencies add the finishing details. When any of these elements are out of proportion, the entire sonic building becomes unstable.
Step 1: Establish Your Reference Foundation
Every successful mastering session begins with proper reference material. Choose three commercial releases that represent your target sound – not just songs you like, but tracks that exhibit the tonal characteristics you want to achieve.
Load these references into your DAW at the same level as your mix (typically -23 LUFS for streaming). Use a reference plugin or simply A/B between your material and the commercial tracks. Pay specific attention to:
- How much low-end energy exists below 100Hz
- Where the vocal presence sits in the 1-5kHz range
- How bright or dark the overall tonal signature feels
- The balance between punch and smoothness
Engineer Todd Patterson recalls mastering a folk album where the artist insisted on more bass. "I kept adding low end until I compared it to similar releases. The references revealed that the original mix actually had perfect bass balance – the monitoring environment was the problem."
Step 2: Analyze Before You Act
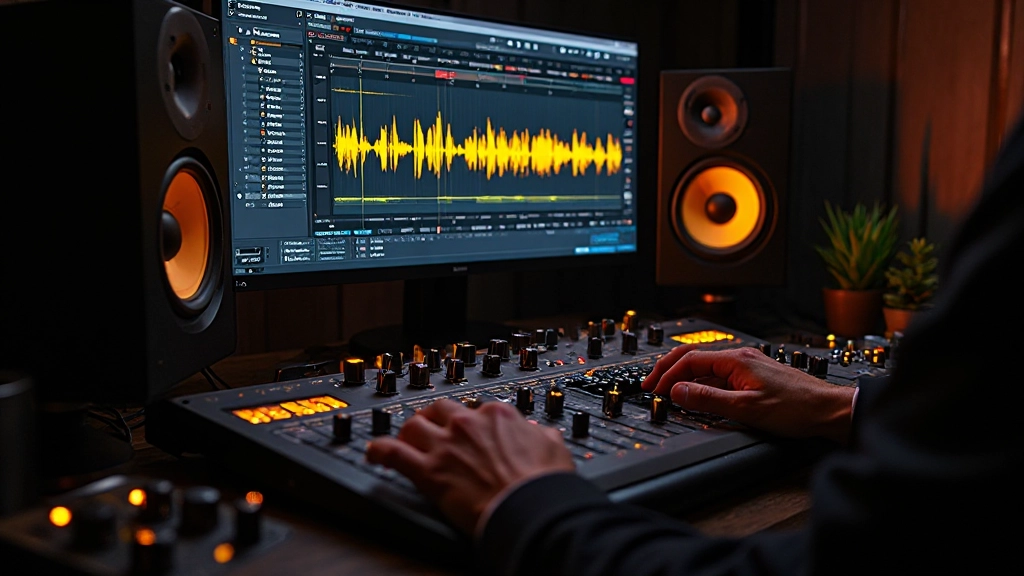
Visual analysis tools prevent costly mistakes in mastering. Insert a spectrum analyzer before any processing to see exactly where tonal problems live. Don't rely on your ears alone – even experienced engineers can be fooled by room acoustics or ear fatigue.
Look for these common tonal issues:
| Frequency Range | Common Problems | Visual Clues |
|---|---|---|
| 20-60Hz | Rumble, muddiness | Excessive energy below fundamental notes |
| 60-200Hz | Boominess, lack of clarity | Peaks around 80-120Hz |
| 200Hz-2kHz | Boxiness, honky midrange | Uneven response, prominent 400-800Hz |
| 2-8kHz | Harshness, sibilance | Sharp peaks around 3-5kHz |
| 8kHz+ | Dullness or excessive brightness | Rolled-off or hyped high frequencies |
Step 3: Address the Foundation First
Start tonal shaping from the bottom up. The low end forms the foundation for everything else, so get it right before touching midrange or treble. Use a high-quality linear phase EQ for broad tonal moves to avoid phase distortion.
Begin with a gentle high-pass filter around 20-30Hz to remove inaudible rumble that wastes headroom. Most home recordings benefit from this simple move. Then evaluate the 60-200Hz region where muddiness lives.
If the low end sounds boomy or unclear, try a broad 1-2dB reduction around 100-150Hz with a wide Q (0.3-0.7). This clears the "mud zone" without removing fundamental bass energy. For thin-sounding material, a gentle boost around 80Hz can add warmth without compromising clarity.
"I learned to think of the low end as a sculpture – you're carving away what doesn't belong rather than adding what's missing. Most mix problems come from too much information in the wrong places."
Step 4: Sculpt the Critical Midrange
The 200Hz-2kHz range contains most of the musical information your ears are designed to hear. This is where vocals live, where guitars find their body, and where drums get their punch. Mistakes here are immediately obvious on any playback system.
Use surgical EQ moves in this range. If vocals sound boxy or honky, sweep a narrow bell curve through the 400-800Hz region until you find the offending frequency, then apply a modest 1-3dB reduction. For presence and clarity, gentle enhancement around 1-2kHz can bring vocals forward without harshness.
Many bedroom recordings suffer from 500Hz buildup due to small room resonances. A precise cut here often produces immediate clarity improvements across the entire mix.
Step 5: Manage Presence and Aggression
The 2-8kHz range controls how aggressive or smooth your master sounds. This is where sibilance, harshness, and digital artifacts become problematic. It's also where presence and excitement live, so heavy-handed cuts can make everything sound dull and lifeless.
Use de-essing or dynamic EQ for problem frequencies in this range rather than static cuts. If you hear harshness around 3-4kHz, try a gentle dynamic reduction that only activates when the problematic frequencies exceed a certain threshold. This preserves natural dynamics while controlling peaks.
For adding presence without harshness, try a broad, gentle boost around 6-8kHz instead of the typical 3-5kHz range. This enhances clarity without triggering ear fatigue.
Step 6: Shape the Air and Sparkle
High-frequency enhancement above 8kHz adds the "air" that makes professional masters sound open and detailed. But this range requires delicate handling – too much sounds harsh and fatiguing, too little sounds dull and amateurish.
Start with a gentle shelf boost around 10-12kHz, adding no more than 1-2dB initially. Use your references to gauge the appropriate amount. Some genres (electronic, pop) can handle more high-frequency energy than others (jazz, folk).
Consider using harmonic exciters or tape saturation plugins instead of pure EQ for high-frequency enhancement. These tools add harmonics that create the perception of brightness without harsh digital artifacts.
Step 7: Apply Multiband Dynamics
Once your tonal balance is dialed in, multiband compression helps maintain that balance across dynamic content. Unlike full-band compression, multiband processors can control specific frequency ranges independently.
Set up four bands roughly corresponding to: sub-bass (20-80Hz), low-mids (80-300Hz), mids (300Hz-3kHz), and highs (3kHz-20kHz). Use gentle ratios (2:1 to 3:1) and slow attack times to preserve transients while controlling sustained energy.
The goal isn't obvious compression but frequency-specific control. If your low end pumps during loud sections, the bottom band can tame it without affecting midrange punch. If sibilance occasionally pokes through, the high band can catch it without dulling the entire top end.
Step 8: Final Limiting and Level Optimization
The final limiter serves two purposes: achieving competitive loudness and applying final tonal shaping. Choose a limiter known for musical behavior rather than pure transparency – the subtle harmonic coloration often enhances the finished master.
Start with conservative settings: slow attack, medium release, and minimal gain reduction. Aim for -1dB to -1.5dB of limiting to maintain dynamics while achieving appropriate loudness for your target platform.
Many modern limiters include integrated EQ or harmonic enhancement. Use these features sparingly for final polish – a touch of high-frequency clarity or low-end tightening can provide the final 5% that separates good masters from great ones.
- Set appropriate output level: -1dBFS for streaming, -0.3dBFS for CD
- Check LUFS compliance: -14 LUFS for most streaming platforms
- Monitor intersample peaks: Keep true peaks below -1dBTP
- A/B against references: Final volume-matched comparison
When Tonal Shaping Goes Wrong
Even experienced engineers make tonal mistakes. Recognizing common pitfalls helps avoid them. Over-EQing is the most frequent error – if you find yourself making dramatic cuts or boosts, step back and reconsider your approach.
Another trap is chasing the wrong reference material. Comparing a folk ballad to a heavy metal track leads to inappropriate tonal choices. Your references should share similar arrangement density and stylistic elements.
Finally, remember that mastering can't fix fundamental mix problems. If vocals are buried or drums lack punch, those issues need to be addressed in mixing, not masked with mastering EQ.
"The best mastering is invisible – you don't notice what was done, you just notice that everything sounds exactly right. Tonal balance should feel inevitable, not imposed."
Professional tonal shaping transforms good mixes into exceptional masters through systematic frequency management. By following these eight steps methodically, your home studio masters will compete with commercial releases across any playback system. The key is patience, reference material, and trusting the process over quick fixes.
Hear what these choices do to your own song.
Upload stems or a finished track, choose a reference direction, and compare a private Moozix mix before you export anything.