The control room monitors cut through the late-night silence as Wesley adjusted the bass level for the hundredth time. His DI track sounded clean but lifeless, while the amp recording had character but buried itself in the dense rock arrangement. Three weeks into mixing his band's debut EP, he was starting to understand why seasoned engineers often record bass through multiple signal paths.
When Clean Signal Wins the Battle
Direct injection recording captures bass in its purest form, bypassing the coloration and potential inconsistencies of amplifier recording. The DI box converts your bass's high-impedance output to a low-impedance balanced signal that interfaces cleanly with your audio interface's preamps.
Wesley discovered this approach excels in several specific scenarios. Modern pop, hip-hop, and electronic-influenced genres often demand the tight, controlled low end that only DI recording provides. When your mix features heavily programmed drums with precise kick patterns, a DI bass track locks into the rhythm section without fighting for frequency space.
The technical advantages extend beyond genre preferences. DI recording eliminates room acoustics from the equation entirely. Whether you're tracking in a bedroom studio with questionable acoustics or a basement space with concrete walls, the DI signal remains consistent. This consistency becomes crucial when overdubbing bass parts or punching in corrections weeks after the initial session.
Additionally, DI tracks provide maximum flexibility during mixing. You can apply amp simulation plugins, re-amp through hardware later, or sculpt the tone completely in the digital domain. The clean signal acts as raw material that adapts to mix decisions you haven't made yet.
The Amplified Approach to Character
Recording through a bass amplifier introduces harmonic content, dynamic response, and tonal character that no plugin perfectly replicates. The interaction between pickup, preamp tubes, power section, and speaker cabinet creates complex harmonic relationships that evolve with playing dynamics.
Clarence, Wesley's bassist, preferred tracking through his vintage Ampeg SVT rig. The tube preamp added subtle compression and harmonic saturation that made his playing feel more musical and expressive. When he dug in during the chorus sections, the amp responded with natural compression and added harmonics that complemented his aggressive fingerstyle technique.
Amplifier recording particularly shines in rock, blues, and jazz contexts where bass tone contributes to the overall character rather than simply providing rhythm support. The natural compression from tube circuitry helps bass parts sit consistently in the mix without heavy-handed dynamics processing later.
| Recording Method | Frequency Response | Dynamic Behavior | Mix Flexibility |
|---|---|---|---|
| Direct Injection | Extended highs and lows | Consistent, predictable | Maximum post-processing options |
| Amplifier | Shaped by amp voicing | Natural compression curves | Committed character, less malleable |
| Blended Signals | Customizable frequency emphasis | Controllable compression amount | Best of both approaches |
The room acoustics also play a role in amplified recording. A well-treated recording space adds natural ambience that places the bass in a three-dimensional soundstage. This spatial information helps bass parts feel integrated with drums and other acoustic instruments recorded in the same environment.
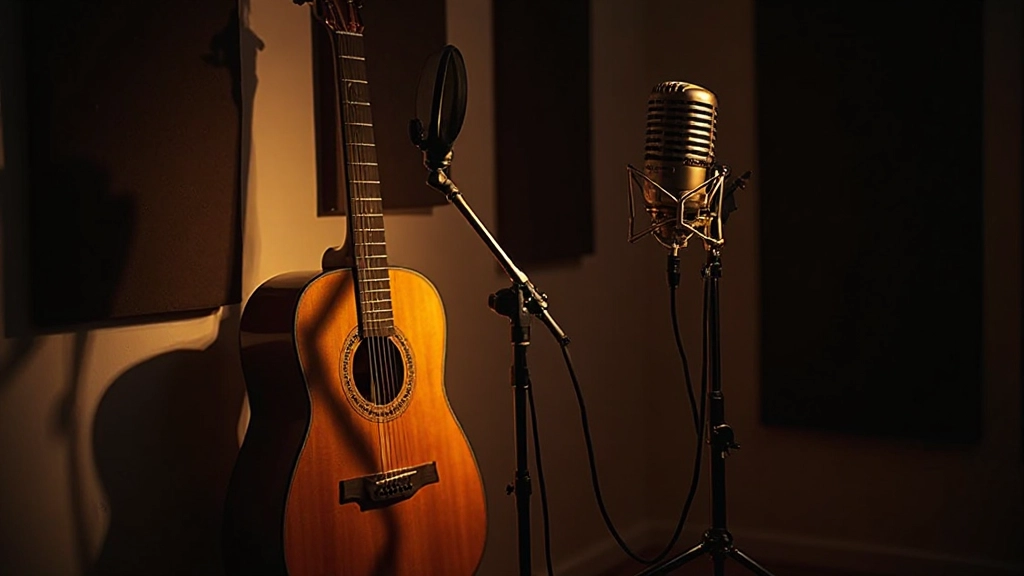
Microphone Placement for Bass Cabinets
When recording amplified bass, microphone choice and placement dramatically affect the captured tone. Dynamic microphones like the Shure SM57 or Electro-Voice RE20 handle the high sound pressure levels while providing different tonal characteristics.
Close-miking the speaker cone center captures more attack and definition but can sound harsh if placed too aggressively. Moving the microphone toward the speaker edge reduces high-frequency content and emphasizes the fundamental frequencies. Wesley found his sweet spot about six inches from the speaker, positioned halfway between center and edge.
- Position the microphone 3-8 inches from the speaker - closer placement increases proximity effect and low-frequency emphasis
- Angle the mic slightly off-axis - this reduces harsh frequencies while maintaining clarity
- Use a pop filter or foam windscreen - bass frequencies can create air movement that causes handling noise
- Monitor for phase relationships - if blending with DI signal, check phase alignment carefully
Room miking adds another dimension but requires acoustic treatment. Placing a condenser microphone 3-6 feet from the cabinet captures the interaction between direct sound and room reflections. This technique works best in treated spaces where early reflections enhance rather than muddy the bass tone.
The Art of Signal Blending
Recording both DI and amplified signals simultaneously provides ultimate flexibility during mixing. You can emphasize the clean DI signal for tight low end while blending in amplified character for midrange warmth and presence.
The key to effective blending lies in understanding what each signal contributes to the overall bass sound. The DI typically handles sub-bass and low-frequency content (roughly 40-150 Hz) while the amplified signal contributes midrange character and harmonic content (150-2000 Hz and above).
"I learned to think of DI and amp signals as different ingredients in the same recipe. The DI provides the foundation, and the amp adds the flavor."
Phase alignment becomes critical when blending signals. Even small timing differences between DI and amplified tracks can cause frequency cancellations that hollow out the bass tone. Most DAWs include phase inversion controls and sample-accurate delay compensation to address these issues.
High-pass filtering helps define each signal's role in the blend. Rolling off low frequencies from the amplified track (typically below 80-120 Hz) prevents muddy buildup while allowing the DI to handle the fundamental bass frequencies cleanly.
EQ Strategies for Each Approach
Direct injection signals often benefit from gentle EQ curves that enhance natural frequency content rather than dramatic tonal shaping. A slight high-frequency shelf around 3-5 kHz can add string definition and pick attack clarity without creating harshness.
Low-frequency management varies by musical context. Hip-hop and electronic music often emphasize sub-bass content below 60 Hz, while rock arrangements might focus on the 80-120 Hz region for punch and power. The clean DI signal provides precise control over these frequency decisions.
Amplified bass recordings usually require less dramatic EQ intervention since the amp and cabinet have already shaped the tone. Focus on corrective EQ to address frequency buildups or deficiencies rather than creative tonal sculpting.
Common amplified bass EQ moves include gentle cuts in the 200-400 Hz range to reduce muddiness, and careful management of the 800-1200 Hz region where finger noise and string buzz become prominent. The natural compression from tube amplification often eliminates the need for aggressive dynamic control.
Compression Techniques Across Signal Types
DI bass signals typically require more compression than amplified recordings due to the lack of natural compression from tube circuitry. Start with gentle ratios (3:1 or 4:1) and medium attack times that allow initial transients to pass through while controlling sustain levels.
The attack time setting proves crucial for maintaining bass definition. Fast attack times can eliminate the pick or finger attack that helps bass parts cut through dense arrangements. Medium attack settings (10-30 milliseconds) preserve initial transients while providing consistent sustain control.
Amplified bass recordings often need minimal compression since the tube amp has already provided natural dynamic control. When compression is necessary, use gentle ratios and slow attack times to enhance the existing character rather than imposing heavy-handed dynamics processing.
- Set compression ratio between 3:1 and 6:1 for most bass applications
- Use attack times between 10-50ms to preserve transient definition
- Apply 2-6 dB of gain reduction during peak passages
- Choose release times that follow the musical rhythm (1/8 note or 1/4 note values)
Multi-Band Compression for Problem Solving
Complex bass parts sometimes require frequency-specific dynamic control that single-band compressors cannot provide effectively. Multi-band compression allows separate processing of low, mid, and high-frequency content within the same bass track.
Wesley encountered this challenge while mixing a funk track where the bassist's slap technique created inconsistent high-frequency content. A multi-band compressor let him control the aggressive slap sounds in the 2-5 kHz range while leaving the fundamental bass frequencies untouched.
The low band (20-150 Hz) typically needs gentle compression to maintain consistent sub-bass levels. The mid band (150-800 Hz) contains most of the bass guitar's fundamental character and usually requires the most compression. The high band (800 Hz and above) handles string noise, pick attack, and harmonic content that varies significantly with playing technique.
Common Pitfalls and Solutions
Phase issues represent the most common problem when blending DI and amplified bass signals. Even small timing differences can create dramatic frequency cancellations that hollow out the bass tone. Always check phase relationships by soloing both tracks and listening for fullness versus thinness.
Many DAWs include automatic delay compensation, but manual adjustment sometimes provides better results. Zoom into the waveforms and align the initial transients visually, then fine-tune by ear while monitoring the combined signal.
Overprocessing represents another frequent mistake, particularly with DI signals. The clean character that makes DI recording attractive can disappear under heavy EQ and compression. Start with subtle moves and build processing gradually while referencing against other mix elements.
Ground loops and electrical noise affect both recording methods but manifest differently. DI boxes with ground lift switches help eliminate buzz and hum from electrical issues. When recording amplifiers, ensure proper electrical grounding and consider the interaction between amp, microphone, and interface ground references.
Genre-Specific Applications
Electronic and hip-hop production heavily favors DI recording for its clean, controlled character. The precise low-end reproduction works well with drum machines and synthesized elements that occupy specific frequency ranges. Side-chain compression effects also work more predictably with the consistent dynamics of DI bass tracks.
Rock and metal genres benefit from amplified recording or DI/amp blends that provide both power and character. The natural compression and harmonic saturation from tube amplification complements the aggressive dynamics typical in these styles. Wesley's metal project required this approach to match the intensity of heavily distorted guitars.
Jazz and acoustic music often utilizes pure amplified recording to capture the complete musical expression. The dynamic response and tonal complexity of quality bass amplification becomes part of the musical performance rather than simply a recording convenience.
"The best bass tone serves the song, not the engineer's preferences. Sometimes that means pristine DI clarity, sometimes it means organic amp character, and sometimes it means both."
Building Your Bass Recording Chain
A complete bass recording setup accommodates both DI and amplified approaches without compromise. Quality DI boxes provide clean signal conversion and impedance matching that preserves the instrument's natural character. Active DI boxes work better with passive bass guitars, while passive DI boxes often complement active instruments effectively.
The recording interface's preamp quality affects both signal paths but impacts DI recording more directly. Clean, transparent preamps with adequate gain provide the foundation for effective post-processing. Consider interfaces with dedicated instrument inputs that bypass unnecessary gain stages.
When building an amplified recording chain, room acoustics become crucial. Basic acoustic treatment reduces problematic reflections while preserving the natural ambience that makes amplified recording attractive. Focus on controlling first reflection points and managing low-frequency buildup in room corners.
Microphone selection balances frequency response, pattern characteristics, and maximum SPL handling. Dynamic microphones handle the high sound pressure levels while providing different tonal signatures. Ribbon microphones offer smooth frequency response but require careful positioning and impedance matching.
Three months after that late-night mixing session, Wesley's band released their EP to positive reviews that specifically mentioned the bass sound. The combination of DI precision and amplified character had created bass tracks that supported each song's unique requirements. Sometimes the best recording choice isn't choosing between approaches – it's understanding when each method serves the music most effectively.
Hear what these choices do to your own song.
Upload stems or a finished track, choose a reference direction, and compare a private Moozix mix before you export anything.