Quick Takeaways
- Ground loops create 60Hz hum that ruins recordings and can't be fixed in post
- Check power sources first: multiple outlets on different circuits cause most noise problems
- Audio interfaces with balanced outputs reduce ground loop susceptibility by 90%
- Laptop power adapters are the biggest culprit in home studio electrical noise
- Test your signal chain with everything powered but inputs muted to isolate noise sources
- Clean recordings start with clean power, not expensive noise gates or plugins
You've dialed in the perfect microphone placement, set your preamp gain just right, hit record, and there it is: a persistent electrical hum that sits under everything you capture. That 60Hz drone isn't a creative choice, and it's not something you can magically remove later without damaging your actual audio. Ground loop noise happens when electrical current finds multiple paths to ground through your audio gear, creating interference that gets baked into every recording.
This problem hits home studios harder than professional facilities because most of us are working in spaces that weren't designed for audio production. We're plugging gear into household electrical systems, running long cable runs across rooms, and connecting equipment that wasn't necessarily meant to play together. The good news is that most electrical noise problems have straightforward solutions once you understand what's causing the interference.
Why Your Home Studio Creates Ground Loops
Ground loops happen when two pieces of audio equipment connect to each other through audio cables and also connect to electrical ground through different paths. Your audio interface might plug into one wall outlet while your monitor speakers plug into another outlet across the room. If those outlets are on different electrical circuits, you've created a loop where electrical current can flow through your audio cables instead of staying in the power lines where it belongs.
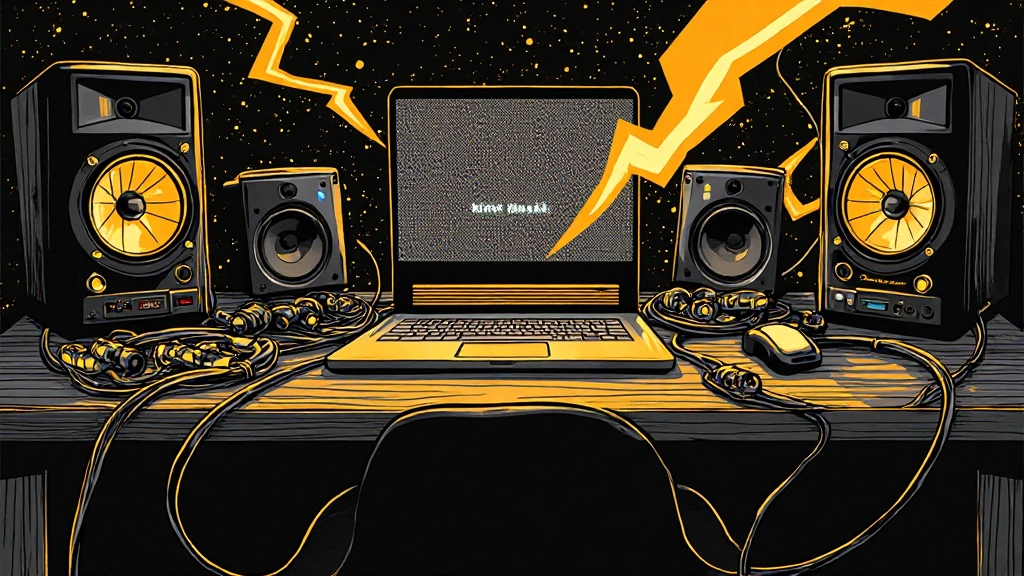
The most common setup that creates this problem involves a laptop, audio interface, and powered monitors. Your laptop runs on battery or a wall adapter, your interface plugs into one outlet, and your speakers plug into another outlet. Each connection to the electrical system creates a potential difference, and that difference shows up as hum in your recordings.
Unbalanced audio connections make the problem worse because they use the cable shield as part of the signal path. When electrical current flows through that shield, it mixes with your audio signal. Balanced connections keep the signal separate from the shield, which is why professional studios rely heavily on balanced gear.
The Laptop Power Adapter Problem
Laptop power adapters are notorious noise generators in home studios. These switching power supplies create electrical interference that can travel through USB cables, audio cables, and even through the air to nearby equipment. If you're getting noise only when your laptop is plugged in, the power adapter is likely the source.
The first test is simple: record a few seconds with your laptop plugged in, then unplug the power adapter and record again with the laptop running on battery. If the noise disappears when you unplug the adapter, you've found your culprit. This doesn't mean you need a new laptop or adapter, it means you need to break the ground connection between the adapter and your audio gear.
A direct box with ground lift can solve this problem by isolating the laptop's ground connection from your audio interface. Place the DI between your laptop's headphone output and your interface's line input, engage the ground lift switch, and the electrical connection breaks while the audio signal passes through clean.
Power Source Audit: Where Everything Plugs In
Map out where every piece of audio gear gets its power. Your audio interface, monitor speakers, laptop adapter, USB hubs, external drives, and any rack gear each represent a potential ground connection. The goal is to get as much equipment as possible powered from the same electrical circuit.
Start by identifying which wall outlets are on the same circuit breaker. You can do this by plugging a lamp into different outlets and flipping breakers to see which ones control which outlets. Alternatively, use a circuit tester or have an electrician map your studio space. Once you know which outlets share the same circuit, try to power all your audio gear from that single circuit.
If your studio is in a basement or spare bedroom, you might only have one or two circuits available. In that case, use a single power strip with surge protection to power all your gear from one outlet. This creates a single ground reference point for all your equipment, eliminating the voltage differences that cause ground loops.
| Equipment | Common Noise Symptoms | Quick Test |
|---|---|---|
| Laptop Power Adapter | Hum only when plugged in | Record on battery vs. plugged in |
| USB Hub | Digital clicks and pops | Unplug hub, use direct USB connection |
| Monitor Speakers | Hum increases with volume | Disconnect audio inputs, power speakers only |
| Audio Interface | Constant low-level hum | Mute all inputs, monitor direct output |
| External Hard Drive | High-frequency whine | Switch to SSD or move drive away from audio cables |
Balanced vs. Unbalanced: Why Connection Type Matters
Balanced audio connections use three conductors: positive, negative, and ground/shield. The audio signal travels on both the positive and negative wires, but in opposite polarity. When the signal reaches its destination, the negative wire gets flipped and added to the positive wire, doubling the signal strength. Any electrical interference that affects both wires equally gets canceled out in this process.
Unbalanced connections use only two conductors: signal and ground. The cable shield carries both the ground reference and any electrical interference it picks up along the way. This is why guitar cables and consumer audio cables are much more susceptible to ground loop noise than professional balanced cables.
If your audio interface has balanced outputs (usually 1/4" TRS jacks or XLR outputs), use balanced cables to connect to your monitor speakers. This single change can eliminate most ground loop problems, even if other parts of your signal chain aren't perfect. Many home studio owners use unbalanced RCA or 1/8" connections simply because that's what came in the box, not realizing that balanced connections would solve their noise problems.
Signal Chain Isolation Test
To find the exact source of ground loop noise, you need to test your signal chain piece by piece. Start with everything powered on but no audio inputs connected to your interface. Set your interface to monitor its own output through your speakers or headphones. If you hear hum at this stage, the problem is in the power connections between your interface, computer, and speakers.
Next, connect one audio input at a time while monitoring the output. Plug in your microphone or instrument cable, but don't play anything. If the hum gets louder or changes character when you connect an input, that input connection is part of a ground loop. This often happens when you connect a guitar or bass that's also connected to an amplifier in another part of the room.
USB connections can also create ground loops, especially if you're using a USB hub or connecting through a long USB extension cable. Try connecting your interface directly to your computer with the shortest USB cable you have. If the noise decreases, either the hub or the cable length was contributing to the problem.
What Makes Ground Loops Worse
These common mistakes can turn a minor ground loop into a major noise problem:
- Running audio cables parallel to power cables for more than a few inches
- Using multiple power strips plugged into different wall outlets
- Connecting equipment racks without proper ground bonding between rack rails
- Using unbalanced cables longer than 10 feet in electrically noisy environments
- Plugging audio gear into the same power strip as computers, routers, or fluorescent lights
Cable Routing and Physical Separation
The physical layout of your cables affects how much electrical interference they pick up. Audio cables act like antennas for electrical noise, especially long unbalanced cables. Keep audio cables away from power cables, computer monitors, WiFi routers, and cell phone chargers. When audio cables must cross power cables, do it at a 90-degree angle to minimize the interference pickup.
Coiling excess cable creates an even better antenna for electrical noise. Instead of coiling long cables, use shorter cables when possible, or drape excess cable length loosely rather than winding it in tight coils. This is especially important for unbalanced instrument cables and microphone cables in high-gain recording situations.
USB cables can also pick up and transmit electrical noise, particularly cheap cables with poor shielding. If you're getting digital clicks, pops, or dropouts along with ground loop hum, try a different USB cable or a shorter cable length. Some USB cables designed for charging don't have proper data line shielding and can introduce noise even when they successfully carry the audio signal.
Ground Lift Solutions That Actually Work
Ground lift switches disconnect the cable shield from the equipment ground, breaking the ground loop while maintaining the audio connection. Many direct boxes, audio interfaces, and monitor speakers include ground lift switches for this purpose. However, ground lift should be your last resort, not your first move, because it can create safety issues if used incorrectly.
The safest approach is to use a direct box with transformer isolation and ground lift capability. Connect the noisy source to the DI input, connect the DI output to your interface, and engage the ground lift switch on the DI. This breaks the ground loop at one point in the signal chain while maintaining proper grounding everywhere else.
Some monitor speakers have ground lift switches on the back panel. These can be effective for eliminating ground loops between your interface and speakers, but only use ground lift on one piece of equipment in the signal chain. Lifting ground on multiple devices can create more problems than it solves and may violate electrical safety codes.
When to Call an Electrician vs. DIY Fixes
Most home studio ground loop problems can be solved with proper cable management, balanced connections, and careful attention to power sources. However, some electrical issues require professional help. If you're getting shocked by audio equipment, if lights dim when you turn on audio gear, or if you're tripping circuit breakers regularly, call an electrician before continuing to work in your studio.
Dedicated electrical circuits for audio equipment eliminate many ground loop problems at the source. An electrician can install isolated ground outlets that provide clean power for audio gear without interfering with household electrical systems. This is especially valuable if your studio is in a basement, garage, or other space with questionable electrical wiring.
GFCI outlets can cause problems for audio equipment because they're designed to detect tiny electrical leaks and shut off power when they find them. Audio gear with slight electrical leakage that wouldn't be dangerous can trigger GFCI outlets to trip repeatedly. If your studio outlets are GFCI protected and you're having power issues, an electrician can install proper audio-rated outlets on a dedicated circuit.
Testing Your Noise Floor Before Recording
Before you start any recording session, do a noise floor check to make sure your electrical connections are clean. Set up your microphone or instrument as you normally would, but don't play or sing anything. Record 30 seconds of silence and examine the waveform. You should see a flat line close to zero with only tiny random fluctuations.
If you see regular patterns in the waveform, those indicate electrical interference. A steady horizontal line above zero indicates DC offset, which can be caused by ground loops or interface problems. Regular bumps or spikes every few seconds usually indicate digital interference from computers, phones, or wireless devices.
Listen to your noise floor recording through good headphones at a loud level. You should hear essentially nothing, or at most a very faint hiss that doesn't change when you move cables or adjust gain settings. Any hum, buzz, or clicking sounds indicate electrical problems that will be audible in your final recordings.
Pre-Upload Ground Loop Check
Before sending your tracks for mix feedback or uploading to streaming platforms, do a final noise check:
- Export a 10-second section of silence from your quietest recorded track
- Listen at 75% volume through studio headphones
- Check for any periodic hum, buzz, or electrical artifacts
- If noise is present, identify the source before recording additional material
- Clean recordings always translate better than processed recordings with noise reduction applied
Working Around Noise You Can't Eliminate
Sometimes you'll encounter electrical noise that you can't completely eliminate due to building wiring, neighboring electrical equipment, or other factors beyond your control. In these situations, you can minimize the impact through recording technique and arrangement choices.
Record during times when electrical interference is lowest. Air conditioning systems, refrigerators, and other household equipment cycle on and off throughout the day. If you notice that noise levels change at different times, schedule your recording sessions during the quieter periods.
Use close microphone techniques to maximize the ratio of signal to noise. A microphone placed 6 inches from a vocalist will pick up much less room noise and electrical interference than a microphone 3 feet away, even if the distant microphone sounds more natural. You can always add artificial ambience later, but you can't remove electrical noise without affecting the audio quality.
When using AI stem mixing tools or sending tracks to automated mastering services, clean source recordings always produce better results than noisy recordings that have been processed with noise reduction. Electrical artifacts can confuse AI processing algorithms and lead to unexpected frequency response changes or dynamic processing errors.
Common Ground Loop Fixes That Backfire
Noise gates seem like an obvious solution to electrical hum, but they create more problems than they solve. Gates can't distinguish between low-level musical content and electrical noise, so they either let the noise through or cut off quiet musical passages. The attack and release times that work for eliminating noise usually sound unnatural on musical content.
EQ cuts at 60Hz and 120Hz can reduce ground loop hum, but they also remove musical content in those frequency ranges. Bass instruments, kick drums, and male vocals all contain important information around 60Hz. Cutting these frequencies to eliminate electrical noise makes your recordings sound thin and unnatural.
Ground loop isolator boxes sold for car audio don't work well for studio applications. These devices are designed for unbalanced, line-level signals and often introduce their own noise and frequency response problems. Professional isolation transformers cost more but actually solve the problem without degrading audio quality.
Using multiple power conditioners or surge protectors in series can actually increase ground loop problems by creating additional ground paths. If you need power conditioning, use one high-quality unit that can handle all your audio equipment, rather than daisy-chaining multiple smaller units.
Common Questions About Studio Ground Loop Noise
How do I know if my studio noise is from ground loops or something else?
Ground loops create steady 60Hz hum that doesn't change when you adjust input gain or move cables. Digital interference creates clicks, pops, or high-frequency whines. RF interference from cell phones or wireless devices creates buzzing that varies with proximity to the equipment.
Can I fix ground loop noise with plugins or noise reduction software?
Software noise reduction can reduce electrical hum but always affects audio quality in the process. It's much better to eliminate the noise at the source through proper grounding and cable management. Clean recordings always sound better than processed recordings.
Why do I get more electrical noise when I turn up my interface preamps?
Preamp gain amplifies everything equally, including electrical noise. If you're hearing more noise at higher gain settings, the interference is entering your signal chain before the preamp. Check your cable connections, power sources, and microphone positioning.
Will balanced cables solve all my ground loop problems?
Balanced cables reject ground loop noise much better than unbalanced cables, but they won't fix all electrical problems. Power-related ground loops can still affect balanced connections, especially if equipment is plugged into different electrical circuits.
Is it safe to use ground lift switches on multiple pieces of equipment?
Only lift ground on one device in your signal chain. Lifting ground on multiple devices can create safety hazards and may violate electrical codes. If one ground lift doesn't solve the problem, look for the actual source of the ground loop instead.
Should I be concerned about electrical noise in my home studio setup?
Electrical noise in recordings is always worth fixing because it compounds through every stage of production. Slight hum in your source recordings becomes obvious after compression and mastering. Address electrical problems before they become audible in your final mixes.
Hear what these choices do to your own song.
Upload stems or a finished track, choose a reference direction, and compare a private Moozix mix before you export anything.