Your bass sounds perfect in your home studio, but when you test the track in your car or on a friend's system, it either vanishes completely or turns into an uncontrolled rumble. This low end translation problem happens because different playback systems reveal different parts of your bass frequency spectrum, and what works in one acoustic environment often fails in another.
Quick takeaways
- Check your bass content in both 40-80 Hz (sub) and 80-250 Hz (fundamental) ranges separately
- Test mono compatibility to catch phase cancellation that kills bass on certain speakers
- Use high-pass filtering below 30 Hz to clean up inaudible rumble that wastes headroom
- Reference your low end against commercial tracks on the same speakers you're mixing on
- Verify translation by checking your mix on at least three different playback systems
- Balance fundamental bass frequencies (80-120 Hz) for small speakers, sub frequencies (40-80 Hz) for larger systems
Why Bass Translation Fails on Different Speaker Systems
Bass translation breaks down because most home studios and consumer playback systems handle low frequencies differently. Small speakers like laptop built-ins and earbuds can't reproduce anything below 80 Hz, so they only play the fundamental and harmonic content of your bass. Meanwhile, systems with subwoofers or large drivers reveal the sub-bass region that might be overloaded or missing entirely in your mix.
The frequency response of your room also shapes what you hear while mixing. Untreated corners create bass buildup around 60-120 Hz, making you think there's more low end than actually exists in your mix. When you compensate by reducing bass during mixing, the result sounds thin everywhere else. Conversely, if your room has poor bass response, you might overpump the low end to compensate, creating a muddy mess on systems that can actually reproduce those frequencies.
Phase relationships between your kick drum and bass also affect translation. If these elements are fighting in the same frequency range with opposite polarities, they'll cancel each other out on some speakers while creating an overwhelming boom on others. This phase cancellation is particularly noticeable when your mix collapses to mono, which happens on many Bluetooth speakers and club sound systems.
The Two-Zone Bass Check That Reveals Translation Issues
Split your bass analysis into two distinct frequency zones to identify where translation problems occur. Use your DAW's built-in EQ or a spectrum analyzer to solo the sub-bass region (20-80 Hz) and the fundamental bass region (80-250 Hz) separately.
Start with the sub-bass zone. Solo everything below 80 Hz using a steep low-pass filter. You should hear mostly the lowest octave of your kick drum and bass instrument, plus any sub-harmonic content. This region provides weight and power but disappears entirely on small speakers. If this zone is too loud, your mix will sound boomy on large systems. If it's too quiet or missing, your track will lack impact on club systems and good headphones.
Next, solo the fundamental bass region between 80-250 Hz. This zone contains the perceived pitch of most bass instruments and the fundamental frequency of your kick drum. Small speakers rely entirely on this range to convey bass content. If this region is muddy or unbalanced, your bass will sound unclear on every system. If it's too thin, your track will lack body even on full-range playback systems.
Compare the relative levels between these two zones. On most commercial tracks, the fundamental region sits slightly higher than the sub-bass region to ensure clarity while maintaining power. Use a reference track in the same genre to check this balance on your monitoring system.
Mono Compatibility Testing for Bass Translation
Check your bass in mono to catch phase issues that kill low end translation. Most streaming services, radio stations, and many consumer audio devices sum stereo content to mono at various points in the signal chain. If your bass elements cancel each other in mono, they'll disappear or sound weak on these systems.
Insert a mono plugin or use your DAW's mono button on your master bus. Listen specifically to how your kick drum and bass interact. If the low end suddenly sounds thin or hollow, you have phase cancellation between these elements. This often happens when you've used stereo bass processing, doubled bass parts with slight timing differences, or mixed bass elements that were recorded with multiple microphones without checking phase alignment.
Fix mono bass problems by adjusting the phase relationship between your kick and bass. Try inverting the polarity on one element using your DAW's phase invert button. If that improves the mono compatibility, keep the change. You can also use a slight EQ adjustment to separate the fundamental frequencies of kick and bass, giving each element its own space in the frequency spectrum.
For stereo bass effects like chorus or wide stereo imaging, use a utility plugin to keep everything below 120 Hz in mono while allowing higher frequencies to remain in stereo. This preserves the stereo width effect while ensuring bass translation on mono-compatible systems.
Room Acoustic Reality Check
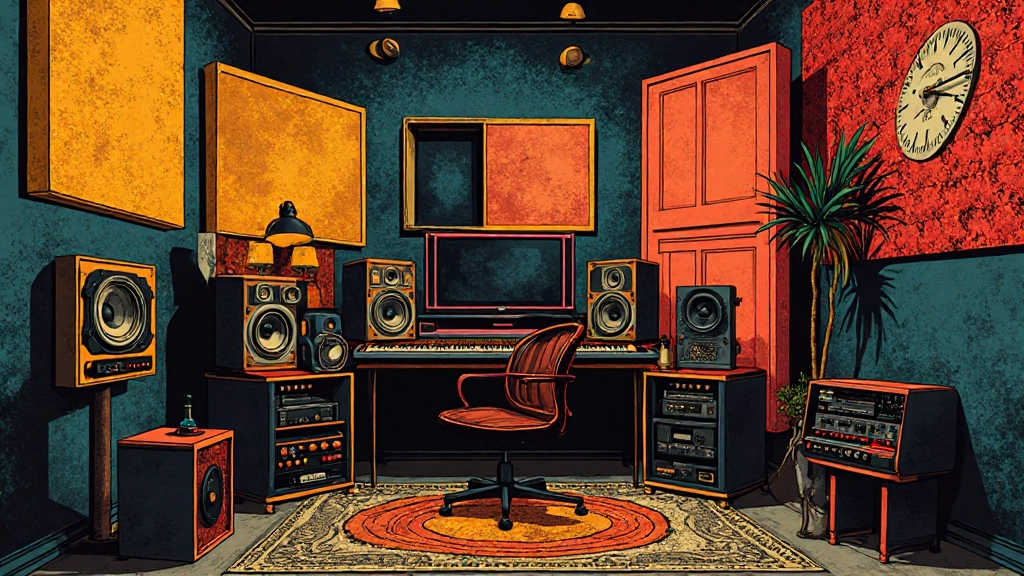
Your mixing room's acoustic response directly affects how you perceive bass balance, leading to translation problems when your mix hits other systems. Small rooms typically have uneven bass response with nulls and peaks at different frequencies, making it difficult to judge the actual bass content in your mix.
Identify your room's bass problems by playing a reference track you know sounds good on other systems. Note where the bass sounds too loud, too quiet, or unclear compared to your memory of that track on other speakers. These differences reveal your room's coloration, which you need to mentally compensate for while mixing.
If your room makes bass sound louder than it actually is (common in untreated rooms with corner buildup), you'll naturally mix with less bass than needed. Your tracks will sound thin on systems with better bass response. If your room makes bass sound weaker (common in overly treated rooms or rooms with bass traps that are too aggressive), you'll overpump the low end and create boomy mixes.
Use acoustic treatment targeted at your room's specific problems. Place bass traps in corners to reduce low-frequency buildup, but avoid over-treating if your room already lacks bass response. The goal is neutral monitoring that lets you hear your mix without strong room coloration.
| Room Problem | What You Hear | Mix Result | Quick Fix |
|---|---|---|---|
| Corner bass buildup | Boomy, unclear low end | Thin bass on other systems | Add corner bass traps |
| Standing wave nulls | Missing bass at mix position | Overcooked low end | Adjust listening position |
| Over-treatment | Dead, lifeless bass | Excessive bass compensation | Remove some absorption |
| Reflective surfaces | Unclear bass definition | Muddy low-mid content | Add targeted absorption |
High-Pass Filter Strategy for Clean Low End
Remove inaudible low-frequency content that wastes headroom and creates translation problems. Most mix elements contain energy below their useful frequency range - rumble from air conditioning, handling noise, and electronic artifacts that you can't consciously hear but that affects your mix's overall clarity and punch.
Apply gentle high-pass filtering to individual tracks rather than aggressive filtering on the mix bus. Start with a 12 dB per octave slope around 30-40 Hz for most instruments except kick drum and bass. For vocals, acoustic guitars, and other mid-range focused instruments, you can often high-pass at 80-100 Hz without losing any musical content.
Be conservative with bass and kick drum high-passing. These elements need their fundamental frequencies intact, but they often benefit from removing content below 25-30 Hz that only creates subwoofer rumble without musical value. Use a gentle 6 dB per octave slope and listen carefully to ensure you're not removing the weight and impact of these elements.
Layer your high-pass filtering across multiple mix stages. Individual tracks get gentle filtering to remove obvious rumble, bus processing can tighten up frequency ranges for instrument groups, and your master bus might need minimal high-pass filtering around 20-25 Hz to remove any remaining subsonic content before mastering.
Reference Track Frequency Matching
Compare your bass content directly against commercial references to calibrate your low end for translation. Load a reference track that sounds good on multiple systems into your DAW and level-match it against your mix to ensure fair comparison.
Use a spectrum analyzer to compare the frequency balance between your mix and the reference. Pay attention to the relative levels in the sub-bass (20-60 Hz), low bass (60-120 Hz), and low-mid (120-300 Hz) regions. Your mix doesn't need to match exactly, but it should be in the same ballpark for similar genre material.
A/B your bass elements against the reference track's bass content. Solo your bass and kick, then solo the reference track's low end using the same filtering. Listen for differences in tone, sustain, attack, and frequency balance. If your bass sounds much darker, brighter, longer, or shorter than the reference, adjust your processing to get closer to that proven sound.
Check the reference track's mono compatibility as well. If the commercial track maintains its bass power in mono while yours doesn't, you know you have phase issues to address. This reference check helps you understand what level of bass translation to expect for your genre and style.
Multi-System Translation Testing
Test your mix on at least three different playback systems to verify bass translation before considering your mix finished. Each system will reveal different aspects of your low end balance and help you identify problems that need addressing.
Start with your studio monitors as your primary reference, then move to consumer playback systems that represent your audience's likely listening environment. Check your mix on decent headphones, laptop speakers or a portable Bluetooth speaker, and if possible, a car stereo or home system with a subwoofer.
Listen for consistent bass balance across these systems. Your bass should remain present and clear on small speakers (even if not as deep), while maintaining control and definition on systems with good low-frequency response. If your bass disappears on small speakers, you need more fundamental content in the 80-120 Hz range. If it becomes boomy or unclear on large systems, you need to clean up the 60-200 Hz range or address phase issues.
Take notes on each system and look for patterns. If two out of three systems show the same problem, that's likely a real issue in your mix rather than a quirk of one particular speaker. Make adjustments based on these patterns rather than trying to perfect your mix for any single playback system.
Translation test checklist
- Bass remains audible on laptop/phone speakers
- Low end stays controlled on headphones
- Kick and bass don't fight for space
- Mix sounds balanced in mono
- No excessive rumble on systems with subs
Frequency-Specific EQ Moves for Better Translation
Make targeted EQ adjustments that improve bass translation without destroying your low end character. Instead of broad bass cuts or boosts, use narrow bands to address specific frequency problems that cause translation issues.
Address the 60-80 Hz region carefully, as this zone often causes the biggest translation problems. Excessive energy here creates boom on systems with subwoofers while making small speakers sound muddy and unclear. Use a narrow Q to cut 2-3 dB if this region sounds overpowering compared to your reference tracks.
Boost the 80-120 Hz range slightly if your bass disappears on small speakers. This fundamental region carries the perceived pitch of your bass elements and translates well across different playback systems. A gentle 1-2 dB boost with a moderate Q can help your bass maintain presence without creating muddiness.
Clean up the 200-400 Hz range if your mix sounds unclear or muddy on any system. This low-mid region often accumulates buildup from multiple instruments and can mask your bass definition. Cut 2-4 dB with a moderate Q to create more separation between your bass elements and the rest of your mix.
Use dynamic EQ or multiband compression for problem frequencies that only appear at certain times during your song. If your bass sounds great during verses but becomes overwhelming during the chorus, a multiband compressor can tame the problematic frequencies only when they become excessive.
Phase Alignment Tools for Kick and Bass
Align the phase relationship between your kick drum and bass to ensure they work together instead of fighting each other across different playback systems. Even small timing differences can create phase cancellation that affects translation.
Use your DAW's audio alignment tools or a dedicated phase alignment plugin to check the relationship between kick and bass. Look for the moments where these elements hit simultaneously - typically on beat 1 and other strong downbeats. If the waveforms are moving in opposite directions at these impact points, you have phase cancellation that will hurt translation.
Adjust timing before using polarity inversion. Sometimes a small timing adjustment of 5-10 milliseconds can align kick and bass transients for better phase coherence. Use your DAW's nudge function or slip editing to move one element slightly earlier or later until the transients align better.
Try polarity inversion on either the kick or bass if timing adjustments don't solve the problem. Flip the phase of one element and check if this improves the punch and clarity of your low end, especially in mono. Keep the change if it improves translation across multiple playback systems.
Consider frequency separation if phase alignment doesn't work perfectly. Use EQ to give kick and bass their own frequency territories - perhaps emphasizing kick around 60-80 Hz while focusing bass energy around 40-50 Hz or 100-120 Hz. This separation reduces direct frequency competition even if perfect phase alignment isn't possible.
Pre-Upload Bass Translation Check
Complete a final bass translation verification before uploading your track to streaming platforms or sending it for mastering. This final check catches translation problems that could affect how your music sounds to listeners on different devices.
Export your mix and import it back into a fresh DAW session for objective analysis. Use a spectrum analyzer to verify your bass frequency balance against your reference tracks. Check that you have appropriate energy in both the sub-bass and fundamental bass regions without excessive peaks or nulls.
Test the exported file on the same multiple playback systems you used during mixing. Listen specifically for any changes in bass translation compared to your mixing session. Sometimes the export process or different playback software reveals issues that weren't apparent during mixing.
Verify your mix's bass translation using Mix Feedback to get objective analysis of your low end balance. This can catch frequency imbalances or phase issues that affect translation before your track reaches listeners. The analysis helps identify specific frequency ranges that need adjustment for better cross-platform compatibility.
Check your final mix's mono compatibility one more time. Switch your playback system to mono and ensure your bass content remains strong and clear. If you notice significant bass loss in mono, return to your mix to address phase issues before finalizing your track.
DAW-Specific Bass Translation Tools
Use your DAW's built-in tools to check and improve bass translation without requiring additional plugins. Most modern DAWs include spectrum analyzers, phase correlation meters, and utility plugins that help identify and fix translation problems.
In Pro Tools, use the built-in EQ III's analyzer section to visualize your bass frequency content. The real-time spectrum display helps you see exactly where your low end sits compared to reference tracks. Use the Trim plugin to adjust levels and the AIR Stereo Width plugin to check mono compatibility.
Logic Pro users can utilize the built-in Multipressor for multiband bass control and the Correlation Meter plugin to check phase relationships. The Linear Phase EQ works well for bass adjustments that won't introduce phase problems, and the Gain plugin provides simple polarity inversion when needed.
Ableton Live's Spectrum device provides detailed frequency analysis, while the Utility device handles mono summing, polarity inversion, and stereo width adjustment. The Multiband Dynamics device helps control specific bass frequency ranges that cause translation problems.
Reaper users can take advantage of the built-in ReaEQ with spectrum analysis and the JS plugins for phase correlation and stereo imaging. The ReaXcomp multiband compressor provides precise control over problem bass frequencies.
- Load a spectrum analyzer on your master bus
- Set up a reference track for A/B comparison
- Use mono summing to check phase compatibility
- Apply gentle multiband compression to problem frequencies
- Verify changes on multiple playback systems
Common questions about bass translation
Why does my bass sound great on headphones but disappear on phone speakers?
Phone speakers can't reproduce frequencies below 200-300 Hz, so they only play the upper harmonics of your bass. Add more content in the 80-120 Hz fundamental range and use saturation or harmonic enhancement to create audible harmonics in the midrange that represent your bass on small speakers.
Should I mix bass in mono to ensure better translation?
Keep bass content below 120 Hz in mono to ensure translation, but you can use stereo effects on higher bass frequencies. Most low end translation problems come from phase cancellation in the sub and fundamental bass ranges, which are better handled in mono anyway.
How do I know if my room is affecting my bass translation decisions?
Compare reference tracks you know well against how they sound on other systems. If familiar tracks sound significantly different in your room compared to your car or headphones, your room is coloring your bass perception and affecting your mixing decisions.
What's the difference between bass that translates and bass that's just loud?
Translating bass maintains its musical character and impact across different playback systems, while loud bass often becomes boomy on large speakers and muddy or missing on small ones. Focus on balance between sub-bass weight and fundamental clarity rather than just maximum level.
Can I fix bass translation problems in mastering instead of mixing?
Basic frequency balance can be adjusted in mastering, but phase problems between kick and bass need to be fixed during mixing when you have access to individual tracks. Address major translation issues during mixing and use mastering for final polish and loudness optimization.
How many different speaker systems should I test my bass translation on?
Test on at least three different systems: your studio monitors, consumer headphones, and small speakers like laptop or phone speakers. Add a car stereo or home system with subwoofer if possible. This range covers most of your listeners' playback scenarios.
Hear what these choices do to your own song.
Upload stems or a finished track, choose a reference direction, and compare a private Moozix mix before you export anything.