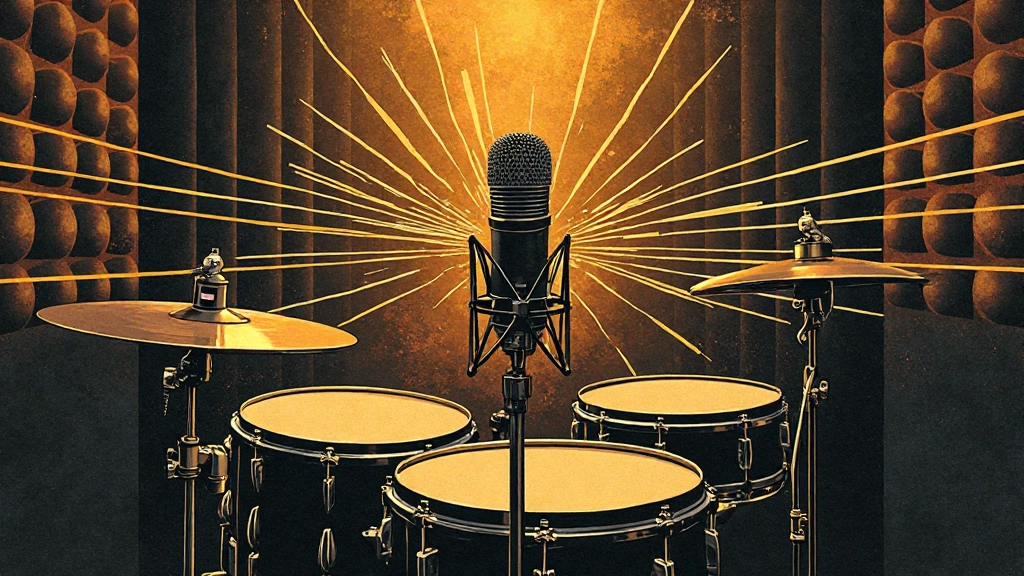
You set up three mics on your drum kit, hit record, and everything sounds great through your headphones during tracking. But when you play back the recording, something's wrong. The drums sound hollow, thin, and weirdly filtered—like they're coming through a comb filter or sitting in a metal tube. The individual mics sound fine when soloed, but together they create this strange, phasey mess that sucks the life out of your rhythm section.
This is classic multi-mic phase drift, and it happens when the same drum hit reaches different microphones at slightly different times. Those tiny timing differences create phase cancellation that can hollow out your sound in very specific frequency ranges, making your drums sound like they're being played underwater or through a cheap transistor radio.
Quick Takeaways
- Phase drift occurs when drum hits reach multiple mics with timing differences as small as 1-2 milliseconds
- The hollow sound comes from frequency cancellation, not recording quality problems
- You can spot phase issues by comparing the solo sound to the combined sound
- Time alignment tools in your DAW can fix most phase problems without re-recording
- Proper mic placement during recording prevents most phase drift before it happens
- Reference checks on different speakers will reveal if your fix actually works
What Phase Drift Actually Sounds Like in Your Mix
Phase drift doesn't sound like obvious technical problems. It's not distortion, clipping, or background noise. Instead, it creates a subtle but devastating filtering effect that makes your drums sound distant and weak, even when the levels are properly balanced.
The telltale signs show up when you compare soloed tracks to the full drum mix. Your kick drum sounds punchy and full when you solo it, but thin and clicky when all drum mics are active. The snare loses its body and starts sounding more like a rim shot. Toms can completely disappear in certain frequency ranges, creating weird gaps in their natural resonance.
This happens because when the same drum hit reaches multiple microphones with different travel distances, those timing differences create phase relationships that either reinforce or cancel specific frequencies. A kick drum hit might reach your close mic in 1 millisecond but take 4 milliseconds to reach your overhead mics. That 3-millisecond difference creates predictable cancellation around specific frequencies—usually in the low-midrange where drums get their body and warmth.
The Reference Comparison Test
Before you start moving audio around, you need to confirm that phase drift is actually your problem. This reference test will show you exactly what frequencies are being affected and how severe the issue is.
Start by setting up a simple A/B comparison in your DAW. Create two buses: one with all your drum mics active, and one with just your close mics (kick, snare, and any tom close-mics). Make sure both buses are level-matched so you're hearing the tonal difference, not just a volume difference.
Play a section with consistent drum hits and switch between the two buses. If you have phase drift, the full-mic bus will sound noticeably thinner, more hollow, or filtered compared to the close-mic bus. The difference should be obvious, not subtle. You might hear the kick lose its low-end punch, the snare lose its body around 200-400 Hz, or the entire kit sound like it's sitting in a different room.
| Frequency Range | What You'll Hear | Which Drums Affected |
|---|---|---|
| 60-120 Hz | Kick loses weight and power | Kick drum, floor tom |
| 200-400 Hz | Snare sounds thin and papery | Snare, rack toms |
| 400-800 Hz | Drums sound boxy or hollow | All drums, especially toms |
| 1-3 kHz | Attack sounds muffled | Snare crack, kick beater |
Record yourself switching between the buses and listen back on different speakers. If the problem is consistent across headphones, studio monitors, and your car speakers, you've confirmed phase drift as the culprit.
Solo Tests to Isolate the Problem Mics
Once you've confirmed phase issues, you need to figure out which microphone combinations are causing the worst problems. This step-by-step solo process will help you identify the specific mic pairs that need alignment.
Start with your close mics—kick and snare—and make sure they sound good together. These are usually your phase reference point because they're closest to the source and have the most direct sound. If even your close mics have phase issues, you'll need to fix those first before moving to room mics.
Next, add your overhead mics one at a time. Solo just the kick close mic and left overhead. Does the kick suddenly sound different? Add the snare close mic to that pair. Does the snare change character? Continue this process, adding one mic at a time and listening for changes in tone, particularly in the low-midrange where phase cancellation is most obvious.
Pay special attention to these common problem combinations: kick close mic plus overhead mics, snare close mic plus overhead mics, and any close mic plus room mics. These pairs have the biggest timing differences because of the distance between microphones.
Make notes about which combinations sound problematic. You might discover that your left overhead works fine with the close mics, but your right overhead creates phase issues. Or your room mics sound great with overheads but terrible when combined with close mics. These notes will guide your alignment work.
Time Alignment Using Your DAW's Stock Tools
Most DAWs include basic time alignment tools that can fix phase drift without requiring expensive plugins. The key is making small, precise adjustments—usually just a few milliseconds—rather than dramatic moves.
In Pro Tools, you can use the Time Adjuster plugin or simply nudge tracks by samples using the plus and minus keys. Logic Pro offers the Sample Delay plugin, while Ableton Live has the Simple Delay set to very short times. FL Studio users can adjust track delays in the mixer, and Reaper includes automatic delay compensation tools.
Start with your most problematic mic pair from the solo test. If your overhead mics are causing the kick drum to sound thin, focus on aligning the overhead timing with your kick close mic. Solo both mics and play a section with clear kick hits.
Add small amounts of delay to the closer microphone—usually the close mic—in 0.1 to 0.5 millisecond increments. You're trying to time-align the arrival of the drum hit at both microphones. As you adjust the delay, you should hear the kick drum start to sound fuller and more present.
- Solo the problematic mic pair
- Add 0.1 ms delay to the closer microphone
- Listen for improved low-midrange fullness
- Continue in small increments until the sound improves
- Test with all mics active to confirm the fix works in context
- Repeat for other problematic mic pairs
The correct alignment usually falls between 0.5 and 5 milliseconds for typical drum room setups. If you need more than 10 milliseconds of delay, you might have a more fundamental recording issue or need to check your mic polarity settings.
When Time Alignment Doesn't Fix the Hollow Sound
Sometimes perfect time alignment still leaves you with phase issues, especially in smaller rooms where early reflections create additional timing complications. When delay adjustment alone doesn't solve the problem, you have several alternative approaches that can restore your drum sound.
The first alternative is selective frequency alignment rather than full-spectrum time alignment. Use your DAW's multiband delay or try aligning only specific frequency ranges. You might delay the low frequencies of your overhead mics by 2 milliseconds while leaving the high frequencies untouched. This approach works well when phase cancellation is primarily affecting one frequency range.
Another approach is polarity inversion on individual microphones. Sometimes flipping the polarity of one mic in a problematic pair can solve phase issues that time alignment can't fix. This is particularly useful for overhead mics that are picking up drums from different angles.
If your room mics are causing the problems, consider using them only during specific sections rather than throughout the entire song. Room mics often work better on choruses where you want a bigger, more ambient sound, but can be muted during verses where you need tight, present drums.
The nuclear option is to simply eliminate the problematic microphones from your mix. If your overhead right mic is causing more problems than it's solving, just use the overhead left and move on. Sometimes a simpler mic setup sounds better than a complex setup with phase issues.
Reference Matching Against Commercial Drums
After fixing your phase alignment, you need to verify that your drums actually sound competitive compared to commercial releases. This reference check will reveal whether your phase fixes have restored the impact and presence your drums need.
Choose 2-3 commercial songs in your genre with drum sounds you admire. Load them into your DAW and level-match them to your mix so you're comparing tonal balance, not just loudness. Focus on songs with similar drum mic setups if possible—a live-sounding rock song for your live drums, or a close-miked pop song for your close-miked setup.
A/B between your drums and the reference drums, focusing on the frequency ranges where you had phase issues. Your kick drum should have similar weight and presence as the reference kick. Your snare should have comparable body in the midrange. The overall drum kit should feel like it's sitting in the same sonic space as your reference, not pushed back or filtered.
If your drums still sound thin or hollow compared to references, you might need additional EQ work beyond phase alignment. But if the phase fixes worked correctly, your drums should sound much closer to commercial standards in terms of impact and presence.
Test this comparison on multiple playback systems. What sounds good on your studio monitors should also translate reasonably well to headphones, car speakers, and laptop speakers. Proper phase alignment improves translation because you're no longer fighting frequency cancellation that changes depending on the listening environment.
Mix Integration After Phase Alignment
Once your drums sound solid in isolation, you need to check how they integrate with the rest of your mix. Phase-corrected drums often need different EQ and compression settings because they now have frequency content that was previously cancelled out.
Your kick drum might suddenly have more low-end presence, which could conflict with your bass guitar. Your snare might have more midrange body, which could compete with vocals or guitars. These are good problems to have because you're now working with the full frequency content of your drums rather than a phase-cancelled version.
Re-evaluate your drum bus compression and EQ after phase alignment. You might find you need less low-end boost on the kick because the phase alignment restored its natural weight. You might need less aggressive snare compression because the snare now has more consistent body and impact.
Check your mix balance at lower volumes after making phase corrections. Properly phase-aligned drums often translate better at quiet listening levels because you're not relying on volume to overcome phase cancellation. Your drum mix should remain punchy and present even when played quietly.
How to Prep Phase-Aligned Drums for Mix Feedback
Before uploading your mix for feedback or sending stems for further processing, you want to make sure your phase corrections translate properly outside your studio setup. This preparation step ensures that your phase fixes work on other monitoring systems and in different acoustic environments.
Bounce your phase-corrected drum tracks as individual stems and also as a mixed drum bus. This gives you flexibility for future mix revisions and ensures that your phase alignment is "printed" into the audio files rather than dependent on DAW plugin settings.
When exporting stems for tools like AI stem mixing, include notes about which tracks have been time-adjusted. This information helps maintain your phase relationships if the tracks need to be imported into a different DAW or processing system.
Test your bounce by importing it back into a fresh DAW session. The drums should sound identical to your corrected version, confirming that all delay and phase adjustments have been properly rendered into the audio files.
- Bounce individual drum stems with phase corrections applied
- Export a mixed drum bus for context reference
- Include processing notes for future mix sessions
- Test bounces in a fresh DAW session
- Verify phase relationships are maintained in exports
Prevention Tips for Future Multi-Mic Recordings
While you can fix phase drift in post-production, preventing it during recording saves time and often yields better results. These recording techniques will minimize phase issues before they reach your DAW.
The 3:1 rule is your first line of defense: each microphone should be at least three times farther from other sound sources than it is from its intended source. If your snare close mic is 6 inches from the snare drum, it should be at least 18 inches from the kick drum. This doesn't eliminate phase relationships, but it ensures that each mic is primarily capturing its intended source.
Consider using fewer microphones rather than more. A well-placed stereo overhead pair often sounds better than four mediocre microphones with phase issues. You can always add room ambiance later with reverb, but you can't easily remove phase cancellation from a complex multi-mic recording.
When possible, use microphones with consistent polar patterns and similar frequency responses. Mixing dynamic and condenser mics, or using mics with very different characteristics, can create phase relationships that are harder to correct in post-production.
Document your microphone positions and distances during recording. Having measurements makes it easier to calculate expected phase relationships and plan your alignment strategy during mixing.
Common Questions About Multi-Mic Phase Alignment
How much delay should I add to fix phase drift in drum recordings?
Most drum phase issues require between 0.5 and 5 milliseconds of delay adjustment. Start with 0.1 ms increments and listen for improved fullness in the low-midrange. If you need more than 10 ms, check for polarity issues or consider mic placement problems.
Can I fix phase problems with EQ instead of time alignment?
EQ can't fix true phase cancellation because the timing relationship between microphones remains unchanged. You might be able to work around some frequency holes with EQ, but time alignment addresses the root cause and usually sounds more natural.
Why do my drums sound worse after trying to fix phase alignment?
Over-correction is common when learning phase alignment. Try smaller delay increments, or check if you're delaying the wrong microphone. Sometimes the "problem" mic is actually fine, and a different mic in the chain needs adjustment.
Should I fix phase issues before or after applying compression to drums?
Fix phase alignment before applying heavy compression or limiting. Compressors react to the actual frequency content, so phase-cancelled drums will compress differently than properly aligned drums. Fix timing first, then adjust your compression settings.
Do phase problems affect how my drums translate to different speakers?
Yes, phase cancellation often translates poorly because different speakers emphasize different frequency ranges. Drums with phase issues might sound acceptable on some systems but terrible on others. Proper alignment improves consistency across playback systems.
Can I use automatic phase alignment plugins instead of manual adjustment?
Automatic plugins can be helpful starting points, but manual adjustment often yields better musical results. Plugins optimize for technical alignment, but you might prefer slight phase relationships that add character to your drum sound.
Hear what these choices do to your own song.
Upload stems or a finished track, choose a reference direction, and compare a private Moozix mix before you export anything.