Harsh frequencies that sound manageable in your mix can become unbearable after mastering compression and limiting amplifies them. The 2-7kHz range, where your ears are most sensitive, demands attention before you bounce stems or send tracks for mastering. This frequency zone carries vocal presence, snare crack, and guitar bite, but it's also where listener fatigue begins.
Quick Takeaways
- Check for harshness at 3-5kHz before mastering to prevent amplification of problems
- Use narrow Q cuts rather than broad shelving for surgical harsh frequency removal
- Test your mix on bright speakers or headphones to reveal hidden bite
- Dynamic EQ handles intermittent harshness better than static cuts
- Reference professional tracks at matched levels to calibrate your ear
- Solo individual elements to isolate which sources contribute to the harsh buildup
How Do You Identify Harsh Frequencies Before They Multiply?
Harsh frequencies hide in busy mixes until mastering compression brings them forward. Start by listening at moderate volume through bright headphones or small speakers that emphasize the 2-7kHz range. These playback systems reveal harshness that studio monitors might mask with their flatter response.
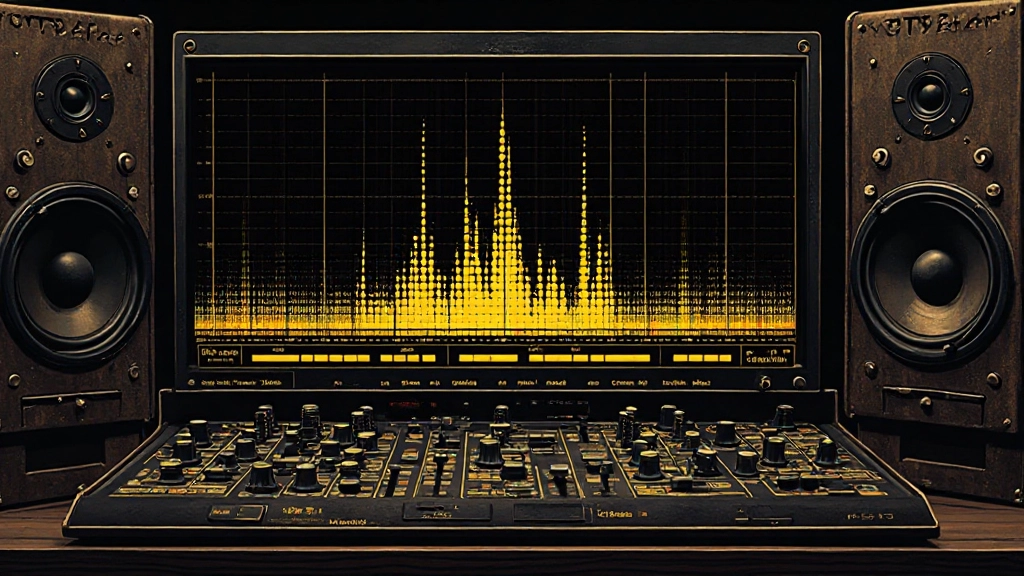
Solo your vocal, snare, and any distorted guitars individually while watching a spectrum analyzer. Look for peaks between 2.5kHz and 6kHz that spike above the surrounding frequency content. A harsh vocal typically shows energy buildup around 3-4kHz, while snares often create bite around 5-6kHz. Electric guitars can push harshness anywhere from 2kHz up to 7kHz depending on the amp simulation and mic placement.
The key listening test involves playing your mix against a professional reference track at matched levels. If your mix sounds brighter or more fatiguing than the reference, you likely have harsh frequency buildup that needs attention before mastering.
Why Mastering Amplifies Mix Harshness Problems
Mastering compression and limiting don't just make your mix louder; they emphasize existing frequency imbalances. When a limiter reduces peaks across your entire mix, it often pushes up the mid-range content where harshness lives. The result makes moderate harshness in your mix become painful after mastering.
Bus compression during mastering also affects how frequencies interact. It tends to bring forward consistent mid-range content while reducing dynamic peaks. If your vocals, snare, and guitars all contribute energy in the same harsh frequency range, bus compression combines these sources into a more prominent problem.
Additionally, the loudness standards for streaming platforms require significant limiting to reach competitive levels. This limiting process naturally emphasizes the 2-7kHz range where your ears are most sensitive, turning minor harshness into major listener fatigue.
Which Sources Usually Create the Harsh Frequency Buildup?
Vocals recorded too close to a condenser microphone often capture excessive presence around 3-5kHz. This proximity effect combined with the microphone's natural brightness creates a harsh edge that cuts through the mix but fatigues listeners quickly. Budget audio interfaces can add digital harshness in this same range when their converters clip subtly.
Snare drums, especially samples with aggressive processing, frequently spike around 4-6kHz. Layering multiple snare samples without checking their combined frequency response often creates harsh peaks that sound punchy in isolation but painful in the full mix. Overcompressed snare tracks also push this harsh content forward.
Electric guitars present another common source, particularly when using amp simulators with bright settings or when double-tracking creates phase interactions in the midrange. Distorted guitars naturally generate harmonics throughout the frequency spectrum, and poor plugin settings can emphasize the harsh zones rather than the musical upper midrange.
| Source | Typical Harsh Range | Common Cause | Quick Check |
|---|---|---|---|
| Lead Vocal | 3-5kHz | Close mic, bright preamp | Solo and sweep with narrow Q boost |
| Snare Drum | 4-6kHz | Over-compressed, harsh samples | Check against kick hits for balance |
| Electric Guitar | 2-7kHz | Bright amp sim, phase issues | Compare left and right channels |
| Acoustic Guitar | 4-8kHz | Pick attack, string buzz | Listen for metallic ring |
| Hi-hat/Cymbals | 6-10kHz | Over-bright samples, room mics | Solo drum bus for balance |
Dynamic EQ vs. Static Cuts for Harsh Frequency Control
Static EQ cuts remove harsh frequencies constantly, but they can dull your mix during quieter sections where the harshness isn't problematic. Dynamic EQ only reduces harsh frequencies when they exceed a set threshold, preserving brightness during verses while controlling harshness during choruses.
Set up dynamic EQ by identifying the exact harsh frequency with a narrow Q boost, then switching to cut mode with a threshold that catches the harshness without affecting normal levels. A moderate attack time around 10-30ms prevents the EQ from catching every transient, while a slower release around 100-300ms avoids pumping artifacts.
For vocals that sound harsh only during loud phrases, dynamic EQ around 4kHz with a 2-3dB cut and threshold set just above the normal singing level works effectively. This approach maintains vocal clarity during quieter sections while controlling harshness when the performance gets more intense.
The Wrong Way to Fix Harshness That Makes Everything Worse
Broad high-frequency shelving cuts above 3kHz might reduce harshness, but they also remove air, presence, and clarity from your entire mix. This approach creates a dull, muffled sound that loses translation on small speakers and earbuds where presence matters most.
Adding warm saturation or tape emulation to mask harshness often backfires by introducing low-order harmonics that muddy the midrange without actually removing the harsh frequencies. The original harshness remains while new frequency problems appear in the 200-800Hz range.
Avoid These Common Harsh Frequency Fixes
- Using broad shelving cuts above 3kHz that dull the entire mix
- Adding excessive warmth plugins that muddy the low mids
- Cutting harshness on the mix bus instead of individual sources
- Using linear phase EQ for surgical cuts that cause pre-ringing
- Setting dynamic EQ thresholds too low and dulling quiet sections
Another common mistake involves using linear phase EQ for sharp notch cuts in the harsh frequency range. While linear phase EQ preserves timing relationships, it can introduce pre-ringing artifacts that create a different type of harshness, especially when making steep cuts above 2kHz.
Step-by-Step DAW Workflow for Harsh Frequency Detection
Start by loading a spectrum analyzer on your mix bus and playing the loudest section of your song, typically the final chorus. Look for frequency peaks between 2kHz and 7kHz that stand significantly above the surrounding content. Note the specific frequencies and approximate levels of these peaks.
In most DAWs, you can use the stock EQ with a narrow Q boost to sweep through the suspected harsh range. In Logic Pro, insert a Channel EQ and set a bell curve with Q around 8-10, then boost by 6-8dB while sweeping from 2kHz to 7kHz. When you hit a harsh frequency, you'll hear immediate discomfort or brightness.
For Pro Tools users, the stock EQ III allows precise frequency sweeping with visual feedback. Set up a high-mid band with narrow Q, boost significantly, and sweep while listening for harsh spots. Ableton Live's EQ Eight provides similar functionality with its frequency sweep feature and real-time visual response.
- Load spectrum analyzer on mix bus
- Play the loudest mix section and identify frequency peaks 2-7kHz
- Insert EQ on individual tracks starting with vocals and snare
- Use narrow Q boost to sweep and locate exact harsh frequencies
- Switch to cut mode with 2-4dB reduction at identified frequencies
- A/B test the cuts against the original to ensure musical balance
- Check your changes on multiple speaker systems for consistency
How to Test Your Harsh Frequency Fixes Across Playback Systems
After making EQ adjustments, test your mix on the brightest speakers or headphones available. Cheap computer speakers, bright headphones, and even smartphone speakers reveal whether you've successfully controlled harshness or overcorrected into dullness. Your mix should sound clear but not fatiguing on these revealing systems.
The car stereo test remains valuable because automotive audio systems often emphasize midrange frequencies where harshness lives. If your mix sounds harsh in the car after your EQ adjustments, you likely need more aggressive cuts or better source control. Conversely, if it sounds dull compared to professional tracks, you may have overcorrected.
Use the mono compatibility check to reveal phase-related harshness that might not be obvious in stereo. Sum your mix to mono and listen for any frequencies that suddenly sound more prominent or harsh. Phase interactions between double-tracked elements often create harsh buildups that become apparent only in mono playback.
Pre-Master Checklist for Harsh Frequency Prevention
Before bouncing your final mix or sending tracks for mastering, run through this systematic check to catch harsh frequency problems. This process prevents costly revisions and ensures your mastered track translates well across all playback systems.
- Solo each vocal track and sweep 2-5kHz with narrow Q boost to identify harsh spots
- Check snare drum for peaks around 4-6kHz that spike above musical content
- Compare your mix against reference tracks at matched levels on bright speakers
- Test mono compatibility to reveal phase-related harsh frequency buildup
- Listen on laptop speakers or earbuds to simulate consumer playback systems
- Verify that EQ cuts sound natural and don't create holes in the frequency spectrum
Document the specific frequencies and amounts of any cuts you make. This information helps if you need to make adjustments after receiving mastered versions, and it provides valuable reference for future mixes with similar instrumentation.
When Harsh Frequencies Help Your Mix Cut Through
Not all bright content qualifies as problematic harshness. Musical presence in the 4-6kHz range helps vocals cut through dense arrangements and gives instruments definition that translates well to small speakers. The goal isn't eliminating all bright content but controlling frequencies that cause fatigue without adding musical value.
Distinguish between harsh frequencies and musical brightness by listening for listener fatigue versus clarity. Musical brightness adds definition and helps elements sit forward in the mix without causing discomfort. Harshness creates immediate fatigue and sounds unpleasant even at moderate levels.
Some genres benefit from more aggressive midrange content than others. Metal and rock productions often maintain more energy in the 4-7kHz range to achieve the characteristic bite and aggression. The key involves controlling peaks while preserving the essential character that defines the genre.
How Mix Feedback Tools Reveal Hidden Harshness
Professional mix feedback services often catch harsh frequency problems that home studio environments mask. Fresh ears on professional monitoring systems immediately identify harsh buildups that you might miss after hours of mixing in the same room. This outside perspective proves especially valuable for harsh frequency detection because ear fatigue affects your ability to judge these critical ranges accurately.
AI-powered analysis tools can identify harsh frequency peaks objectively, without the bias that develops during long mixing sessions. These tools compare your frequency balance against professional references and highlight potential problem areas before you commit to mastering. While they don't replace critical listening, they provide useful data points for harsh frequency detection.
When preparing tracks for feedback or AI automix and mastering, export both the full mix and individual stems so the analysis can identify which sources contribute to harsh frequency buildup. This detailed breakdown helps focus your EQ adjustments on the actual problem sources rather than applying broad fixes that might affect musical elements unnecessarily.
Export Settings That Prevent Harsh Frequency Amplification
When bouncing your final mix for mastering, avoid export settings that might emphasize harsh frequencies. Some digital audio workstations apply subtle processing during bounce that can shift frequency balance, particularly in the upper midrange where harshness lives.
Export at your project's native sample rate rather than upsampling during bounce. Sample rate conversion can introduce subtle artifacts in the upper midrange, especially if your DAW uses lower-quality conversion algorithms during real-time export. If your project runs at 44.1kHz, export at 44.1kHz rather than converting to 48kHz or higher during the bounce process.
Choose 24-bit depth for mastering exports to preserve dynamic range and prevent any quantization distortion that might add harshness. Avoid applying any limiting or loudness processing during export, as these processors can emphasize harsh frequencies in unpredictable ways that complicate the mastering process.
Common Questions About Fixing Harsh Frequencies
Should I fix harsh frequencies on individual tracks or the mix bus?
Always fix harsh frequencies on individual source tracks first. This approach allows surgical control without affecting other elements. Mix bus processing should only address overall tonal balance, not fix problems that stem from specific sources like vocals or snare drums.
How much can I cut harsh frequencies without dulling my mix?
Most sources can handle 2-4dB of narrow Q cuts in harsh frequency ranges without losing musical character. Broader cuts or deeper reductions often dull the mix. Use your ears and reference tracks to judge whether cuts maintain clarity while controlling harshness.
Why does my mix sound harsh only after mastering compression?
Mastering compression emphasizes midrange content by reducing peaks and bringing up average levels. Harsh frequencies that seem manageable in your mix become prominent when compressed and limited to streaming loudness standards. Fix harshness before mastering to prevent this amplification.
Can room acoustics make me miss harsh frequencies in my mix?
Yes, rooms with poor high-frequency response can mask harshness during mixing. Test your mix on multiple playback systems including bright headphones, laptop speakers, and car stereos to reveal harsh frequencies your room might hide.
Is dynamic EQ always better than static EQ for harshness control?
Dynamic EQ works best for intermittent harshness that appears only during loud sections. If harsh frequencies remain constant throughout your mix, static EQ cuts provide simpler and more predictable results without the complexity of threshold and timing settings.
How do I know if I've overcorrected harsh frequency problems?
Overcorrection makes your mix sound dull compared to professional references at matched levels. If vocals lose presence, snares sound weak, or the overall mix lacks clarity on small speakers, you've likely cut too much midrange content while fixing harshness.
Hear what these choices do to your own song.
Upload stems or a finished track, choose a reference direction, and compare a private Moozix mix before you export anything.