You've layered a killer beat with thick 808s, punchy kicks, melodic synths, and vocal chops, but when you play it back, everything sounds like it's fighting for space. Individual elements that sounded crisp in isolation now blend into a muddy mess. This is frequency masking at work - when multiple sounds occupy the same frequency range and cancel each other out or create an unclear sonic pile-up.
Frequency masking happens when your mix elements compete for the same spectral real estate, causing some sounds to disappear entirely or creating a muddy buildup that lacks definition. Dense productions are especially vulnerable because they pack more musical information into the same frequency spectrum. The good news is that you can diagnose and fix these conflicts with targeted EQ moves, smarter arrangement choices, and strategic frequency placement.
Quick takeaways for clearing frequency conflicts
- Solo each element to hear its natural frequency range, then compare against the full mix
- Use subtractive EQ to carve space rather than boosting everything louder
- Assign each major element its own primary frequency zone
- Check your mix in mono to reveal hidden masking issues
- Consider arrangement changes before reaching for more processing
- Test your separation on different playback systems before finalizing
When every element sounds great alone but terrible together
Frequency masking reveals itself when you A/B between solo tracks and the full mix. That crisp snare that cut through beautifully on its own suddenly feels buried under the synth lead. The bass line that felt perfect in isolation now fights with the kick drum and creates a boomy, undefined low end. The vocal melody gets swallowed by pad chords in the same register.
This happens because our ears can only process a limited amount of information in each frequency band. When multiple elements occupy the 200-500 Hz range, for example, they don't just add together harmoniously - they compete for our attention and can actually cancel each other out through phase interactions. The louder or more prominent element masks the quieter ones, making them effectively disappear from the mix.
Dense electronic music, hip-hop beats, and heavily arranged pop tracks are particularly susceptible because they often layer multiple melodic and rhythmic elements across the full spectrum. A typical dense beat might include kick, snare, hi-hats, 808, bass synth, lead synth, pad, vocal sample, and effects - all competing for clarity in a crowded frequency landscape.
Reading the frequency collision map in your mix
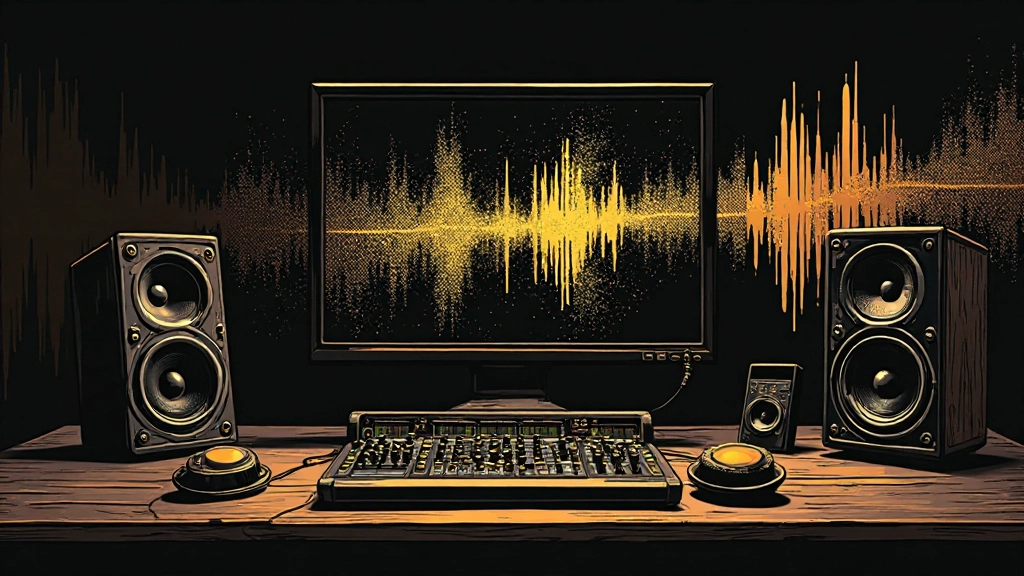
Before you start cutting frequencies, you need to identify where the collisions are actually happening. Load up a spectrum analyzer on your mix bus and play through different sections of your track. Look for frequency ranges where you see dense, overlapping energy that doesn't clearly separate into distinct peaks.
Common collision zones in dense beats include:
- 60-120 Hz: Kick drum fundamental vs. 808 sub-bass vs. bass synth low end
- 200-400 Hz: Kick body vs. snare body vs. vocal lower mids vs. bass harmonics
- 400-800 Hz: Vocal presence vs. lead synth mid-range vs. snare crack
- 1-3 kHz: Vocal clarity vs. hi-hat attack vs. synth upper harmonics
- 3-8 kHz: Vocal sibilance vs. hi-hat shimmer vs. synth brightness
Solo pairs of elements that you suspect are masking each other. Play the kick and 808 together, then add the bass synth. Listen for when the definition starts to blur. Do the same with your midrange elements - solo the vocal against the lead synth, then add the snare. These isolated comparisons will reveal which specific elements are fighting for the same frequency territory.
Use a reference track in a similar style to understand how professional mixes handle frequency separation. Notice how each element occupies its own primary frequency zone while still contributing harmonics across the spectrum.
The subtractive EQ approach that actually works
Most producers instinctively reach for EQ boosts to make masked elements cut through, but this often makes the problem worse by adding more energy to already crowded frequency ranges. Instead, use subtractive EQ to carve dedicated spaces for each element.
Start with your most important rhythmic foundation - typically the kick and bass elements. If your kick's fundamental sits around 60 Hz and your 808 occupies 40-50 Hz, create clean separation by cutting 40-50 Hz from the kick and cutting 60-80 Hz from the 808. This prevents the low end from becoming a boomy mess where neither element has clear definition.
For midrange conflicts, identify which element should dominate each frequency zone. If your vocal needs to sit prominently in the 1-3 kHz range for clarity, cut that same range from competing elements like lead synths or snare overtones. You're not removing these frequencies entirely - you're reducing them enough that the vocal can occupy the primary position while other elements contribute supporting harmonics.
Work systematically through your frequency spectrum. Cut 200-400 Hz buildup from elements that don't need body in that range. Remove unnecessary low mids from high-frequency elements like hi-hats. Trim upper mids from bass elements that only need to provide low-end foundation.
The key is making cuts narrow enough to preserve each element's character while creating enough separation to eliminate masking. A 2-3 dB cut with a moderate Q setting is often sufficient to restore clarity without making any single element sound thin or processed.
Arrangement decisions that prevent frequency wars
Sometimes the best solution to frequency masking isn't EQ - it's rearranging your musical elements so they don't compete in the first place. Consider which elements really need to play simultaneously and which could take turns occupying the same frequency space.
Vocal-heavy sections might benefit from simpler instrumental arrangements. Pull back the lead synth when the main vocal is singing, or filter it to stay out of the vocal's primary frequency range. Use automation to duck competing midrange elements during vocal phrases, then let them return during instrumental breaks.
Rhythmic separation can be equally effective. If your snare and kick both need punch in the 200 Hz range, make sure they're not hitting simultaneously. Adjust your snare timing or use ghost notes to create rhythmic space where each element can occupy its frequency zone without competition.
Consider octave displacement for melodic elements. If your bass line and lead melody are both fighting in the 400-800 Hz range, try moving one element up or down an octave. This preserves the harmonic content while eliminating direct frequency competition.
Layer management also helps prevent masking. Instead of stacking multiple synth layers in the same register, spread them across different octaves or use different timbres that naturally occupy complementary frequency ranges.
False fixes that make frequency masking worse
Boosting EQ to push masked elements forward usually backfires by adding more energy to already crowded frequency ranges. If your vocal sounds buried at 2 kHz, boosting 2 kHz on the vocal just creates more competition with other elements in that range. You end up in an EQ war where you keep boosting different elements to fight for the same space, resulting in a harsh, overprocessed sound.
Adding more compression to increase loudness often reduces dynamic separation between elements, making masking issues more apparent. Heavy compression can actually push competing elements closer together dynamically, reducing the natural space that helps differentiate them.
Parallel saturation or harmonic excitement might seem like a good way to help elements cut through, but adding more harmonic content across the spectrum can worsen masking by creating additional frequency overlap. Use these tools sparingly and only after establishing clean frequency separation.
Simply turning everything up louder never solves masking - it just makes the problem louder. Masking is about relative frequency balance, not absolute volume levels.
Stereo field placement for frequency relief
Strategic stereo positioning can reduce frequency masking by giving competing elements different spatial locations. When two elements occupy similar frequency ranges but sit in different stereo positions, they're less likely to mask each other completely.
Keep your foundational elements - kick, snare, bass, and lead vocal - centered for maximum impact and mono compatibility. Then use the stereo field to separate supporting elements that might compete frequency-wise. Pan background vocals, melodic doubles, or harmonic layers away from center to reduce their direct competition with lead elements.
Width processing can help differentiate elements without changing their frequency content. A wide pad that spreads across the stereo field will mask a centered vocal less than the same pad positioned dead center. Use stereo widening tools or mid-side processing to push supporting elements to the sides while keeping lead elements focused in the center.
Be cautious with low-frequency stereo placement - bass elements below 150 Hz should generally stay centered to maintain punch and mono compatibility. Focus your stereo separation strategies on midrange and high-frequency elements where stereo imaging is most effective.
Work it in your DAW: frequency carving workflow
Here's a systematic approach to identifying and fixing frequency masking using stock tools in any DAW:
- Load a spectrum analyzer on your mix bus and identify frequency buildups during the busiest sections of your track
- Solo your rhythm section elements (kick, snare, bass) and establish clean low-end separation first
- Add one midrange element at a time while monitoring for frequency conflicts on your analyzer
- Use parametric EQ with visual feedback to make targeted cuts in competing frequency ranges
- Check your separation in mono by toggling your DAW's mono button - masking issues become more obvious
- Reference against a commercial track in the same genre to verify your frequency balance
- Test on different playback systems to ensure your frequency separation translates
In Logic Pro, use the built-in MultiMeter plugin to visualize frequency content, then apply cuts with the Channel EQ. Ableton users can rely on the Spectrum device for analysis and EQ Eight for surgical cuts. Pro Tools offers the built-in EQ III and Frequency Analyzer for the same workflow.
Most DAWs include spectrum analysis either built into their stock EQ plugins or as separate metering tools. Use these visual guides to confirm what your ears are hearing about frequency competition.
When to fix masking in mixing vs. mastering
Frequency masking is primarily a mixing issue that should be addressed before mastering. Mastering can enhance the separation you've created, but it can't fix fundamental frequency conflicts between individual mix elements.
Handle obvious frequency collisions during the mixing stage when you still have access to individual tracks. Use subtractive EQ, arrangement changes, and stereo positioning to create clear frequency lanes for each element. This gives your mastering engineer (or your mastering chain) a balanced mix to work with.
Mastering can help enhance frequency separation through gentle multiband processing or subtle EQ moves that emphasize the frequency zones you've already established. But mastering shouldn't be used to fix major frequency masking issues - that typically requires individual track adjustments that aren't possible during the mastering stage.
If you're preparing stems for AI stem mixing, clean frequency separation becomes even more important. AI mixing algorithms work more effectively when individual stems aren't competing heavily in the same frequency ranges.
Checking your frequency separation before upload
Before finalizing your mix for streaming or distribution, run through a systematic frequency check to ensure your masking fixes translate across different playback systems.
Listen to your mix on studio monitors, then switch to headphones, car speakers, and phone speakers. Frequency masking that seems solved on studio monitors might reappear on systems with limited frequency response or room acoustic issues.
Check your mix in mono using your DAW's mono button. Frequency masking issues often become more obvious in mono because you lose the stereo separation that can help differentiate competing elements. If your separation works in mono, it will definitely work in stereo.
Use Mix Feedback tools to get objective analysis of your frequency balance. Fresh ears can often identify masking issues that you've become accustomed to during the mixing process.
Test your mix against reference tracks on the same playback system. A/B between your mix and commercial tracks in a similar style to verify that your frequency separation is competitive and translates well.
Monitoring your frequency decisions with meters
While your ears should guide frequency decisions, meters can help you verify and quantify the changes you're making. Use spectrum analyzers to confirm that your EQ cuts are creating the separation you intended.
Set up a spectrum analyzer that shows before-and-after comparisons when you make EQ adjustments. Many plugins offer this feature, allowing you to see how your cuts affect the overall frequency balance.
Pay attention to the relationship between different frequency bands rather than absolute levels. You're looking for clean separation and definition, not necessarily flat frequency response. A slight boost in one range might be perfectly appropriate if it helps establish clear frequency hierarchy.
Use peak meters on individual tracks to monitor how your frequency adjustments affect overall levels. Sometimes aggressive frequency cuts require slight level compensation to maintain the element's presence in the mix.
Genre-specific frequency strategies
Different musical styles have established conventions for frequency allocation that can guide your masking decisions. Hip-hop beats typically reserve the 60-80 Hz range for the kick drum fundamental, with the 808 sitting below in the 40-60 Hz range. Trap and drill beats often push the 808 even lower to create massive sub-bass presence.
Electronic dance music tends to use more aggressive high-frequency separation, with lead synths occupying distinct upper-midrange slots while pads and atmospheric elements spread across the stereo field in supporting frequency ranges.
Pop and R&B productions prioritize vocal clarity in the 1-3 kHz range, often requiring significant frequency carving from competing instruments. The vocal typically gets priority in its primary frequency zones, with other elements arranged around this focal point.
Rock and metal mixes face different challenges with multiple distorted guitars occupying similar frequency ranges. These styles often rely more on stereo positioning and rhythmic separation than frequency carving, though selective EQ cuts can still help differentiate guitar parts.
Common questions about frequency masking in dense mixes
How do I know if frequency masking is actually the problem?
Solo individual elements that sound good alone, then listen to them together. If they lose definition or clarity when combined, frequency masking is likely occurring. Use a spectrum analyzer to confirm overlapping frequency content in the same ranges.
Should I cut frequencies from every competing element?
No, establish a hierarchy where the most important element gets priority in each frequency range. Cut competing frequencies from supporting elements while leaving the lead element intact. This maintains musical balance while creating separation.
Can arrangement changes fix masking better than EQ?
Often yes. Moving elements to different octaves, adjusting timing so they don't play simultaneously, or simplifying busy sections can eliminate frequency competition more naturally than heavy EQ processing.
How narrow should my EQ cuts be for frequency separation?
Use moderate Q settings (around 1.0-2.0) for most cuts. Too narrow and you create unnatural notches; too wide and you remove too much harmonic content. Adjust by ear while monitoring the affected element's overall character.
Does frequency masking show up differently on different speakers?
Yes, speaker frequency response and room acoustics can emphasize or hide masking issues. Always check your frequency separation on multiple playback systems, especially in mono, to ensure it translates consistently.
When should I use stereo separation instead of frequency cuts?
Use stereo positioning for supporting elements that don't need to be centered. Keep foundational elements like kick, snare, bass, and lead vocals centered, but spread competing midrange and high-frequency elements across the stereo field for natural separation.
Hear what these choices do to your own song.
Upload stems or a finished track, choose a reference direction, and compare a private Moozix mix before you export anything.