You've spent hours balancing your mix, but something's wrong with the low end. It sounds bloated and unclear, especially when you check it on different speakers. In small rooms, low frequency buildup creates a muddy mess that masks your kick drum and makes bass lines disappear on smaller systems. This rumble and boxiness isn't just a room problem – it's a mix translation disaster waiting to happen.
Quick takeaways for cleaning muddy low end
- High-pass filter everything except kick and bass starting around 80-100 Hz
- Use a spectrum analyzer to spot frequency buildup between 100-300 Hz
- Check mono compatibility to reveal phase issues making mud worse
- Test translation on earbuds and car speakers to verify cleanup
- Apply gentle cuts at problem frequencies rather than aggressive filtering
- Record bass sources with less proximity effect to prevent mud at the source
Why Small Rooms Turn Clean Recordings Into Muddy Mixes
Small rooms accumulate low frequency energy in unpredictable ways. Your room might emphasize certain bass frequencies while creating null zones for others. When you're mixing in this environment, you're hearing exaggerated low mids and rumble that don't exist in the original recordings.
The result is a feedback loop where you compensate for room problems by making mix decisions that sound worse everywhere else. You might boost the kick drum because it sounds weak, not realizing your room is canceling those frequencies. Or you might leave muddy buildup in the 150-250 Hz range because your room makes it sound normal.
This frequency masking also hides mix problems. Overlapping low end between kick drums, bass guitars, and other instruments gets worse when room acoustics blur the boundaries between different sources. What sounds like a full, warm low end in your room might translate as an unfocused mess on other systems.
How Do You Know When Low End Mud Is Ruining Your Mix?
The clearest symptom is when your mix sounds powerful in your room but loses all punch on smaller speakers. If your bass disappears completely when you check on laptop speakers or earbuds, you've got mud problems masking the fundamental frequencies that need to cut through.
Solo your kick and bass together. If you can't clearly distinguish between them, or if the low end sounds like one blurry mass, frequency overlap is creating mud. The kick should punch while the bass provides steady foundation, not blend into an indistinct rumble.
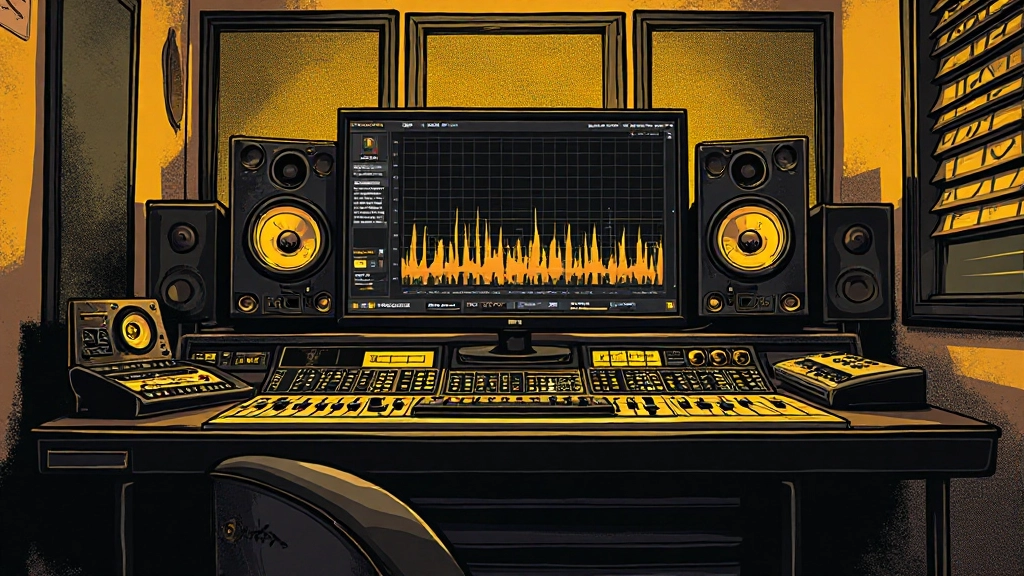
Use a spectrum analyzer to check for buildup between 80-300 Hz. Look for frequencies that spike consistently across different sections of your song. These peaks often indicate room resonance that's fooling your ears and muddying your mix decisions.
| Symptom | Likely Cause | Quick Test |
|---|---|---|
| Bass disappears on earbuds | Mud masking fundamentals | High-pass everything but kick/bass |
| Kick and bass blend together | Frequency overlap | Solo them and check separation |
| Mix sounds boomy in room | Room resonance emphasis | Check spectrum analyzer for peaks |
| Low end collapses in mono | Phase issues plus mud | Switch to mono and listen |
| Other instruments sound buried | Low mid buildup | Cut 150-250 Hz on problem tracks |
Start With High-Pass Filtering Everything Except Kick and Bass
Before you start cutting specific frequencies, eliminate unnecessary low end from sources that don't need it. High-pass filter guitars, vocals, snares, hi-hats, and most other instruments starting around 80-100 Hz. Some tracks might need filtering as high as 120-150 Hz.
In your DAW, insert an EQ on each track and enable the high-pass filter. Set the slope to 12 dB per octave for a gentle roll-off that won't create phase issues. Sweep the cutoff frequency upward while the track plays until you hear the sound getting thin, then back it off slightly.
Don't be afraid to filter aggressively on sources like hi-hats, tambourines, or lead vocals. These elements often have rumble and handling noise below 100 Hz that contributes nothing musical but adds to the overall mud. Even electric guitars recorded with amps can benefit from filtering around 80-90 Hz to remove cabinet resonance.
The goal isn't to make individual tracks sound perfect in solo – it's to create space for your kick and bass to work clearly in the full mix. You might find that tracks sound thin when soloed but contribute to a much cleaner overall sound when everything plays together.
Use Spectrum Analysis to Spot Problem Frequencies in Your Room
Visual feedback helps you see what your ears can't trust in a small room. Place a spectrum analyzer on your mix bus and look for consistent peaks that don't change much between different song sections. These sustained buildups often point to room resonances that are coloring your perception.
Focus on the 80-300 Hz range where most mud problems occur. Room modes typically emphasize certain frequencies while creating nulls at others. If you see a spike around 120 Hz, for example, your room might be making that frequency seem more prominent than it really is.
Play commercial reference tracks through your system and note which frequencies spike on the analyzer. Compare this to what you're seeing in your own mix. If your mix has significantly more energy in problem frequency ranges, you've found areas where mud is building up.
Don't mix to make the analyzer look flat – that's not the goal. Instead, use it to identify frequencies where your room might be lying to you. When you see consistent buildup that doesn't match your reference tracks, you've found mud that needs addressing.
Check What's Really Happening in the 150-250 Hz Danger Zone
This frequency range causes more mix translation problems than any other in small rooms. It's where kick drum thump, bass guitar body, guitar cab resonance, and vocal proximity effect all converge into potential mud. Too much energy here makes mixes sound boxy and unclear on most playback systems.
Solo different elements in your mix and sweep a narrow EQ cut through 150-250 Hz. When you hear the sound clean up and become more defined, you've found a problem frequency. Often, cutting 2-3 dB at the right spot will clear up mud without making the source sound thin.
Bass guitar recorded too close to the amp often needs cuts around 180-220 Hz to remove boominess. Vocals tracked with proximity effect might need gentle cuts around 200-250 Hz. Electric guitars can usually handle cuts in the 150-180 Hz range without losing punch.
Be surgical with these cuts – use a Q setting between 2-4 to target problem frequencies without affecting nearby areas. Make gentle 1-2 dB cuts on multiple sources rather than dramatic cuts on one track. This distributed approach maintains fullness while eliminating buildup.
Working Low Mid Cuts in Popular DAWs
- Pro Tools: Insert 7-band EQ III, enable band 3, set to cut mode with Q around 3
- Logic Pro: Add Channel EQ, click band 2, set to negative gain with moderate Q
- Ableton Live: Insert EQ Eight, activate low-mid band, pull gain down while adjusting Q
- Reaper: Insert ReaEQ, enable band 2, set negative gain and adjust bandwidth
- Studio One: Add Pro EQ, enable low-mid band, reduce gain with focused Q setting
Why Your Mono Button Reveals Hidden Mud Problems
Switching to mono doesn't just check compatibility – it exposes low frequency issues that stereo imaging can mask. When you collapse your mix to mono, phase relationships between left and right channels can either reinforce or cancel frequencies, making mud problems more obvious.
Hit the mono button and listen specifically to your low end. If the bass suddenly becomes much more prominent or much weaker, you've got phase issues that are either adding to mud problems or masking them in stereo. These phase relationships often occur when recording bass with both DI and amp signals or using multiple microphones on sources.
In mono, frequency masking becomes more apparent because you're hearing direct frequency overlap without stereo placement helping separate sources. If your kick and bass become an indistinct blob in mono, they need frequency separation even if they sound okay in stereo.
Use mono checking throughout your mix process, not just at the end. When you make EQ moves to clean up mud, switch to mono to verify that your changes actually improve clarity rather than just shifting the problem to a different frequency range.
Car Speaker and Earbud Translation Checks That Actually Work
Small speakers reveal mud problems because they emphasize the midrange frequencies where clarity lives while reducing the deep bass where mud often hides. If your mix translation falls apart on these systems, low frequency cleanup will fix most of the problems.
Export a rough mix and listen in your car with the windows up and air conditioning off to reduce ambient noise. Pay attention to whether you can still distinguish between kick and bass. If the low end turns into mush, you need more aggressive high-pass filtering and low-mid cleanup.
Check on quality earbuds or in-ear monitors – not cheap ones that have no bass response. Good earbuds will reveal mud problems while still reproducing enough low end for you to hear what's happening. If instruments sound buried or unclear, the problem is usually in the 100-250 Hz range.
Don't try to fix translation problems by boosting high frequencies to compensate for muddy low end. Instead, clean up the mud first, then reassess whether you need any brightness adjustments. Often, removing low frequency masking makes the entire mix sound clearer without additional processing.
When EQ Cuts Make Your Mix Sound Thin Instead of Clean
Aggressive filtering and cutting can solve mud problems but create new issues if you go too far. The goal is removing problematic frequencies while maintaining the weight and fullness that makes your mix sound complete on full-range systems.
If your mix starts sounding thin after cleanup, you've likely high-passed too aggressively or made cuts that are too wide. Check your filter settings and reduce the cutoff frequency slightly. Sometimes moving a high-pass filter from 100 Hz down to 80 Hz restores fullness without bringing back the mud.
Narrow your EQ cuts if the mix sounds hollow after frequency reduction. Wide cuts can remove too much harmonic content along with the problem frequencies. Use a higher Q setting to target specific buildup while leaving nearby frequencies intact.
Consider adding gentle low frequency saturation or harmonic enhancement to restore warmth after cleaning up mud. Subtle tape saturation or tube-style processing can add perceived fullness without the frequency buildup that causes translation problems.
Bass and Kick Drum Frequency Separation Strategies
These two elements form the foundation of most mixes, but they often compete for the same frequency space. Effective separation ensures both elements translate clearly while maintaining the power of your low end.
Find the fundamental frequency of your kick drum using a spectrum analyzer – it's usually between 50-80 Hz. Then identify where your bass guitar or synth bass sits – typically between 60-120 Hz for the fundamental. Look for overlap and decide which element should dominate each frequency range.
Try cutting the bass guitar around the kick's fundamental frequency while boosting the bass slightly higher, around 80-100 Hz where the kick doesn't have as much energy. This gives the kick punch in the deep sub while letting the bass provide weight in the low mids.
Use sidechain compression subtly to duck the bass when the kick hits. This creates rhythmic separation without obvious pumping. Set a fast attack, medium release, and only 2-3 dB of reduction to carve space for the kick without making the bass disappear.
- High-pass the bass around the kick's fundamental
- Boost bass harmonics where kick energy is lower
- Use gentle sidechain compression for rhythmic separation
- Check separation in mono to verify it works
- Test on small speakers to confirm punch and clarity
Recording Techniques That Prevent Mud Before Mixing
Many mud problems start during recording, especially with proximity effect on vocals and bass sources recorded too close to amplifiers. Addressing these issues at the source saves time in mixing and results in cleaner tracks.
When recording vocals, maintain consistent distance from the microphone to avoid proximity effect that boosts low frequencies unpredictably. Use a pop filter and position it as a distance reference to keep the vocalist from getting too close during emotional sections.
Record bass guitars with less proximity effect by pulling the microphone back from the amp cabinet. Instead of placing the mic directly against the grille, try positioning it 6-12 inches away. You'll capture less cabinet resonance and room tone but avoid the boominess that creates mud.
Consider recording bass DI and amp signals separately, then blending them during mixing. The DI provides clarity and definition in the upper frequencies while the amp adds character in the mids. This gives you more control over the balance between clarity and warmth.
Use high-pass filtering during recording only when you're certain it won't be needed later. It's better to capture the full frequency range and filter during mixing when you can hear the track in context with other elements.
How to Check Your Mud Fixes Before Upload or Mastering
Before sending tracks for mastering or uploading to streaming platforms, verify that your mud cleanup actually improves translation across different systems. This prevents mastering engineers from having to fix problems that should have been addressed in the mix.
Export your mix and check it on at least three different systems: your monitors, earbuds or headphones, and a Bluetooth speaker or car system. The low end should remain clear and defined on all three, with kick and bass maintaining separation.
If you're using Mix Feedback to get perspective on your mix, specifically ask about low end clarity and translation. Upload both the raw mix and a version with your mud cleanup to compare how the changes affect overall balance and power.
Check your mix against commercial references at matched volume levels. Use a level matching plugin or simply adjust your monitor volume so the perceived loudness matches. This reveals whether your low end cleanup has made the mix too thin compared to professional releases.
For tracks going to AI automix and mastering, clean low end processing works better than heavily processed mud that requires corrective mastering. The algorithms can enhance clean low end more effectively than they can fix fundamental frequency problems.
Setting Up Your Room for Better Low End Decisions
While you can't eliminate all room problems without major acoustic treatment, some simple changes help you make better low frequency decisions and catch mud problems earlier in the mixing process.
Position yourself and your monitors to avoid the worst room modes. Try sitting closer to your monitors so you hear more direct sound and less room reflection. Even moving your setup a few feet can significantly change how low frequencies interact with room acoustics.
Use quality headphones for low end reference, but don't mix entirely in headphones. Good headphones let you hear mud and frequency buildup that your room might be masking, while monitors give you a sense of how the mix translates to speakers.
Add basic acoustic treatment focused on first reflection points and corners where low frequencies build up. Even moving blankets or furniture can help reduce the worst resonances that interfere with accurate monitoring.
Keep a small speaker or earbuds near your mixing position for quick translation checks. Don't wait until you think the mix is finished – check translation throughout the process so you can catch mud problems before they become major issues.
Common questions about cleaning up muddy low end
How aggressive should I be with high-pass filtering on guitars and vocals?
Start around 80-100 Hz and sweep upward until you hear the sound getting thin, then back off slightly. Most guitars can handle filtering up to 100-120 Hz, while vocals often work well with 80-90 Hz cuts. Always check in the context of the full mix rather than solo.
Why does my mix sound thin after cleaning up mud?
You've probably cut too much or used filters that are too aggressive. Try reducing your high-pass filter frequency by 10-20 Hz, or narrow your EQ cuts with a higher Q setting. The goal is removing problematic buildup while maintaining musical fullness.
Should I use spectrum analyzers to guide all my EQ decisions?
Use analyzers to identify problem areas and confirm your ears, but don't mix purely by visual feedback. Your room might emphasize certain frequencies that show up on the analyzer but don't reflect what listeners will hear on other systems.
How do I know if low end problems come from my room or my mix?
Check your mix on multiple systems and compare to commercial references at matched levels. If your low end sounds consistently muddy across different playback systems, the problem is in your mix. If it only sounds muddy in your room, focus on acoustic treatment.
Can I fix mud problems during mastering instead of mixing?
Basic cleanup is possible during mastering, but detailed frequency separation between kick and bass requires individual track access. It's much more effective to address mud during mixing when you can process each element separately.
What's the difference between mud and warmth in the low end?
Warmth adds fullness without masking other elements or causing translation problems. Mud creates frequency buildup that makes individual sources unclear and causes mixes to fall apart on smaller speakers. Clean low end should sound full but defined.
Hear what these choices do to your own song.
Upload stems or a finished track, choose a reference direction, and compare a private Moozix mix before you export anything.