The snare hit landed like a wet towel against concrete. Jerome stared at his DAW, watching the waveform that looked promising but sounded completely lifeless through his monitors. Three hours into what should have been a straightforward drum session, he faced the same problem that haunts countless home studio recordings: drums that measure well but feel dead.
This scenario plays out in bedrooms, basements, and project studios worldwide. You've got the mics, the interface, maybe even a decent room. But somehow, your drum recordings lack the punch and presence that makes listeners feel the rhythm in their chest. The gap between "technically recorded" and "professionally captivating" often comes down to three fundamental fixes that transform ordinary drum tracks into compelling rhythmic foundations.
Understanding these core principles doesn't require expensive gear or years of experience. These techniques address the most common issues that rob drum recordings of their natural power and musical impact.
The Room Reality Check
Before touching any microphone, Bethany learned this lesson during a particularly frustrating session with her band's drummer. They'd spent weeks preparing, researching microphone placement techniques, and setting up what looked like a professional recording setup. Yet every take sounded cramped and artificial, lacking the natural bloom that makes great drum recordings breathe.
The breakthrough came when she stepped back and listened to the actual room. Standing where the overhead mics were positioned, she clapped her hands and heard a harsh slap echo followed by an uneven decay. The reflective surfaces were creating comb filtering and phase cancellation that no amount of post-production could fix.
- Harsh echoes that return within 50ms
- Uneven decay times between frequencies
- Flutter echoes from parallel walls
- Dead spots where certain frequencies disappear
The solution wasn't expensive acoustic treatment. Bethany repositioned the kit away from the corner, angled it to break up parallel reflections, and added basic absorption using heavy blankets and couch cushions at reflection points. The difference was immediate and dramatic.
Strategic Kit Positioning
Room positioning affects every microphone in your setup. Place the kit where the natural room sound enhances rather than fights your recording goals. This means avoiding corners where bass frequencies build up, staying away from parallel walls that create standing waves, and finding the spot where hand claps sound most musical.
For most home studios, this sweet spot lies roughly one-third into the room's length, pulled away from side walls by at least three feet. This positioning gives you natural ambience without overwhelming reflections, letting the room contribute musicality rather than problems.
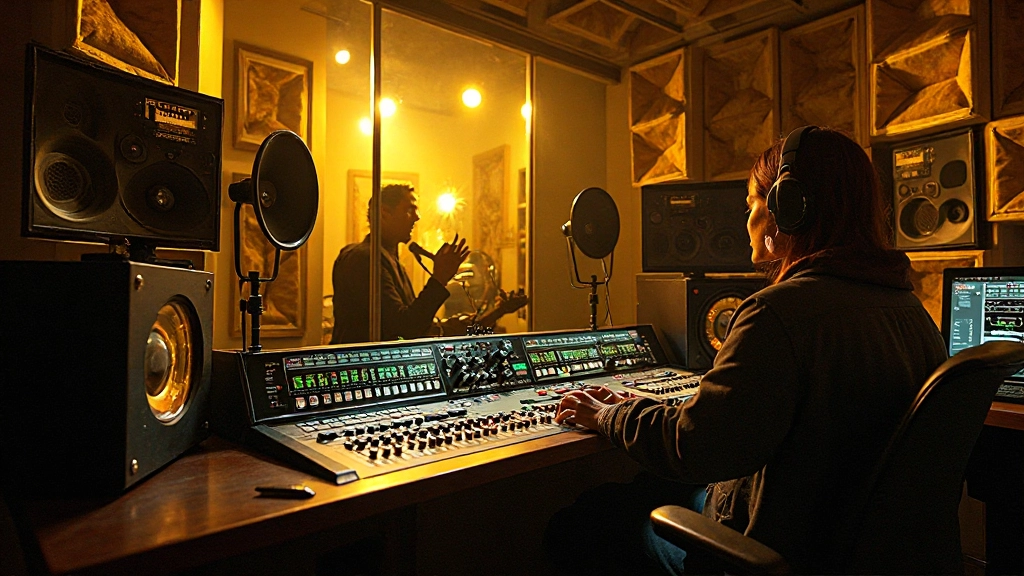
Microphone Relationships That Actually Work
The second transformation happens when you stop thinking about individual microphones and start considering how they interact as a system. This shift in perspective revolutionizes your drum sound more than any single microphone upgrade.
Cameron discovered this during a session where everything looked perfect on paper. His kick drum mic was positioned exactly where the manual suggested, snare mic angled properly to avoid hi-hat bleed, overheads spaced according to textbook measurements. But when he hit record, the kit sounded disjointed, like individual drums fighting for space rather than working together as a unified instrument.
"I was treating each mic like it existed in isolation. The revelation came when I started thinking about how they'd blend together before I even hit record."
Cameron, reflecting on his drum recording breakthrough
The key insight involves phase relationships between microphones. When multiple mics capture the same drum hit at slightly different distances, those timing differences can cause frequencies to cancel or reinforce in unpredictable ways. Understanding this helps you position mics to work together rather than against each other.
The Three-Step Mic Relationship Check
- Start with overheads: Position these first to capture the overall kit balance and room sound you want
- Add close mics to support: Place kick and snare mics to enhance what the overheads capture, not replace it
- Test phase relationships: Listen to combinations of mics together, flipping phase if certain frequencies seem to disappear
This approach creates cohesive drum recordings where each microphone contributes to a unified sound rather than competing for attention. The overheads provide the musical context and ambience, while close mics add definition and punch to specific elements.
Gain Staging for Punch and Clarity
The third fix addresses the often-overlooked foundation of great drum recordings: proper gain staging throughout the signal chain. This technical aspect directly impacts the musical qualities that separate professional-sounding drums from amateur recordings.
Denise learned this lesson after months of fighting muddy, compressed-sounding drums despite using quality microphones and preamps. Her recordings lacked the dynamic range and transient snap that makes drums exciting to hear. The problem wasn't her technique or equipment, but how she managed signal levels from microphone to DAW.
| Signal Stage | Target Level | Purpose |
|---|---|---|
| Microphone Preamp | -18dBFS peak | Clean amplification with headroom |
| Interface Input | -12dBFS average | Optimal converter performance |
| DAW Track Input | -6dBFS peak | Plugin processing headroom |
These levels provide the dynamic range necessary for drum transients while avoiding the digital distortion that kills punch and clarity. Setting levels too hot forces the system to compress transients, removing the snap and impact that makes drums compelling. Setting them too low introduces noise and reduces the effective resolution of your recording.
The Transient Preservation Workflow
Start by setting your preamp gain so the loudest snare hits peak around -18dBFS. This gives you plenty of headroom for unexpected dynamic peaks while keeping the signal well above the noise floor. Use your interface's direct monitoring to hear the actual recorded signal, not just the input level.
Watch how your DAW handles the incoming signal. Some interfaces and DAWs add subtle processing that affects transient response. Disable any automatic level management, input processing, or real-time effects that might compress or limit your signal during recording.
- Setting levels based on average rather than peak readings
- Ignoring the cumulative effect of multiple gain stages
- Using input compression to control peaks instead of proper gain structure
- Monitoring through plugins that color your level decisions
Real-World Implementation
Applying these three fixes requires a systematic approach that addresses each element methodically. The goal is creating a recording chain where every component supports the final musical result rather than working against it.
Begin each drum session with a room assessment, even if you've recorded in the space before. Room acoustics change with humidity, temperature, and even furniture placement. Spend five minutes listening to the space and adjusting kit position before setting up any microphones.
Next, establish your microphone relationships by starting with the big picture and working toward details. Set overheads first to capture the overall kit sound and room character you want. Then add close mics as needed to support and enhance that foundation, checking phase relationships as you go.
The Quick Setup Checklist
- Room assessment complete - no harsh reflections or dead zones
- Kit positioned for optimal room interaction
- Overhead mics capture balanced, musical kit sound
- Close mics enhance rather than replace overhead perspective
- Phase relationships checked between all mic combinations
- Gain staging provides clean signal with proper headroom
- Test recording confirms punch and clarity before session
Finally, establish your gain structure by working backwards from your DAW input levels. Determine the peak levels you want hitting your recording software, then adjust interface and preamp gains to achieve those levels with appropriate headroom throughout the chain.
Beyond Technical Fixes
These three fundamental improvements create the foundation for drum recordings that translate well across different playback systems and mix contexts. But technical excellence serves musical goals, not the other way around.
The room work ensures your drums sound like they exist in a real space rather than an isolated vacuum. This spatial context helps listeners connect with the rhythm on an emotional level, feeling the drums as part of a complete musical environment rather than clinical isolated sounds.
Proper microphone relationships create cohesion that lets drums function as a complete instrument rather than a collection of separate elements. This unified character makes it easier for other instruments in your mix to lock into the groove and work together musically.
Clean gain staging preserves the dynamic life that makes drums exciting to hear. Those transient peaks and subtle dynamic variations carry musical expression that gets lost when signal levels compromise the system's ability to accurately capture and reproduce the actual performance.
Listening for Musical Results
As you implement these fixes, listen for musical improvements rather than just technical specifications. Your drums should sound more alive, more present in the mix, and more engaging to hear. The rhythm should feel more compelling, encouraging listeners to move with the beat rather than just acknowledge its presence.
Pay attention to how your improved drum recordings affect the rest of your mix. Better drum tracks provide a stronger foundation that makes it easier to place other instruments, create effective dynamics, and maintain listener interest throughout a song.
Great drum recordings don't just capture sound accurately - they capture the musical energy and rhythmic excitement that makes people want to keep listening. These three fixes help you achieve that level of musical impact while building skills that improve every aspect of your recording and mixing work.
Hear what these choices do to your own song.
Upload stems or a finished track, choose a reference direction, and compare a private Moozix mix before you export anything.