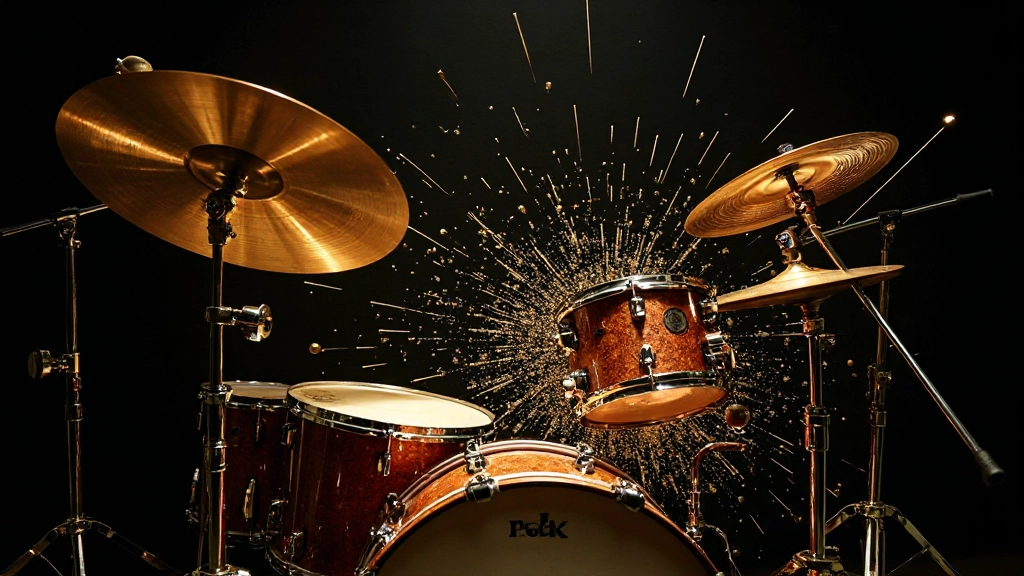
Bradley Chen stared at his Pro Tools session, watching five drum tracks that should have sounded massive but instead felt like they were fighting each other. The kick drum that thundered during tracking now sounded hollow through the monitors. The snare that cracked with authority in the room had turned into a cardboard box. Three hours of tracking with his band's best drummer, and the playback sounded worse than a phone recording.
What Bradley didn't realize was that he'd stumbled into one of recording's most common yet fixable problems: phase cancellation between multiple microphones. His carefully positioned mics were actually working against each other, creating frequency holes that sucked the life out of what should have been a powerful drum sound.
This scenario plays out in home studios every day. You set up multiple mics to capture the full sound of your drums, but instead of getting bigger, fuller recordings, you end up with tracks that sound thin, hollow, or strangely filtered. The culprit isn't your microphones, your preamps, or your room acoustics. It's phase alignment, and once you understand how to tackle it, your drum recordings will never sound the same.
When Good Mics Go Bad: Understanding Phase Cancellation
Phase cancellation occurs when two microphones capture the same sound source at slightly different times. When these delayed signals combine, certain frequencies either reinforce each other (constructive interference) or cancel each other out (destructive interference). In Bradley's case, his overhead mics were positioned at different distances from the snare drum, creating a timing difference that was eating away at the snare's fundamental frequency.
The mathematics behind this phenomenon are straightforward but the audible results can be devastating. When a sound wave traveling at 1,130 feet per second reaches two microphones that are even a few inches apart, those tiny timing differences translate into significant phase shifts. A mere 6-inch difference in microphone placement can create a 180-degree phase shift at certain frequencies, essentially muting those frequencies entirely when the signals combine.
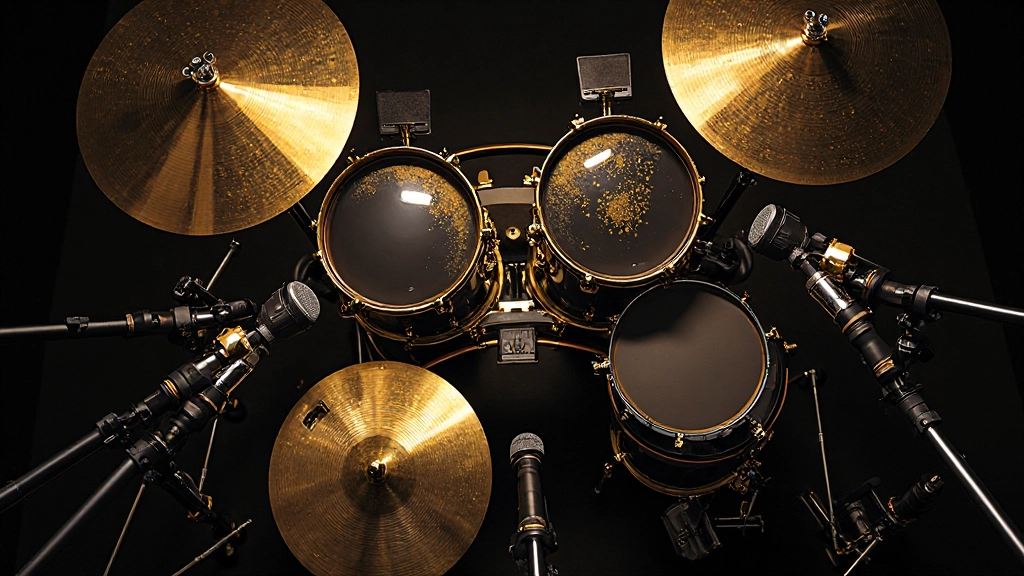
The most common phase problems occur between kick drum mics (inside and outside the drum), snare mics (top and bottom), and overhead mics positioned at different distances from the same sound sources. Each pairing creates its own set of frequency cancellations that can turn a powerful acoustic performance into a lifeless recording.
The Distance Detective: Measuring for Phase Alignment
Professional engineers approach phase alignment systematically, starting with physical measurements before ever reaching for software solutions. The goal isn't to eliminate all phase differences but to minimize the destructive ones while preserving the natural spatial character of your drum kit.
Bradley learned this lesson the hard way during his next session. Armed with a tape measure, he started mapping the distances from each drum to every microphone in his setup. His overhead mics, positioned three feet above the kit, were exactly 18 inches farther from the snare than from the kick drum. That 18-inch difference was creating a significant timing delay that was hollowing out his snare sound.
The traditional solution involves repositioning microphones so they're equidistant from the primary sound sources. For overhead mics, this means measuring the distance from each overhead to the snare drum and adjusting the mic positions until both distances match. Some engineers use the "equidistant triangle" method, positioning overheads so they're the same distance from both the snare and kick drums.
- Measure kick to overhead distance: Use a tape measure from the center of the kick drum to each overhead mic
- Measure snare to overhead distance: Repeat the process from the center of the snare
- Adjust positioning: Move mics to equalize these distances, typically prioritizing the snare measurement
- Verify with additional sources: Check distances to hi-hat and floor tom to minimize secondary phase issues
However, pure mathematical equidistance doesn't always yield the best musical results. Sometimes a slight phase offset can actually enhance the stereo image or add desirable comb filtering effects. The key is making intentional choices rather than leaving phase relationships to chance.
Software Solutions: Time Alignment in Your DAW
When physical repositioning isn't practical or doesn't solve the problem completely, sample-accurate time alignment in your DAW becomes essential. Modern recording software provides the precision needed to align multiple drum mics down to the sample level, eliminating phase cancellation while preserving the natural character of your recordings.
Bradley discovered this approach while working on a jazz quartet session where the drummer insisted on using his vintage kit in a specific room position. Physical mic repositioning would have compromised the acoustic balance, so Bradley turned to Pro Tools' time alignment features to solve the phase issues in post-production.
The process starts with identifying timing relationships between mics using visual waveform analysis. Zoom in on a sharp transient like a snare hit and examine how the same event appears across multiple tracks. The goal is to align these transients so they occur at the same sample position, eliminating the timing differences that cause phase cancellation.
"Time alignment isn't about making everything perfectly in phase. It's about eliminating the destructive phase relationships while preserving the spatial information that makes drums sound three-dimensional."
Most DAWs offer multiple approaches to time alignment. Pro Tools provides the Time Adjuster plugin for precise sample-based delays. Logic Pro includes the Delay Designer for more complex timing adjustments. Even basic DAWs like Reaper offer sample-accurate track delays that can solve most phase alignment issues.
The workflow typically involves selecting a reference track (usually the snare top mic), then adjusting the timing of other mics to align with that reference. Start with the most obvious timing differences, like overhead mics, before addressing subtler issues between close mics.
The Correlation Meter: Your Phase Alignment Guide
While visual alignment provides a good starting point, correlation meters offer more precise feedback about phase relationships between tracks. These meters display the degree of correlation between two signals, with +1 indicating perfect phase alignment and -1 indicating complete phase opposition.
Professional mixing consoles have included correlation meters for decades, but many home studio engineers overlook these powerful tools. Most modern DAWs include correlation metering either built-in or through free plugins. Learning to read these meters transforms phase alignment from guesswork into precise engineering.
| Correlation Reading | Phase Relationship | Action Required |
|---|---|---|
| +0.7 to +1.0 | Good correlation | No adjustment needed |
| +0.3 to +0.7 | Moderate correlation | Consider minor timing adjustment |
| -0.3 to +0.3 | Poor correlation | Timing or polarity adjustment needed |
| -1.0 to -0.3 | Strong phase opposition | Major timing correction or phase flip required |
Bradley started using correlation meters during his drum mixing process and immediately noticed improvements in his low-end clarity and overall punch. The meters helped him identify subtle phase issues that weren't obvious from visual inspection alone, particularly between his kick drum mics where timing differences were creating a hollow, unfocused low end.
When using correlation meters, remember that perfect correlation isn't always the goal. Some phase differences contribute to stereo width and spatial character. The objective is eliminating destructive phase relationships while preserving the musical benefits of natural spatial recording.
Beyond Basic Alignment: Advanced Phase Techniques
Once you've mastered basic phase alignment, advanced techniques can further enhance your drum recordings. Multi-band phase alignment addresses frequency-specific timing issues that broad-spectrum alignment might miss. Some frequencies might align perfectly while others remain problematic, particularly when dealing with complex acoustic spaces or non-ideal mic placement.
Modern phase alignment tools like Waves InPhase or Sound Radix Auto-Align analyze frequency content across the spectrum and apply targeted corrections. These plugins can automatically detect and correct phase issues that would take hours to address manually. However, understanding the underlying principles remains crucial for making musical decisions about when and how much correction to apply.
Polarity flipping represents another essential phase tool that's often overlooked. Sometimes the solution to phase cancellation isn't timing adjustment but simply inverting the polarity of one signal. This technique works particularly well for bottom snare mics, which naturally capture an inverted version of the snare sound compared to the top mic.
Bradley encountered this distinction while mixing a rock session where his bottom snare mic was perfectly time-aligned but still sounded thin when combined with the top mic. A simple polarity flip on the bottom mic instantly restored the snare's body and crack, demonstrating that not all phase problems require complex solutions.
Room Acoustics and Natural Phase Relationships
Understanding how room acoustics influence phase relationships helps you make better decisions during tracking. Early reflections from walls, ceiling, and floor create natural phase shifts that can either enhance or degrade your recordings. Learning to work with these acoustic properties rather than fighting them leads to more natural-sounding results.
In Bradley's home studio, a concrete floor created strong early reflections that were reaching his overhead mics just 3 milliseconds after the direct sound. While this timing difference seemed insignificant, it was creating comb filtering effects that made his drums sound boxy and artificial. Strategic acoustic treatment and microphone repositioning helped minimize these destructive reflections.
Professional drum rooms often incorporate design elements that naturally minimize problematic phase relationships. Angled walls, varied ceiling heights, and strategic absorption placement all contribute to acoustic environments where multiple microphones can capture complementary rather than competing signals.
When working in less-than-ideal acoustic spaces, understanding these principles helps you adapt your microphone techniques accordingly. Sometimes accepting natural phase variations produces more musical results than attempting to eliminate every timing difference through technical correction.
Practical Phase Workflow: From Setup to Mix
Developing a consistent workflow for phase management streamlines your recording and mixing process while ensuring reliable results. This systematic approach addresses phase relationships at every stage, from initial microphone placement through final mix adjustments.
- Pre-tracking: Measure distances and position mics for optimal phase relationships
- During tracking: Monitor for obvious phase issues and make real-time adjustments
- Post-tracking: Use visual alignment and correlation meters for precise correction
- Mixing: Apply advanced phase tools and verify mix translation across different systems
This workflow prevents phase problems from accumulating throughout your production process. Addressing issues during tracking saves time in post-production and typically yields more natural-sounding results than extensive software correction.
Bradley now implements this systematic approach in every drum session. His recordings immediately became punchier and more focused, and his mixing process accelerated significantly since he no longer needed to fight basic phase issues while trying to achieve creative mix goals.
The Translation Test: Making Phase Decisions Stick
The ultimate test of successful phase alignment is how your drums translate across different playback systems. Phase-corrected drums should sound consistent whether played through studio monitors, headphones, car speakers, or phone speakers. Poor phase alignment often becomes more obvious on consumer playback systems, particularly those with limited bass response.
Professional engineers regularly test their drum mixes on multiple systems specifically to verify phase alignment decisions. What sounds great on full-range studio monitors might reveal phase problems when played through laptop speakers or earbuds. This translation testing catches phase issues that meters and visual inspection might miss.
Bradley learned this lesson during his first professional release when his perfectly aligned studio drum sound fell apart on streaming platforms. The aggressive limiting applied during mastering exposed subtle phase issues that weren't apparent in his studio mix. Now he checks phase alignment at various gain levels and through different processing chains to ensure his decisions remain solid throughout the entire production process.
Phase alignment might seem like a technical detail, but it's actually one of the most musical aspects of recording. When your drum mics work together instead of fighting each other, everything else in your mix falls into place more naturally. The guitars find their space, the bass locks in with the kick, and your vocals sit perfectly in the pocket created by a coherent, powerful drum sound.
Master these phase alignment principles, develop a systematic workflow, and test your results across multiple playback systems. Your drums will reward you with the punch, clarity, and three-dimensional presence that separates professional recordings from amateur attempts. The difference between night and day often comes down to a few milliseconds of timing alignment and the knowledge to implement it effectively.
Hear what these choices do to your own song.
Upload stems or a finished track, choose a reference direction, and compare a private Moozix mix before you export anything.