The hiss started three seconds into Curtis's vocal take. Not the good kind of analog warmth, but the telltale flutter of early reflections bouncing off his bedroom walls like pinballs. I stopped the recording and walked him through what I was hearing in those crucial first moments of his room tone.
Every room tells its story within the first 30 seconds of any recording. Before you capture a single note, your space is already shaping the sound in ways that will either elevate your mix or force you into hours of corrective surgery later. Learning to decode these acoustic fingerprints can save your recordings and transform how you approach both treatment and microphone placement.
The First Three Clues Your Room Reveals
When I press record in any new space, I'm listening for three specific elements that reveal the room's character immediately. These acoustic signatures appear whether you're recording vocals, acoustic guitar, or even room mics for drums.
The decay pattern tells me everything about the room's size and surface materials. A bedroom with carpet and curtains will have a fast, warm decay. A bathroom with tile surfaces creates longer, brighter reflections. But it's the mid-frequency buildup that usually causes the most problems in untreated home studios.
Curtis's room had classic 250Hz buildup, the frequency range where most small rectangular rooms develop standing waves. When he sang, certain notes would bloom and sustain longer than others, creating an uneven tonal character that would fight against the mix later.
Frequency Hotspots That Destroy Mix Translation
The second element I track is frequency accumulation in specific ranges. Most home studios suffer from predictable problem frequencies based on their dimensions:
- 80-120Hz: Bass buildup from room modes
- 200-400Hz: Midrange muddiness from standing waves
- 1-3kHz: Harsh reflections from parallel walls
- 4-8kHz: Sibilance emphasis from hard surfaces
- 10kHz+: Brightness loss from absorption materials
During that first 30-second window, I'm specifically listening for notes or frequencies that seem to hang in the air longer than they should, or conversely, frequencies that seem to disappear entirely. These imbalances become amplified in the final recording and create translation problems when your mix moves to different playback systems.
Timing Tells: Early Reflections and Reverb Decay
The timing of early reflections reveals your room's geometry and treatment effectiveness. In an untreated room, you'll hear the first reflection within 3-15 milliseconds of the direct sound, depending on your distance from the nearest wall.
I worked with a guitarist named Patricia whose living room had a peculiar acoustic signature. The early reflection from her back wall arrived exactly 12 milliseconds after the direct guitar signal, creating a subtle comb filtering effect that made her acoustic recordings sound thin and phasey. We identified this by recording a simple finger snap and analyzing the reflection pattern.
"I always wondered why my guitar recordings sounded different from my live playing. Learning to hear those early reflections changed how I position myself and my microphone in the room."
The decay characteristics tell another crucial story. A healthy room decay should sound smooth and even across frequencies. If you hear flutter echoes (rapid, repetitive reflections between parallel surfaces), metallic ringing in certain frequency ranges, or sudden dropouts in the reverb tail, your room is actively working against your recordings.
The Goldilocks Zone of Room Treatment
Over-treatment creates its own problems. I've walked into home studios that sounded like anechoic chambers, completely dead with no natural reverb character. These rooms produce recordings that sound lifeless and require artificial reverb to restore musicality.
The goal is controlled reflections, not elimination. You want enough natural room character to add life and dimension to your recordings while avoiding problematic buildups and harsh reflections.
Undertreated Room Signs
- Flutter echoes between walls
- Frequency buildups in corners
- Harsh sibilance on vocals
- Boomy bass response
- Difficulty hearing mix details
Overtreated Room Signs
- Dead, lifeless recordings
- Loss of high-frequency detail
- Unnatural vocal character
- Need for excessive artificial reverb
- Monitoring fatigue
Strategic Listening Positions and Microphone Placement
Once you understand your room's acoustic signature, you can use positioning to work with its character rather than against it. The 30-second listening test should be performed from multiple positions within your recording space.
I discovered this lesson while tracking vocals with a singer named Jerome in his basement studio. His first position, directly in the room center, captured every standing wave and created a muddy, undefined vocal sound. When we moved him 18 inches toward the corner and angled him 30 degrees away from the parallel walls, the recording transformed completely.
The Triangle Method for Room Analysis
Position yourself at three different points in your room, forming a triangle with roughly equal sides. Record the same 30-second test from each position. You'll discover that each location emphasizes different frequency ranges and reflection patterns.
| Position | Typical Characteristics | Best For |
|---|---|---|
| Room Center | Maximum standing wave interaction | Identifying problem frequencies |
| Corner (1/3 distance) | Reduced parallel wall reflections | Vocals, acoustic instruments |
| Off-Center Diagonal | Asymmetrical reflections, natural variation | Drums, stereo sources |
The position that produces the most balanced frequency response and natural decay pattern becomes your primary recording location. This simple test can eliminate hours of corrective EQ and processing later in your mix.
Practical Room Assessment Tools and Techniques
Beyond subjective listening, several practical techniques can help quantify your room's acoustic behavior during that critical first 30 seconds of evaluation.
The clap test remains one of the most revealing diagnostic tools. Record yourself clapping sharply in different areas of your room. The decay should sound smooth and even. If you hear distinct echoes, flutter patterns, or metallic ringing, you've identified specific treatment needs.
Frequency sweeps provide another layer of analysis. Play a sine wave sweep from 50Hz to 10kHz through your monitors and listen for frequencies that seem to build up or disappear as the sweep progresses. These frequency-specific behaviors indicate standing waves, absorption issues, or reflection problems that will affect your recordings.
The Vocal Booth Alternative
Not every recording requires a completely neutral room. Some genres benefit from specific acoustic characters. A slightly live room can enhance rock vocals, while a controlled, intimate space works better for folk or jazz recordings.
Understanding your room's personality allows you to choose projects and approaches that complement its natural characteristics. Instead of fighting your space, you can embrace its acoustic signature as part of your creative palette.
Treatment Strategies Based on Your 30-Second Diagnosis
Once you've identified your room's acoustic strengths and weaknesses through careful listening, treatment becomes a targeted process rather than guesswork.
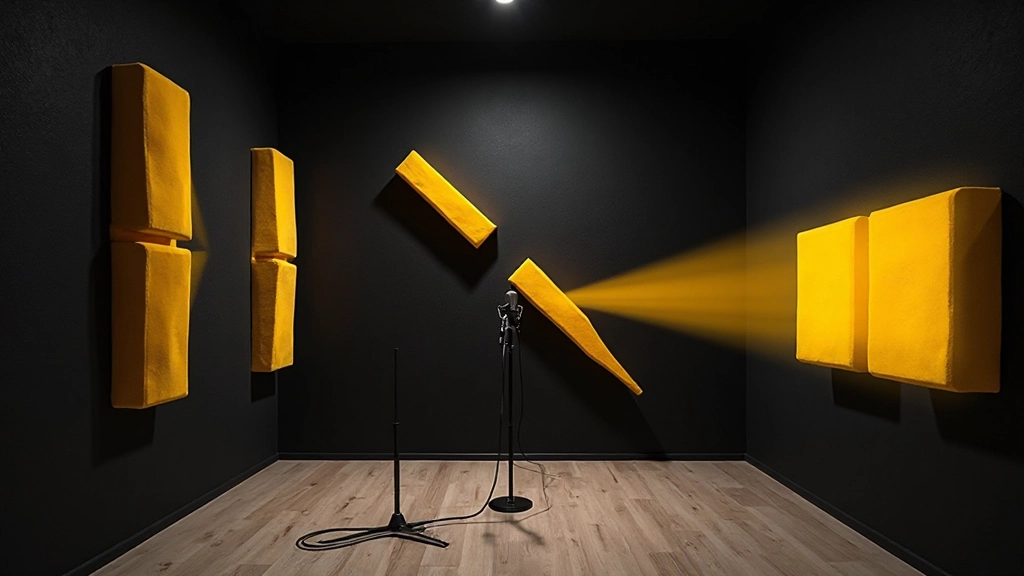
For Curtis's bedroom studio, we focused on taming the 250Hz buildup with strategic bass trapping in two corners. Rather than covering every surface with foam, we placed thick absorption panels at the first reflection points and added some diffusion on the back wall to maintain natural reverb character.
- Address the worst problems first: If flutter echoes dominate your room sound, treating parallel wall reflections takes priority over bass trapping.
- Preserve natural room character: Don't eliminate all reflections. Controlled early reflections add life and dimension to recordings.
- Test incrementally: Add treatment gradually and re-test your room response after each addition.
- Consider portable solutions: Moving blankets, acoustic screens, and repositionable panels offer flexibility for different recording situations.
The goal is acoustic control that enhances your creativity rather than limiting it. A well-treated room should sound natural and balanced, not dead or artificial.
Monitoring Your Progress
Regular room assessment prevents acoustic drift as you make changes to your space. Furniture moves, equipment additions, and even seasonal humidity changes can shift your room's acoustic behavior.
I recommend performing the 30-second listening test monthly, especially if you're actively treating your space or making layout changes. This consistent monitoring helps you understand how modifications affect your room's character and recording quality.
"Once I started really listening to my room instead of just hearing it, everything about my recordings improved. The room became a tool instead of an obstacle."
Beyond Treatment: Working With What You Have
Perfect room acoustics remain a luxury for most home studio owners. Learning to work effectively within your acoustic constraints often proves more valuable than pursuing expensive treatment solutions.
Microphone selection and placement can compensate for many room problems. A dynamic microphone's directional pattern naturally rejects room reflections compared to a large-diaphragm condenser. Close-miking techniques reduce room interaction, while strategic positioning can place problematic frequencies in the microphone's null areas.
The 30-second room assessment should guide these practical decisions. If your room emphasizes harshness in the 3-5kHz range, choose microphones with gentler high-frequency response. If bass buildup dominates, consider high-pass filtering during recording rather than trying to fix it in post-production.
Understanding your room's acoustic signature through careful, systematic listening transforms how you approach recording. Those first 30 seconds reveal everything you need to know about working with your space rather than against it. Whether you're tracking in a bedroom, basement, or purpose-built studio, the room always has something to say about your music. Learning its language makes all the difference.
Hear what these choices do to your own song.
Upload stems or a finished track, choose a reference direction, and compare a private Moozix mix before you export anything.