Quick Takeaways
- Preamp distortion happens before your DAW meters even register clipping
- Input gain and output level are two separate controls with different sweet spots
- Digital meters don't show analog saturation - trust your ears and watch hardware VU meters
- The "just before breakup" zone gives you maximum clean headroom without artifacts
- Different preamp types distort differently - know your gear's personality
- A simple gain reduction of 3-6dB often saves a distorted take without re-recording
You've nailed the perfect performance, but something sounds harsh and brittle when you play it back. The vocal sits wrong in the mix, or that guitar tone has an ugly edge that EQ can't fix. Your DAW meters look fine, but the source sounds damaged. Welcome to the world of preamp overload - where the distortion happens before your computer even sees the signal.
Preamp distortion is sneaky because it occurs in the analog domain, often bypassing the safety net of digital peak meters. Unlike digital clipping, which creates obvious square-wave distortion, preamp overload can sound musical at first, then quickly turn into unusable harshness. The key is learning to hear the difference between intentional analog warmth and destructive overload.
What Preamp Overload Actually Sounds Like
Preamp distortion doesn't announce itself with obvious digital artifacts. Instead, it creeps in as a subtle hardening of the source, gradually becoming more aggressive as you push the input gain higher.
On vocals, preamp overload first shows up as a loss of natural breath and airiness. The voice starts to sound compressed and forward, even without any compression applied. As the overload increases, sibilant sounds become harsh and spitty, while consonants develop an unnatural edge that cuts through the mix in an unpleasant way.
Acoustic instruments reveal preamp saturation differently. An acoustic guitar might lose its woody resonance, with the natural decay of notes becoming clipped short. String attack becomes overly aggressive, and the harmonic complexity that makes an acoustic guitar sound three-dimensional gets flattened into a more one-dimensional representation.
Electric instruments can mask preamp distortion better, especially if you're already using amp simulation or distortion effects. However, even heavily processed sources suffer when the preamp clips. The distortion adds an unfocused, fuzzy quality that sits poorly in a dense mix, making the instrument harder to place in the stereo field.
The False Fix That Makes It Worse
When a vocal sounds harsh, the instinctive move is reaching for a de-esser or cutting high frequencies. This approach backfires with preamp distortion because the harshness comes from harmonic distortion across the frequency spectrum, not just excessive highs. De-essing an already-distorted vocal often makes it sound dull and lifeless while the underlying aggression remains. The real solution is preventing the distortion at the source.
Understanding Your Preamp's Gain Structure
Every preamp has two distinct gain stages that interact to determine your final recording level. The input gain amplifies the microphone signal to a workable level, while the output level determines how hot the signal hits your audio interface or DAW.
The input gain control is where preamp character lives. This is where the magic happens in a high-quality preamp - the subtle saturation and harmonic enhancement that makes analog gear desirable. However, it's also where destructive overload occurs if you push too hard. Most preamps have a sweet spot where they add pleasing coloration without crossing into harshness.
The output level control typically comes after the preamp's character-defining circuits. You can often push this harder without affecting the preamp's sonic signature, though you'll eventually hit the output stage's own distortion threshold. Understanding this separation lets you find the optimal input gain for tone, then use the output control to achieve proper recording levels.
| Preamp Type | Sweet Spot Characteristics | Overload Warning Signs | Recovery Strategy |
|---|---|---|---|
| Solid State | Clean, transparent, consistent | Sudden harsh clipping | Back off input gain 3-6dB immediately |
| Tube/Valve | Gradual warming, harmonic richness | Compression before distortion | Reduce gain slowly while monitoring tone |
| Transformer-Coupled | Midrange warmth, gentle saturation | Low-mid muddiness, loss of clarity | Find the "just warm" point, stay there |
| Class A | Musical compression, even harmonics | Pumping, unnatural dynamics | Lower gain, compensate with output level |
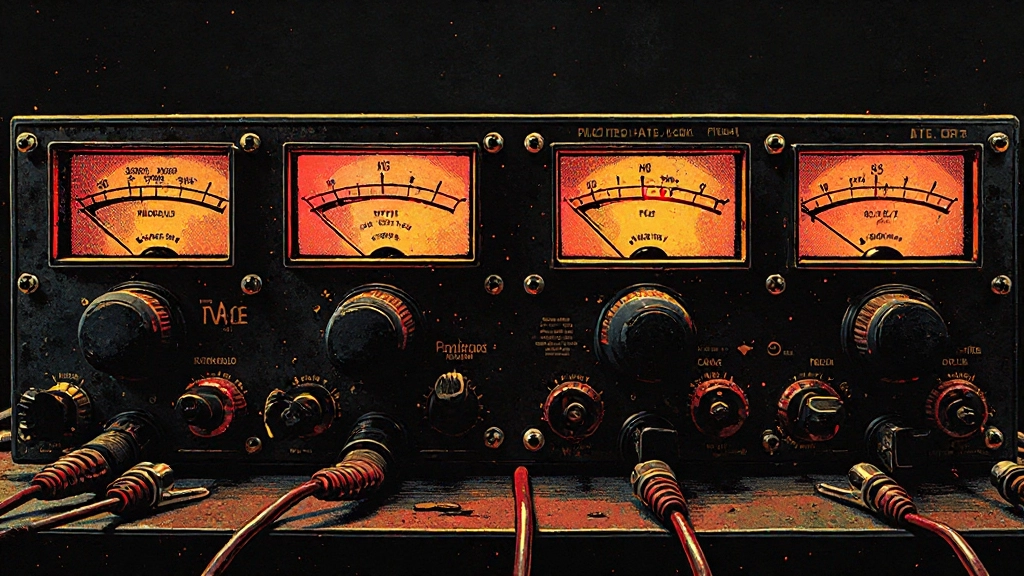
VU Meters vs. Digital Peak Meters: Why Both Matter
Digital peak meters in your DAW excel at preventing digital clipping but tell you nothing about analog saturation occurring before the converter. A signal can be perfectly legal in the digital domain while being heavily distorted by preamp overload.
VU meters, whether physical or plugin-based, respond more like human hearing. They show average levels rather than instantaneous peaks, giving you a better sense of how the signal will be perceived. Most importantly, they can reveal the compression and density changes that occur during preamp saturation before those changes become problematic.
When setting levels, start by watching the VU meter for consistent readings around 0 VU, then check your digital peak meters to ensure you're not clipping the converter. This dual-meter approach helps you find the maximum clean level without digital artifacts or analog overload.
Hardware VU meters on your preamp or interface are particularly valuable because they show exactly what's happening at that gain stage. If your interface has both VU and peak meters, you can watch the VU meter compress and distort while the peak meter remains clean - a clear sign of analog saturation.
The 20dB Headroom Rule for Home Studios
Professional studios often record with peaks around -12dB to -18dB, leaving substantial headroom for mixing and mastering. In home studios, this approach becomes even more critical because you're likely wearing multiple hats - engineer, mixer, and mastering engineer.
The 20dB headroom rule suggests keeping your loudest transients around -20dB while maintaining strong, consistent average levels. This might seem overly conservative, but it provides several advantages beyond preventing digital clipping.
First, it gives you room to compensate for preamp character. If you discover your vocal needs more preamp saturation after recording, you have the digital headroom to boost the input gain on subsequent takes without changing your converter settings.
Second, it prevents the cumulative level buildup that occurs during mixing. Even if individual tracks have perfect levels, combining dozens of tracks creates a much hotter mix bus. Starting with conservative recording levels prevents mix bus overload without requiring extensive gain reduction later.
Work It in Your DAW: Setting Up Proper Gain Structure
- Insert a VU meter plugin (or use your DAW's built-in version) on your recording track
- Set the VU meter to -18dB = 0 VU (this aligns with professional analog levels)
- Record a test performance while adjusting preamp input gain to hit 0 VU on average
- Check that your DAW's peak meters show transients around -20dB to -12dB
- If peak levels are too high, reduce preamp output (not input) to maintain the analog character
- Save this gain structure as your starting point for similar sources
Condenser vs. Dynamic Mic Preamp Requirements
Different microphone types place different demands on your preamp, affecting both the likelihood of overload and the character of that overload when it occurs.
Condenser microphones typically output higher levels and have more extended frequency response. Their higher output means you need less preamp gain, reducing the chance of input stage overload. However, condensers also capture more detail, making preamp distortion more audible. The extended high-frequency response can make even mild preamp saturation sound harsh and fatiguing.
Dynamic microphones need more preamp gain, pushing you closer to the overload threshold. However, dynamics often sound more forgiving when slightly overdriven, especially on sources like snare drums or guitar amps where some aggression enhances the character. The challenge is finding the line between useful coloration and destructive distortion.
Ribbon microphones present the greatest challenge because they output very low levels, requiring substantial preamp gain. Clean ribbon preamp requires at least 60dB of gain, often more. Many preamps that sound excellent on other sources become noisy or harsh when pushed to ribbon-friendly gain levels. This is where preamp selection becomes critical - not all preamps can handle the gain requirements of ribbon mics while maintaining their sonic character.
When Preamp Character Becomes Preamp Damage
The line between musical preamp saturation and destructive overload isn't fixed - it depends on the source material, the musical context, and your aesthetic goals. Learning to hear this transition is essential for capturing recordings that enhance your mix rather than fighting against it.
Musical saturation typically adds harmonic content that supports the fundamental frequencies of your source. The added harmonics integrate smoothly with the original signal, creating a fuller, more present sound without obvious artifacts. The dynamic response remains natural, with loud passages compressing gradually rather than hitting a hard wall.
Destructive overload, by contrast, adds harmonics that compete with the fundamental frequencies or create beating and intermodulation distortion. The dynamics become unnatural, with sudden changes in character as the signal crosses the overload threshold. Most tellingly, the distortion draws attention to itself rather than enhancing the source.
Context matters enormously. A vocal preamp setting that sounds musical in a sparse folk arrangement might become harsh and aggressive in a dense rock mix. The same preamp saturation that adds welcome aggression to a snare drum can make a violin sound synthetic and unpleasant.
The A/B Test That Reveals Everything
The most reliable way to identify preamp overload is comparing the suspected take with a cleaner version. If possible, record a second pass with 6dB less input gain, keeping all other settings identical. The cleaner take might sound less impressive when soloed, but it should sit more naturally in a full mix context.
Pay particular attention to how the two versions interact with reverb and delay. Distorted sources often sound unstable in time-based effects, with the distortion artifacts creating a washy, unfocused decay. Clean sources maintain their definition through effects processing, allowing the reverb or delay to enhance rather than obscure the original performance.
Fixing Overloaded Takes Without Re-Recording
Sometimes you capture a perfect performance with imperfect gain structure. Before scrapping the take, several techniques can salvage overloaded recordings, though prevention is always preferable to correction.
Digital gain reduction is the first line of defense. Reducing the track's input gain by 6-12dB often reveals usable material hidden beneath the distortion. This won't remove the harmonic distortion that's already been printed, but it can restore proper headroom for processing and mixing.
Gentle high-frequency filtering can minimize the harshness without destroying the source character. Start with a gentle high-shelf cut around 8-10kHz, reducing by 2-3dB. This targets the frequency range where preamp distortion is most audible while preserving the fundamental character of the performance.
Harmonic exciters and saturation plugins, counterintuitively, can sometimes mask preamp distortion by adding more controlled harmonic content. The key is using these tools subtly to create a more intentional distorted character rather than the random harshness of overload.
What to Check Before Upload or Export
- Solo each recorded track and listen for harsh transients or unnatural compression
- Check that your VU meters averaged around 0 during recording peaks
- Verify that preamp saturation enhances rather than fights your mix processing
- Test how preamp character translates through your mix feedback workflow
- Confirm that any analog warmth survives conversion to your final export format
- Document your successful preamp settings for future sessions with similar sources
Preamp Selection for Different Source Materials
Not every preamp works well for every source, and understanding these relationships helps you avoid overload situations before they occur. The interaction between source dynamics, frequency content, and preamp design determines both the optimal gain structure and the character of any saturation.
Vocals benefit from preamps with gentle, progressive saturation curves. Tube and Class A designs excel here because they compress naturally before adding distortion, giving you audible warning before the sound becomes unusable. The gradual transition into saturation provides a wider sweet spot, making it easier to find levels that enhance the vocal without crossing into harshness.
Percussive sources like drums can handle more aggressive preamp behavior because the transient nature masks some distortion artifacts. However, they also create the highest peak levels, making them prone to sudden overload. Fast-responding preamps with clear overload characteristics work better than designs that add compression, which can dull the impact of drum transients.
Acoustic instruments with complex harmonic content, such as piano or acoustic guitar, reveal preamp character most clearly. Clean, transparent preamps typically work best because they preserve the natural harmonic relationships that define these instruments. Any distortion added by the preamp competes with the instrument's own harmonics, potentially creating beating or masking effects.
Building a Preamp Gain Reference Library
Consistent results require documented approaches. Creating a reference library of successful preamp settings eliminates guesswork and provides starting points for similar sources and musical styles.
Document not just the gain settings, but the entire signal chain: microphone position, preamp input and output levels, any pad switches engaged, and the resulting digital levels in your DAW. Include notes about the musical context - a vocal setting that works for intimate ballads might be too clean for rock vocals.
Record brief test tones or reference performances at your documented settings. These references help you quickly dial in appropriate levels for new sessions and provide A/B material when experimenting with different approaches. Over time, this library becomes invaluable for maintaining consistent recording quality across different projects and sessions.
Consider the room acoustics and source positioning as part of your preamp documentation. A setting that works perfectly with close-miked sources might overload when recording in a more distant, ambient style. The interaction between room reflections and preamp saturation can create complex frequency buildups that aren't obvious until you start mixing.
When to Choose Preamp Character vs. Clean Amplification
The decision between colored and clean preamp amplification depends on your mixing workflow, the density of your arrangements, and your aesthetic goals. Neither approach is inherently superior, but each serves different musical purposes.
Choose clean, transparent preamps when your arrangement is dense or when you plan extensive mix processing. Clean sources provide maximum flexibility during mixing, allowing you to add character through plugins while maintaining the option to remove or modify that character later. This approach works particularly well with modern pop and electronic music, where artificial processing is part of the aesthetic.
Preamp character becomes valuable when you want the coloration to be permanent and when your arrangement has space for the added harmonics. Sparse arrangements can accommodate more aggressive preamp saturation because there's less frequency competition. Traditional genres like blues, jazz, and folk often benefit from preamp character that connects the recording to historical sonic precedents.
Consider your downstream processing chain when making this choice. If you're planning to use vintage-style compressors, EQs, and effects, starting with colored preamps creates a cumulative analog character that can't be replicated with digital processing alone. However, if your mix workflow relies heavily on surgical digital processing, clean preamps provide a better foundation for precise manipulation.
Small Room Translation Check
Test your preamp gain structure on multiple playback systems before committing to final takes. Home studio acoustics can mask preamp distortion that becomes obvious on other systems. Play your test recordings through cheap earbuds, car speakers, and phone speakers to ensure the preamp character enhances rather than competes with your mix on consumer playback systems.
Advanced Gain Structure for Multi-Mic Setups
Recording multiple microphones simultaneously creates additional preamp challenges because each mic captures the same source from a different perspective, potentially requiring different gain structures while maintaining phase coherence and tonal balance.
Drum recording exemplifies these challenges. The kick drum mic might need substantial gain and can handle aggressive preamp saturation, while overhead mics typically need less gain and benefit from cleaner amplification to preserve the natural cymbal decay. Room mics often require the most gain but are most sensitive to preamp noise and distortion.
The key is establishing a gain hierarchy that serves the primary role of each microphone. Close mics handle the fundamental character and can accommodate more preamp coloration, while ambient mics capture space and dynamics, requiring cleaner amplification. Balancing these different preamp characters during recording saves significant mixing time and creates more cohesive multi-mic sources.
Phase relationships between microphones become critical when using different preamp settings. Some preamps introduce phase shifts that change with gain settings, potentially creating cancellation or reinforcement issues when multiple mics are combined. Always check the multi-mic blend while setting individual preamp levels, adjusting not just for level but for how the mics integrate sonically.
The Role of Preamp Choice in Modern AI-Assisted Mixing
Modern AI automix and mastering tools analyze your recordings and make processing decisions based on the source characteristics they detect. The quality and character of your preamp stage directly affects these algorithmic decisions, making proper gain structure even more important when using AI assistance.
Clean, properly leveled recordings provide AI systems with accurate information about your source material. Preamp distortion can confuse algorithmic analysis, leading to inappropriate processing decisions. For example, an AI mixer might interpret preamp saturation as intentional distortion and avoid applying warming effects that would actually benefit the track.
However, musical preamp saturation can also guide AI processing in positive ways. Well-implemented analog character provides harmonic and dynamic cues that help AI systems understand the aesthetic direction of your music. The key is ensuring that any preamp coloration is intentional and musical rather than accidental overload.
When preparing sources for AI stem mixing, document your preamp choices as part of the session notes. This information helps you make consistent decisions when AI processing reveals issues that require re-recording or when you need to match new overdubs to existing tracks that were processed with specific preamp characteristics.
Common Questions About Preamp Overload
How can I tell if my preamp is overloading if my DAW meters look fine?
Trust your ears over digital meters. Preamp overload creates harmonic distortion and compression before digital clipping occurs. Listen for harshness, loss of natural dynamics, or an unpleasant edge that EQ can't fix. VU meters or analog-style meters show preamp saturation better than peak meters.
What's the difference between musical preamp saturation and destructive overload?
Musical saturation adds harmonics that support the fundamental frequencies and compresses gradually, enhancing the source character. Destructive overload creates competing harmonics, sudden dynamic changes, and artifacts that draw attention away from the performance. The transition point varies by preamp design and source material.
Should I use the preamp's input gain or output level to control recording levels?
Use input gain to find the preamp's sweet spot for tone and character, then adjust output level to achieve proper recording levels. Input gain determines preamp saturation characteristics, while output level typically affects only the final signal level without changing the analog character.
Can I fix preamp distortion that's already been recorded?
Preamp distortion can't be completely removed once recorded, but you can minimize its impact. Try reducing digital gain by 6-12dB, gentle high-frequency filtering around 8-10kHz, or using subtle saturation plugins to mask the harshness with more musical distortion. Prevention through proper gain staging is always preferable.
Why do some preamps sound better when pushed harder than others?
Different preamp designs handle overload differently. Tube and Class A preamps typically compress gradually before distorting, creating a wider usable range. Solid-state designs often clip more suddenly, making the transition from clean to distorted more abrupt and less forgiving.
How much headroom should I leave when recording to prevent preamp overload?
Aim for peaks around -12dB to -20dB in your DAW while maintaining strong average levels around -18dB (0 VU). This provides enough headroom for unexpected transients while ensuring your preamp operates in its optimal range. The exact amount depends on your source material and preamp characteristics.
Hear what these choices do to your own song.
Upload stems or a finished track, choose a reference direction, and compare a private Moozix mix before you export anything.